Quantcast
Channel: Cloudbase Solutions
Viewing all 83 articles
Browse latest View live

OpenStack on Hyper-V – Icehouse 2014.1.3 – Best tested compute component?

$
0
0

Releasing stable components of a large cloud computing platform like OpenStack is not something that can be taken lightheartedly, there are simply too many variables and moving parts that need to be taken in consideration.

The OpenStack development cycle includes state of the art continuous integration testing including a large number of 3rd party CI testing infrastructures to make sure that any new code contribution won’t break the existing codebase.

The OpenStack on Hyper-V 3rd party CI is currently available for Nova and Neutron (with Cinder support in the works and more projects along the way), spinning up an OpenStack cloud with Hyper-V nodes for every single new code patchset to be tested, meaning hundreds of clouds deployed and dismissed per day. It’s hosted by Microsoft and maintained by a team composed by Microsoft and Cloudbase Solutions engineers.

This is a great achievement, especially when cnsidered in the whole OpenStack picture, where dozens of other testing infrastructures operate in a similar way while hundreds of developers tirelessly submit code to be reviewed. Thanks to this large scale joint effort, QA automation has surely been taken to a whole new level.

Where’s the catch?

There’s always a tradeoff between the desired workload and the available resources. In an ideal world, we would test every possible use case scenario, including all combinations of supported operating systems and component configurations. The result would simply require too many resources or execution times in the order of a few days. Developers and reviewers need to know if the code passed tests, so long test execution times are simply detrimental for the project. A look at the job queue shortly before a code freeze day will give a very clear idea of what we are talking about :-).

On the other side, stable releases require as much testing as possible, especially if you plan to sleep at night while your customers deploy your products in production environments.

To begin with, the time constraint that continuous integration testing requires disappear, since in OpenStack we have a release every month or so and this leads us to:

Putting the test scenarios together

We just need a matrix of operating systems and project specific options combinations that we want to test. The good news here are that the actual tests to be performed are the same ones used for continuous integration (Tempest), simply repeated for every scenario.

For the specific Hyper-V compute case, we need to test features that the upstream OpenStack CI infrastructure cannot test. Here’s a quick rundown list:

  • Every supported OS version: Hyper-V 2008 R2, 2012, 2012 R2 and vNext.
  • Live migration, which requires 2 compute servers per run
  • VHD and VHDX images (fixed, dynamic)
  • Copy on Write (CoW) and full clones 
  • Various Neutron network configurations: VLAN, flat and soon Open vSwitch!
  • Dynamic / fixed VM memory
  • API versions (v1, v2)
  • A lot more coming with the Kilo release: Hyper-V Generation 2 VMs, RemoteFX, etc


Downstream bug fixes and features

Another reason for performing additional tests is that “downstream” product releases, integrate the “upstream” projects (the ones available on the Launchpad project page and related git repositories) with critical bug fixes not yet merged upstream (time to land a patch is usually measured in weeks) and optionally new features backported from subsequent releases.

For example the OpenStack Hyper-V Icehouse 2014.1.3 release includes the following additions:

Nova

  • Hyper-V: cleanup basevolumeutils
  • Hyper-V: Skip logging out in-use targets
  • Fixes spawn issue on Hyper-V
  • Fixes Hyper-V dynamic memory issue with vNUMA
  • Fixes differencing VHDX images issue on Hyper-V
  • Fixes Hyper-V should log a clear error message
  • Fixes HyperV VM Console Log
  • Adds Hyper-V serial console log
  • Adds Hyper-V Compute Driver soft reboot implementation
  • Fixes Hyper-V driver WMI issue on 2008 R2
  • Fixes Hyper-V boot from volume live migration
  • Fixes Hyper-V volume discovery exception message
  • Add differencing vhdx resize support in Hyper-V Driver
  • Fixes Hyper-V volume mapping issue on reboot
  • HyperV Driver – Fix to implement hypervisor-uptime

Neutron

  • Fixes Hyper-V agent port disconnect issue
  • Fixes Hyper-V 2008 R2 agent VLAN Settings issue
  • Fixes Hyper-V agent stateful security group rules

Ceilometer

  • No changes from upstream

Running all the relevant integration tests against the updated repositories provides an extremely important proof for our users that the quality standards are well respected.

Source code repositories:

Packaging

Since we released the first Hyper-V installer for Folsom we had a set goals:

  • Easy to deploy
  • Automated configuration
  • Unattended installation
  • Include a dedicated Python environment
  • Easy to automate with Puppet, Chef, SaltStack, etc
  • Familiar for Windows users
  • Familiar for DevOps
  • Handle required OS configurations (e.g. create VMSwitches)
  • No external requirements / downloads
  • Atomic deployment

The result is the Hyper-V OpenStack MSI installer that keeps getting better with every release:


Sharing the test results

Starting with Icehouse 2014.1.3 we decided to publish the test results and the tools that we use to automate the tests execution:

Test results

http://www.cloudbase.it/openstack-hyperv-release-tests-results

Each release contains a subfolder for every test execution (Hyper-V 2012 R2 VHDX, Hyper-V 2012 VHD, etc), which in turn will contain the results in HTML format and every possible log, configuration file, list of applied Windows Update hot fixes, DevStack logs and so on.

Test tools

All the scripts that we are using are available here:

https://github.com/cloudbase/openstack-hyperv-release-tests

The main goal is to provide a set of tools that anybody can use efficiently with minimum hardware requirements and reproduce the same tests that we run (see for example the stack of Intel NUCs above).

Hosts:

  • Linux host running Ubuntu 12.04 or 14.04
  • One or more Hyper-V nodes

Install the relevant prerequisites on the Linux node.

Enable WinRM with HTTPS on the Hyper-V nodes.

Edit config.yaml, providing the desired Hyper-V node configurations and run:

./run.sh https://www.cloudbase.it/downloads/HyperVNovaCompute_Icehouse_2014_1_3.msi stable/icehouse

The execution can be easily integrated with Jenkins or any other automation tool:

Screen Shot 2014-10-15 at 02.32.12

Run with custom parameters, for testing individual platforms:

We are definitely happy with the way in which Hyper-V support in OpenStack is growing. We are adding lots of new features and new developers keep on joining the ranks, so QA became an extremely important part of the whole equation. Our goal is to keep the process open so that anybody can review and contribute to our testing procedures for both the stable releases and the master branch testing executed on the Hyper-V CI infrastructure.

The post OpenStack on Hyper-V – Icehouse 2014.1.3 – Best tested compute component? appeared first on Cloudbase Solutions.


reBot – using Lego for bare metal deployments on Intel NUC

$
0
0

Here at Cloudbase, we use a lot of Intel Next Unit of Computing (NUC) for our internal testing and development work. The NUC is a small form factor computer, designed and manufactured by Intel, very compact and powerful, sporting a Haswell i5 processor, up to 16 GB of RAM and a mSATA SSD.

You can see our NUC tempest testing rig in action here.

What those NUCs are lacking (except for a single older model, as of today) is the ability to power them on and off remotely, like higher grade servers do with technologies like IPMI, AMT, iLO. Unfortunately, the NUCs don’t have any of those, so we invented our own to have some fun. :-)


Lego to the rescue

Since we had a lot of Lego just lying around, we though, why not building a Lego Mindstorms robot to remotely push the NUC power button?

After a bunch of prototypes, we came out with this:

reBot prototyping


We call it reBot

Our first implementation of reBot was for Ubuntu Metal as a Service (MAAS). MAAS is the bare-metal deployment service for Ubuntu, which spins physical machines up just like virtual machines in OpenStack. I won’t go into the details of how MAAS & Juju work, but you can read more about our Windows implementation here.

Right now we also have a working proof-of-concept power adapter for OpenStack Ironic.

This is how a 4-node reBot MAAS setup is deploying a full OpenStack bare-metal cloud, all unattended:

The Empire deployed Close up of a node


Software

The Mindstorms EV3 brick runs a custom firmware, called leJos which provides some remote control abilities via Java RMI (ok, it ain’t Python, but we can live with it :-)). We connected it to the MAAS controller (the sitting on top of the switches in the picture) via an ethernet-over-USB connection.
Here are some of the motor actions that we wrote for pushing the lever up/down and reset the NUC. Here is an example:

import lejos.remote.ev3.*;
import lejos.utility.Delay;

class BarePlasticAction {
    public static void main(String[] args) {

       if(args.length != 4) {
            System.out.println("usage: BarePlasticAction <EV3 address> <A|B|C|D> <degrees> <pause>");
            System.exit(1);
        }

        String host = args[0];
        String port = args[1];
        int degrees = Integer.parseInt(args[2]);
        int pause = Integer.parseInt(args[3]); 

        RMIRegulatedMotor m = null;

        try {
            RemoteEV3 ev3 = new RemoteEV3(host);

            m = ev3.createRegulatedMotor(port, 'L');

            m.setAcceleration(6000);

            float speed = m.getMaxSpeed();
            m.setSpeed((int)speed);

            m.rotateTo(degrees);

            if (pause >= 0) {
                Delay.msDelay(pause);
                m.rotateTo(0);
            }
        }
        catch(Exception ex) {
            ex.printStackTrace();
        }
        finally {
            if (m != null) {
                try {
                    m.close();
                }
                catch(Exception ex) {
                    // ignore
                }

            }
        }
    }
}

All we needed to do at this point was to call it from MAAS, specifying the EV3 port, degrees of rotation and time to keep the power button pushed down (de facto simulating what you’d do with your finger when resetting a PC).

Power on:

java  -cp ../ev3classes.jar:.. BarePlasticAction 10.0.1.1 B 1440 1500

Power off:

java  -cp ../ev3classes.jar:.. BarePlasticAction 10.0.1.1 B 1440 5000

And this is how the MAAS configuration page looks like:

MAAS configuration page


The code and Lego model are available as open source on GitHub, so go ahead and build your own, or even improve on the design:

https://github.com/cloudbase/reBot

here’s also a handy bill of materials with all the required Lego parts.

The post reBot – using Lego for bare metal deployments on Intel NUC appeared first on Cloudbase Solutions.

SaltStack states for OpenStack

$
0
0

Cloudbase Solutions has partnered with Spirent to build and release a suite of SaltStack states for deploying OpenStack, supporting Icehouse, Juno and Kilo releases, on multiple target platforms. These states are being enhanced and extended to also support OPNFV scenarios. Anyone wishing to collaborate on this parallel effort is welcome to join.
It is recognized that there are many choices available for:

  • hardware (number of NICs, CPUs, RAM, storage)
  • operating system distribution
  • devops tools
  • openstack release
  • networking solution (Open vSwitch, OpenDaylight, OpenContrail, etc)

Regarding the devops tools, there are certainly many tools available each with their own pros and cons. Each organization will use the one best suited for their needs, though many times based on personal experience of the sysadmins. Changing from one tool to another is no easy task as the library of scripts can contain years of investment from hundreds of contributors. More and more of these devops tools have moved beyond just the ability to update operating system configuration files. Now there are solutions to deploy fully working, highly secure and available, multi-node OpenStack platforms. Some organizations might use Fuel, some native Puppet, or Packstack (RDO), others SaltStack, Ansible, Chef, while some hardcore sysadmins might still rely purely on bash scripts.

With this in mind we started last year contributing to a project to build a flexible deployment framework for OpenStack. The goal is to allow defining profiles for any particular OpenStack deployment configuration, all the way to defining networks, flavors and available Glance images, and ensure easy (re)deployment of these profiles, in a reliable and repeatable manner.

This allows to tear down and rebuild machines multiple times a day as part of automated testing solutions.

We are working closely with the OpenDaylight and OpenStack developers to bring more components into this testing framework.

Since the OPNFV Getting Started project is not using SaltStack, it is our intention to follow along as closely as possible to provide a platform with similar capabilities. The end result should be the same:

  • Centos 6.5 / 7, Ubuntu 12.04 / 14.04, Microsoft Hyper-V Server OS
  • kernel parameters for CPU and RAM constraints
  • 1, 2, 4, 6, 8, 12 NICS (1g or 10g)
  • OpenStack Icehouse or Juno (Kilo will be added once it is released)

These salt states are available on GitHub.

The post SaltStack states for OpenStack appeared first on Cloudbase Solutions.

Windows + Open Compute + MAAS = ♥

$
0
0

As most of you may already know, here at Cloudbase Solutions we love to bridge the gap between Microsoft Windows and open source technologies, starting with OpenStack.

Recently we’ve had the opportunity to get our hands on some pretty amazing open source hardware. We are talking about serious hardware that would make any cloud deployer sigh with happiness.  Enter, Microsoft’s Open CloudServer OCS V2.

OCS_chassis_manager

Here’s a very nice slide deck with additional details from a Microsoft Open Compute presentation.

One interesting aspect of this chassis design is the fact that BMC features are available through a management component instead of the individual blades. The chassis manager is a separate board which can run Windows Server, like Microsoft does in its datacenters, or any other OS. The main goal of this component is to expose a set of RESTful API that replace what IPMI and other BMC features do in traditional server hardware. The board sports also a TPM to allow SecureBoot and thus providing enhanced security on the board’s OS image itself. The code that provides this feature has been open sourced by Microsoft.

Come to visit us at the OCP Summit 2015 in San Jose to see this hardware live!

MAAS and Juju

Some time ago we started looking into automated deployment systems. The goal was to find one that would fit into a simple set of requirements:

  • Open source
  • Support for Linux and Windows
  • Easy to use
  • Deployments had to be repeatable with predictable results
  • Good community support
  • Bare metal deployments support

As it turns out, there are a number of amazing open source projects that fit into most (if not all) of our requirements. There is Puppet , SaltStack that can orchestrate deployments of OpenStack on already installed machines, and with some 3rd party components can even do bare metal. There is Crowbar that can both deploy bare metal and orchestrate an OpenStack install.

The projects that eventually caught our eye were actually MAAS (bare metal deployment) and Juju (orchestration). These two projects offer a clear separation of concerns, and they are tightly integrated. We simply loved how you could just take an archive containing a Juju charm, drop it in a gorgeous UI, and with just a few simple configuration options to edit, deploy an entire OpenStack cloud becomes a piece of cake. At that time there was no Windows support in either MAAS or Juju so we decided to provide the required integration, which turned out into a great partnership between Cloudbase Solutions and Canonical. Starting with version 1.16 of MAAS and version 1.21 of Juju, you can now deploy Windows workloads as well.

MAAS and OCS integration

Getting back to the Open Compute topic introduced at the beginning of this article, Canonical and Microsoft announced the support for MAAS based deployments on OCS hardware. This means that now MAAS is able to interact with the chassis manager to perform power operations on the blades, allowing the same bare metal deployment scenarios that you’d expect on traditional server hardware.

OpenStack with Hyper-V on OCS using MAAS

Now is where things become interesting. How do we deploy an entire OpenStack cloud on one or more OCS chassis in a fully automated way using MAAS and Juju?

One of our more recent projects, offers to OpenStack users the possibility to deploy OpenStack, hiding all the existing complexity that notoriously brought some bad rap on OpenStack. The project is called V-Magine.

V-Magine includes a portable command line tool that can be executed from any media, including a simple USB drive and integrates DHCP, TFTP and HTTP services to allow fast automated OS deployments (currently Ubuntu and CentOS) via PXE on any hardware.

Thanks to this tool and an additional set of fully automated Python scripts dubbed AutoMaas (that we’ll introduce in a forthcoming blog post), we can deploy MAAS, Juju and OpenStack on an entire OCS chassis in a couple of hours without any human intervention. More on this later!

Here is a list of the OpenStack components and related services that we deploy:

  • Active directory
  • Keystone (with AD integration)
  • Nova (KVM, Hyper-V)
  • Open vSwitch on Hyper-V
  • Neutron (using Open vSwitch)
  • Cinder (Windows Server running Cinder with SMB3 support)
  • Glance
  • Swift

a5e6b3983d9d695c6a64e1bbae2a37e4

Some interesting aspects of this OpenStack deployment:

  1. We are deploying Open vSwitch on Hyper-V. Yes, it works as you’d expect and it retains the same CLI we are all familiar with on Linux systems, supporting VXLAN, NVGRE or VLAN tenant based network isolation.
  2. We are using Active Directory as a credential storage for keystone
  3. Cinder Volume is running on top of Microsoft Windows Storage Server 2012 R2, using our SMB3 driver.
  4. Windows clustering for full HA (coming soon)

The Active Directory integration allowed us to create relationships between active directory and various OpenStack components, enabling live migration in nova-hyperv and user authentication against AD.

Here’s a sample Active Directory users view side by side with a keystone user-list output.

ad_joy

Adding workloads

Once your OpenStack cloud is ready, you can use Juju or Heat to deploy any type of Linux or Windows workload on it, including our charms for IIS, Active Directory, SQL Server, SharePoint, Exchange and more.


We still find it amazing to see how everything we’ve worked on for the paste few years if coming together so harmoniously. Each piece of technology is amazing by itself, but when you bring them together you get an even better result: multiple platforms working together to create tomorrow’s clouds.

The glue bringing all this together are MAAS, Juju and V-Magine. Stay tuned for part 2 of this post, where we will detail how we bootstrapped everything from scratch!

The post Windows + Open Compute + MAAS = ♥ appeared first on Cloudbase Solutions.

VirtualBox driver for OpenStack

$
0
0

More and more people are interested in cloud computing and OpenStack but many of them give it up because they can’t test or interact with this kind of infrastructure. This is mostly a result of either high costs of hardware or the difficulty of the deployment in a particular environment.

In order to help the community to interact more with cloud computing and learn about it, Cloudbase Solutions has come up with a simple VirtualBox driver for OpenStack. VirtualBox allows you to set up a cloud environment on your personal laptop, no matter which operating system you’re using (Windows, Linux, OS X). It also gets the job done with a free and familiar virtualization environment.

Nova hypervisor Support Matrix

Feature Status VirtualBox
Attach block volume to instance optional Partially supported
Detach block volume from instance optional Partially supported
Evacuate instances from host optional Not supported
Guest instance status mandatory Supported
Guest host status optional Supported
Live migrate instance across hosts optional Not supported
Launch instance mandatory Supported
Stop instance CPUs optional Supported
Reboot instance optional Supported
Rescue instance optional Not supported
Resize instance optional Supported
Restore instance optional Supported
Service control optional Not supported
Set instance admin password optional Not supported
Save snapshot of instance disk optional Supported
Suspend instance optional Supported
Swap block volumes optional Not supported
Shutdown instance mandatory Supported
Resume instance CPUs optional Supported
Auto configure disk optional Not supported
Instance disk I/O limits optional Not supported
Config drive support choice Not supported
Inject files into disk image optional Not supported
Inject guest networking config optional Not supported
Remote desktop over RDP choice Supported
View serial console logs choice Not supported
Remote desktop over SPICE choice Not supported
Remote desktop over VNC choice Supported
Block storage support optional Supported
Block storage over fibre channel optional Not supported
Block storage over iSCSI condition Supported
CHAP authentication for iSCSI optional Supported
Image storage support mandatory Supported
Network firewall rules optional Not supported
Network routing optional Not supported
Network security groups optional Not supported
Flat networking choice Supported
VLAN networking choice Not supported


More information regarding this feature can be found on the following pages: Nova Support Matrix and Hypervisor Support Matrix.

VirtualBox supported features

Guest instance status

Provides a quick report on information about the guest instance, including the power state, memory allocation, CPU allocation, number of vCPUs and cumulative CPU execution time.

Virtualbox Driver - Guest instance status


Guest host status

Provides a quick report of available resources on the host machine.

Virtualbox Driver - Hypervisor information

Launch instance

Creates a new instance (virtual machine) on the virtualization platform.

Virtualbox Driver - Launch instance

Shutdown instance

Virtualbox Driver - Shutdown instance

Stop instance CPUs

Stopping an instance CPUs can be thought of as roughly equivalent to suspend-to-RAM. The instance is still present in memory, but execution has stopped.

Virtualbox Driver - Stop instance CPUs

Resume instance CPUs

Virtualbox Driver - Resume instance CPUs

Suspend instance

Suspending an instance can be thought of as roughly equivalent to suspend-to-disk. The instance no longer consumes any RAM or CPUs, having its live running state preserved in a file on disk. It can later be restored, at which point it should continue execution where it left off.

Virtualbox Driver - Suspend instance

Save snapshot of instance disk

The snapshot operation allows the current state of the instance root disk to be saved and uploaded back into the glance image repository. The instance can later be booted again using this saved image.
VirtualBox Driver - Save snapshot of instance disk

Block storage support

Block storage provides instances with direct attached virtual disks that can be used for persistent storage of data. As an alternative to direct attached disks, an instance may choose to use network based persistent storage.

Virtualbox Driver - Block storage support

Remote desktop over VNC

Virtualbox Driver - Remote desktop over VNC

Note: In order to use this feature, the VNC extension pack for VirtualBox must be installed.

You can list all of the available extension packages running the following command:

VBoxManage list extpacks

Pack no. 0: Oracle VM VirtualBox Extension Pack
 Version: 4.3.20
 Revision: 96996
 Edition:
 Description: USB 2.0 Host Controller, Host Webcam, VirtualBox RDP, PXE ROM with E1000 support.
 VRDE Module: VBoxVRDP
 Usable: true
 Why unusable:

 Pack no. 1: VNC
 Version: 4.3.18
 Revision: 96516
 Edition:
 Description: VNC plugin module
 VRDE Module: VBoxVNC
 Usable: true
 Why unusable:


Setting up DevStack environment

Create Virtual Machine

  • Processors:
    • Number of processors: 2
    • Number of cores per processor 1
  • Memory: 4GB RAM (Recommended)
  • HDD – SATA – 20 GB Preallocated
  • Network:
    • Network Adapter 1: NAT
    • Network Adapter 2: Host Only
    • Network Adapter 3: Nat
  • Operating system – Ubuntu Server 14.04 (Recommended)

Update System

$ sudo apt-get update
$ sudo apt-get upgrade

Install openssh-server, git, vim, openvswitch-switch

$ sudo apt-get install -y git vim openssh-server openvswitch-switch

Edit network Interfaces

Here’s an example for a configuration. You’re free to use your own settings.

# This file describes the network interfaces available on your system
# and how to activate them. For more information, see interfaces(5).

# The loopback network interface
auto lo
iface lo inet loopback

# The primary network interface
auto eth0
iface eth0 inet dhcp

# The management interface
auto eth1
iface eth1 inet manual
up ip link set eth1 up
up ip link set eth1 promisc on
down ip link set eth1 promisc off
down ip link set eth1 down

# The public interface
auto eth2
iface eth2 inet manual
up ip link set eth2 up
down ip link set eth2 down

Clone devstack

$ cd
$ git clone https://github.com/openstack-dev/devstack.git
$ cd devstack

Change local.conf

$ sudo vim ~/devstack/local.conf

Here we have a template config file. You can also use your own settings.

[[local|localrc]]
HOST_IP=10.0.2.15
DEVSTACK_BRANCH=master
DEVSTACK_PASSWORD=Passw0rd

#Services to be started
enable_service rabbit
enable_service mysql

enable_service key

enable_service n-api
enable_service n-crt
enable_service n-obj
enable_service n-cond
enable_service n-sch
enable_service n-cauth
enable_service n-novnc
# Do not use Nova-Network
disable_service n-net

enable_service neutron
enable_service q-svc
enable_service q-agt
enable_service q-dhcp
enable_service q-l3
enable_service q-meta
enable_service q-lbaas
enable_service q-fwaas
enable_service q-metering
enable_service q-vpn

disable_service horizon

enable_service g-api
enable_service g-reg

enable_service cinder
enable_service c-api
enable_service c-vol
enable_service c-sch
enable_service c-bak

disable_service s-proxy
disable_service s-object
disable_service s-container
disable_service s-account

enable_service heat
enable_service h-api
enable_service h-api-cfn
enable_service h-api-cw
enable_service h-eng

disable_service ceilometer-acentral
disable_service ceilometer-collector
disable_service ceilometer-api

enable_service tempest

# To add a local compute node, enable the following services
disable_service n-cpu
disable_service ceilometer-acompute

IMAGE_URLS+=",https://raw.githubusercontent.com/cloudbase/ci-overcloud-init-scripts/master/scripts/devstack_vm/cirros-0.3.3-x86_64.vhd.gz"
HEAT_CFN_IMAGE_URL="https://www.cloudbase.it/downloads/Fedora-x86_64-20-20140618-sda.vhd.gz"

Q_PLUGIN=ml2
Q_ML2_PLUGIN_MECHANISM_DRIVERS=openvswitch
Q_ML2_TENANT_NETWORK_TYPE=vlan

PHYSICAL_NETWORK=physnet1
OVS_PHYSICAL_BRIDGE=br-eth1
OVS_BRIDGE_MAPPINGS=physnet1:br-eth1

OVS_ENABLE_TUNNELING=False
ENABLE_TENANT_VLANS=True
TENANT_VLAN_RANGE=500:2000

GUEST_INTERFACE_DEFAULT=eth1
PUBLIC_INTERFACE_DEFAULT=eth2

CINDER_SECURE_DELETE=False
VOLUME_BACKING_FILE_SIZE=50000M

LIVE_MIGRATION_AVAILABLE=False
USE_BLOCK_MIGRATION_FOR_LIVE_MIGRATION=False

LIBVIRT_TYPE=kvm
API_RATE_LIMIT=False

DATABASE_PASSWORD=$DEVSTACK_PASSWORD
RABBIT_PASSWORD=$DEVSTACK_PASSWORD
SERVICE_TOKEN=$DEVSTACK_PASSWORD
SERVICE_PASSWORD=$DEVSTACK_PASSWORD
ADMIN_PASSWORD=$DEVSTACK_PASSWORD

SCREEN_LOGDIR=/opt/stack/logs/screen
VERBOSE=True
LOG_COLOR=False

SWIFT_REPLICAS=1
SWIFT_HASH=66a3d6b56c1f479c8b4e70ab5d2014f6

KEYSTONE_BRANCH=$DEVSTACK_BRANCH
NOVA_BRANCH=$DEVSTACK_BRANCH
NEUTRON_BRANCH=$DEVSTACK_BRANCH
SWIFT_BRANCH=$DEVSTACK_BRANCH
GLANCE_BRANCH=$DEVSTACK_BRANCH
CINDER_BRANCH=$DEVSTACK_BRANCH
HEAT_BRANCH=$DEVSTACK_BRANCH
TROVE_BRANCH=$DEVSTACK_BRANCH
HORIZON_BRANCH=$DEVSTACK_BRANCH
TROVE_BRANCH=$DEVSTACK_BRANCH
REQUIREMENTS_BRANCH=$DEVSTACK_BRANCH

More information regarding local.conf can be found on Devstack configuration.

Edit ~/.bashrc

$ vim ~/.bashrc

Add this lines at the end of file.

export OS_USERNAME=admin
export OS_PASSWORD=Passw0rd
export OS_TENANT_NAME=admin
export OS_AUTH_URL=http://127.0.0.1:5000/v2.0

Disable Firewall

$ sudo ufw disable

Run stack.sh

$ cd ~/devstack
$ ./stack.sh
IMPORTANT: If the scripts don’t end properly or something else goes wrong, please unstack first using ./unstack.sh script.

Setup networks

# Remove the current network configuration 

# Remove the private subnet from the router
neutron router-interface-delete router1 private-subnet
# Remove the public network from the router
neutron router-gateway-clear router1
# Delete the router
neutron router-delete router1
# Delete the private network
neutron net-delete private
# Delete the public network
neutron net-delete public

# Setup the network

# Create the private network
NETID1=$(neutron net-create private --provider:network_type flat --provider:physical_network physnet1 | awk '{if (NR == 6) {print $4}}');
echo "[i] Private network id: $NETID1";
# Creathe the private subnetwork
SUBNETID1=$(neutron subnet-create private 10.0.1.0/24 --dns_nameservers list=true 8.8.8.8 | awk '{if (NR == 11) {print $4}}');
# Create the router
ROUTERID1=$(neutron router-create router | awk '{if (NR == 9) {print $4}}');
# Attach the private subnetwork to the router
neutron router-interface-add $ROUTERID1 $SUBNETID1
# Create the public network
EXTNETID1=$(neutron net-create public --router:external | awk '{if (NR == 6) {print $4}}');
# Create the public subnetwork
neutron subnet-create public --allocation-pool start=10.0.2.100,end=10.0.2.120 --gateway 10.0.2.1 10.0.2.0/24 --disable-dhcp	
# Attach the public network to the router
neutron router-gateway-set $ROUTERID1 $EXTNETID1

# Security Groups

# Enable ping
nova secgroup-add-rule default ICMP 8 8 0.0.0.0/0
# Enable SSH
nova secgroup-add-rule default tcp 22 22 0.0.0.0/0
# Enable RDP
nova secgroup-add-rule default tcp 3389 3389 0.0.0.0/0
 

Change current version of nova and neutron

For the moment the *Nova Driver* and *Neutron Agent* for *VirtualBox* are not included in the current version of OpenStack. In order to use them we must change the version of *nova* and *neutron* installed by DevStack.

  • Change the nova version used:
$ cd /opt/stack/nova
$ git remote add vbox https://github.com/cloudbase/nova-virtualbox.git
$ git fetch vbox
$ git checkout -t vbox/virtualbox_driver
$ sudo python setup.py install
  • Change the neutron version used:
$ cd /opt/stack/neutron
$ git remote add vbox https://github.com/cloudbase/neutron-virtualbox.git
$ git fetch vbox
$ git checkout -t vbox/virtualbox_agent
$ sudo python setup.py install
  • Change mechanism drivers:
$ cd /etc/neutron/plugins/ml2
$ vim ml2_conf.ini
  • Add vbox in the following line:
mechanism_drivers = openvswitch,vbox

Port forwarding

In order to access the services provided by the virtual host with DevStack from within the host machine you have to forward the ports towards said host.

For each used port we need to run one of the following commands:

# If the virtual machine is in power off state.
$ VBoxManage --modifyvm DevStack [--natpf<1-N> [<rulename>],tcp|udp,[<hostip>],
                                 <hostport>,[<guestip>],<guestport>]

# If the virtual machine is running
$ VBoxManage --controlvm DevStack natpf<1-N> [<rulename>],tcp|udp,[<hostip>],
                                             <hostport>,[<guestip>],<guestport> |

For example the required rules for a compute node can be the following:

# Message Broker (AMQP traffic) - 5672
$ VBoxManage controlvm DevStack natpf1 "Message Broker (AMQP traffic), tcp, 127.0.0.1, 5672, 10.0.2.15, 5672"

# iSCSI target - 3260
$ VBoxManage controlvm DevStack natpf1 "iSCSI target, tcp, 127.0.0.1, 3260, 10.0.2.15, 3260"

# Block Storage (cinder) - 8776
$ VBoxManage controlvm DevStack natpf1 "Block Storage (cinder), tcp, 127.0.0.1, 8776, 10.0.2.15, 8776"

# Networking (neutron) - 9696
$ VBoxManage controlvm DevStack natpf1 "Networking (neutron), tcp, 127.0.0.1, 9696, 10.0.2.15, 9696"

# Identity service (keystone) - 35357 or 5000
$ VBoxManage controlvm DevStack natpf1 "Identity service (keystone) administrative endpoint, tcp, 127.0.0.1, 35357, 10.0.2.15, 35357"

# Image Service (glance) API - 9292
$ VBoxManage controlvm DevStack natpf1 "Image Service (glance) API, tcp, 127.0.0.1, 9292, 10.0.2.15, 9292"

# Image Service registry - 9191
$ VBoxManage controlvm DevStack natpf1 "Image Service registry, tcp, 127.0.0.1, 9191, 10.0.2.15, 9191"

# HTTP - 80
$ VBoxManage controlvm DevStack natpf1 "HTTP, tcp, 127.0.0.1, 80, 10.0.2.15, 80"

# HTTP alternate
$ VBoxManage controlvm DevStack natpf1 "HTTP alternate, tcp, 127.0.0.1, 8080, 10.0.2.15, 8080"

# HTTPS - 443
$ VBoxManage controlvm DevStack natpf1 "HTTPS, tcp, 127.0.0.1, 443, 10.0.2.15, 443"

More information regarding Openstack default ports can be found on Appendix A. Firewalls and default ports.


Setting up nova-compute

Clone nova

$ cd
$ git clone -b virtualbox_driver https://github.com/cloudbase/nova-virtualbox.git

Install nova & requirements

$ cd nova
$ pip install -r requirements.txt
$ python setup.py install

Configuration

VirtualBox Nova Driver have the following custom config options:

Group Config option Default value Short description
[virtualbox] remote_display False Enable or disable the VRDE Server.
[virtualbox] retry_count 3 The number of times to retry to execute command.
[virtualbox] retry_interval 1 Interval between execute attempts, in seconds.
[virtualbox] vboxmanage_cmd VBoxManage Path of VBoxManage.
[virtualbox] vrde_unique_port False Whether to use an unique port for each instance.
[virtualbox] vrde_module Oracle VM VirtualBox Extension Pack The module used by VRDE Server.
[virtualbox] vrde_port 3389 A port or a range of ports the VRDE server can bind to.
[virtualbox] vrde_require_instance_uuid_as_password False Use the instance uuid as password for the VRDE server.
[virtualbox] vrde_password_length None VRDE maximum length for password.
[virtualbox] wait_soft_reboot_seconds 60 Number of seconds to wait for instance to shut down after soft reboot request is made.
[rdp] encrypted_rdp False Enable or disable the rdp encryption.
[rdp] security_method RDP The security method used for encryption. (RDP, TLS, Negotiate).
[rdp] server_certificate None The Server Certificate.
[rdp] server_private_key None The Server Private Key.
[rdp] server_ca None The Certificate Authority (CA) Certificate.


The following config file is an example of nova_compute.conf. You can use your own settings.

[DEFAULT]
verbose=true
debug=true
use_cow_images=True
allow_resize_to_same_host=true
vnc_enabled=True
vncserver_listen = 127.0.0.1
vncserver_proxyclient_address = 127.0.0.1
novncproxy_base_url=http://127.0.0.1:6080/vnc_auto.html
# [...]

[cinder]
endpoint_template=http://127.0.0.1:8776/v2/%(project_id)s

[virtualbox]
#On Windows
#vboxmanage_cmd=C:\Program Files\Oracle\VirtualBox\VBoxManage.exe
remote_display = true
vrde_module = VNC
vrde_port = 5900-6000
vrde_unique_port = true
vrde_password_length=20
vrde_require_instance_uuid_as_password=True
[rdp]

#encrypted_rdp=true
#security_method=RDP
#server_certificate=server_cert.pem
#server_private_key=server_key_private.pem
#server_ca=ca_cert.pem
#html5_proxy_base_url=http://127.0.0.1:8000/

More information regarding compute node configuration can be find on the following pages: List of compute config options and Nova compute.

Start up nova-compute

$ nova-compute --config-file nova_compute.conf

Setting up the VirtualBox Neutron Agent

Clone neutron

$ cd
$ git clone -b virtualbox_agent https://github.com/cloudbase/neutron-virtualbox.git

Install neutron & requirements

$ cd neutron
$ pip install -r requirements.txt
$ python setup.py install

Create neutron-agent.conf

VirtualBox Neutron Agent have the following custom config options:

Group Config option Default value Short description
[virtualbox] retry_count 3 The number of times to retry to execute command.
[virtualbox] retry_interval 1 Interval between execute attempts, in seconds.
[virtualbox] vboxmanage_cmd VBoxManage Path of VBoxManage.
[virtualbox] nic_type 82540EM The network hardware which VirtualBox presents to the guest.
[virtualbox] use_local_network False Use host-only network instead of bridge.


Here is a config file as an example for neutron_agent.conf. Feel free to use your own settings.

[DEFAULT]
debug=True
verbose=True
control_exchange=neutron
policy_file=$PATH/policy.json
rpc_backend=neutron.openstack.common.rpc.impl_kombu
rabbit_host=127.0.0.1
rabbit_port=5672
rabbit_userid=stackrabbit
rabbit_password=Passw0rd
logdir=$LOG_DIR
logfile=neutron-vbox-agent.log

[AGENT]
polling_interval=2
physical_network_mappings=*:vboxnet0

[virtualbox]
use_local_network=True

Start up the VirtualBox agent

$ neutron-vbox-agent --config-file neutron_agent.conf

Proof of concept

The post VirtualBox driver for OpenStack appeared first on Cloudbase Solutions.

Cloudbase Solutions and Canonical partner to deliver Windows Hyper-V support to BootStack managed OpenStack clouds

$
0
0

Vancouver – OpenStack Summit – 18 May 2015: Cloudbase Solutions, the developer of Windows components in OpenStack, announced today that it is partnering with Canonical to enable their customers to run KVM and Hyper-V environments side-by-side in the same managed cloud. Cloudbase Solutions believes Windows and open source interoperability is essential for the adoption of managed clouds by enterprises.

Delivered by BootStack, the managed private cloud service from Canonical, this new capability allows customers to run Windows virtual workloads on Hyper-V and Linux workloads on Ubuntu hosts, with seamless networking between Linux and Windows application components.

Enterprise users frequently employ Active Directory for identity management. BootStack now allows the integration of Keystone (OpenStack’s identity component) with Active Directory, either by leveraging an existing onsite domain or by provisioning a new fault tolerant Active Directory forest and domain.

Networking between Ubuntu and Hyper-V hosts is based on modern overlay standards provided by Open vSwitch (OVS) with VXLAN, VLANs and soon NVGRE on Microsoft’s native networking stack, fully integrated in Neutron. Open vSwitch comes natively in Ubuntu and has been recently ported to Hyper-V thanks to Cloudbase Solutions, VMWare and the rest of the other members of the community.

Since its launch in 2014, BootStack has been adopted rapidly by organisations looking to benefit from the agility of OpenStack without the need to worry about security updates, managing complex upgrades or alerts monitoring. BootStack is the only fully managed OpenStack cloud that’s SLA-backed and supported end-to-end.


Cloudbase Solutions has also contributed Windows support to Juju and MAAS, Canonical’s award-winning cloud automation tools, allowing the same level of automation, fault tolerance and user experience that Juju provides on Ubuntu. Cloudbase Solutions’ Juju charms are available for Hyper-V, Active Directory, Windows Scale-Out File Server Storage, Nagios, Windows Server Update Services (WSUS) and many other Microsoft based application workloads from the Charm Store.

Alessandro Pilotti, CEO Cloudbase Solutions said, “As OpenStack is maturing, a large market opportunity is opening up for bringing together the open source experience provided by Canonical and OpenStack with the Windows-based IT found in most enterprises. BootStack, along with our Hyper-V and Windows automation plus support, is the perfect managed product to achieve this goal”.

Arturo Suarez, Product Manager Canonical said, “We are committed to bringing the widest range of options to all the different levels of the stack, including the hypervisor. Our focus is ease of use and reliability and so by partnering with Cloudbase, Canonical delivers the many benefits of OpenStack to Microsoft workloads in the form of BootStack, our fully managed service offered worldwide.”

Canonical and Cloudbase Solutions are exhibiting at OpenStack Summit, Vancouver, 18 – 22 May 2015. Come visit us at booth P3 (Canonical) and booth T64 (Cloudbase Solutions) for more detail.


About Cloudbase Solutions

Cloudbase Solutions is a privately held company dedicated to cloud computing and interoperability, with two offices in Romania and a soon-to-be-opened one in the USA.


Cloudbase Solutions’ mission is to bridge the modern enterprise and cloud computing worlds by bringing OpenStack to Windows based infrastructures. This effort starts with developing and maintaining all the crucial Windows and Hyper-V OpenStack components and culminates with a product range which includes orchestration for Hyper-V, SQL Server, Active Directory, Exchange and SharePoint Server via Juju charms and Heat templates. Furthermore, to solve the perceived complexity of OpenStack deployments, Cloudbase Solutions developed v-magine, bringing a reliable, fast and easy bare-metal deployment model to hybrid and multi hypervisor OpenStack clouds with mixed compute, SDN and storage requirements, ranging from proof of concepts to large scale infrastructures.


For more information on Cloudbase Solutions please contact Diana Macau – dmacau@cloudbasesolutions.com


About Canonical

Canonical is the commercial sponsor of the Ubuntu project and the leading provider of enterprise services for Ubuntu cloud deployments. Ubuntu delivers reliability, performance and interoperability to cloud and scale out environments. Telcos and cloud service providers trust Ubuntu for OpenStack and public cloud and it is used by global enterprises such as AT&T, Comcast, Cisco WebEx, Deutsche Telekom, Ericsson, China Telecom, Korea Telecom, NEC, NTT, Numergy and Time Warner Cable.


Canonical’s tools Juju and MAAS raise the bar for scale-out modeling and deployment in cloud environments. With developers, support staff and engineering centres all over the world, Canonical is uniquely positioned to help its partners and enterprise customers make the most of Ubuntu. Canonical is a privately held company.


For more information on Canonical and Ubuntu please contact Sarah Whebble, March PR – ubuntu@marchpr.com

The post Cloudbase Solutions and Canonical partner to deliver Windows Hyper-V support to BootStack managed OpenStack clouds appeared first on Cloudbase Solutions.

The Open Enterprise Cloud – OpenStack’s Holy Grail?

$
0
0

The way people think about the enterprise IT is changing fast, putting into question many common assumptions on how hardware and software should be designed and deployed. The upending of these long held tenets of Enterprise IT are happening simply due to the innovation brought on by OpenStack and a handful of other successful open source projects that have gained traction in recent years.


What is still unclear is how to deliver all this innovation in a form that can be consumed by customers’ IT departments without the need to hire an army of experienced DevOps, itself as notoriously hard to find as unicorns commodity that has a non-trivial impact on the TCO.


The complexity of an OpenStack deployment is not just perception or FUD spread by the unhappy competition. It’s a real problem that is sometimes ignored by those deeply involved in OpenStack and its core community. The industry is clearly waiting for the solution that can “package” OpenStack in a way that hides the inherent complexity of this problem domain and “just works”. They want something that provides user-friendly interfaces and management tools instead of requiring countless hours of troubleshooting.


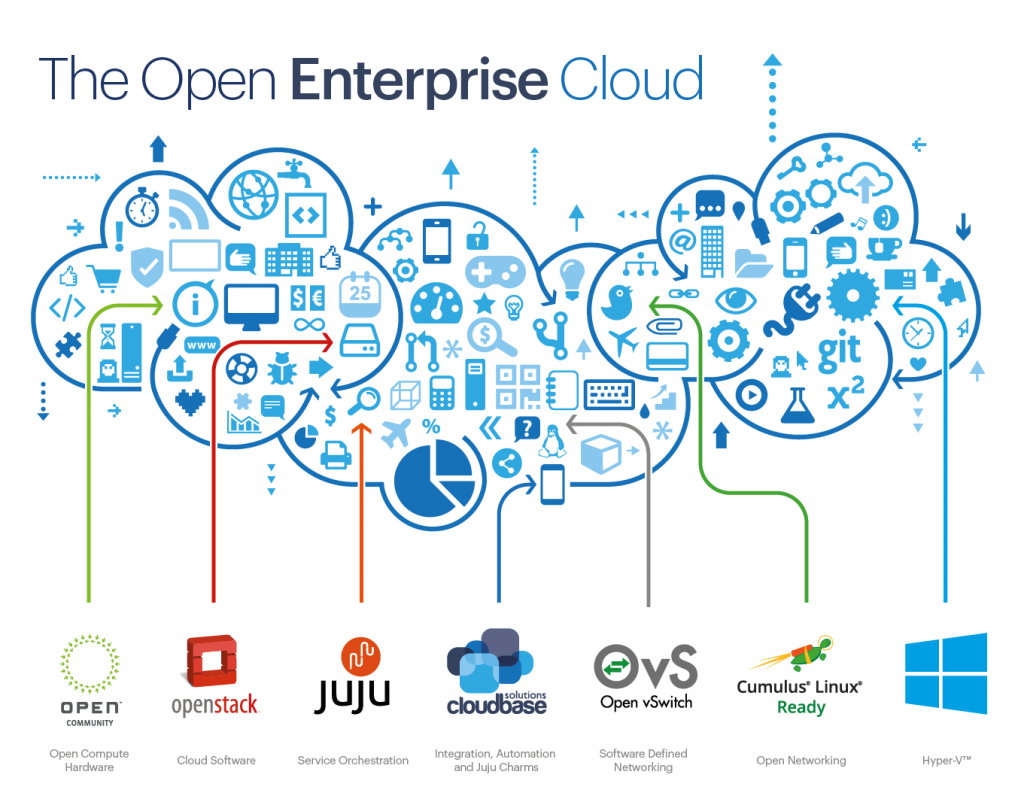
This blog post is the result of our attempt to find and successfully productize this ‘Holy Grail’, featuring a mixture of open source projects that we actively develop and contribute to (OpenStack, Open vSwitch, Juju, MAAS, Open Compute) alongside Microsoft technologies such as Hyper-V that we integrate into Openstack and that are widely used in the enterprise world.


We are excited to be able to demonstrate this convergence of all the above technologies at our Cloudbase Solutions booth at the Vancouver Summit, where we shall be hosting an Open Compute OCS chassis demo.

The Open Enterprise Cloud

Objectives

Here are the prerequisites we identified for this product:

  • Full automation, from the bare metal to the applications
  • Open source technologies and standards
  • Windows/Hyper-V support, a requirement in the enterprise
  • Software Defined Networking (SDN) and Network Function Virtualization (NFV)
  • Scalable and inexpensive storage
  • Modern cloud optimized hardware compatible with existing infrastructures
  • Easy monitoring and troubleshooting tools
  • User friendly experience


Hardware

Let’s start from the bottom of the stack. The way in which server hardware has been designed and produced didn’t really change much in the last decade. But when the Open Compute Project kicked off it introduced a set of radical innovations from large corporations running massive clouds like Facebook.

Private and public clouds have requirements that differ significantly from what traditional server OEMs keep on offering over and over again. In particular, cloud infrastructures don’t require many of the features that you can find on commodity servers. Cloud servers don’t need complex BMCs beyond basic power actions and diagnostics (who needs a graphical console on a server anymore?) or too many redundant components (the server blade itself is the new unit of failure) or even fancy bezels.

 
image
 

Microsoft’s Open CloudServer (OCS) design, contributed to the Open Compute Project, is a great example. It offers a half rack unit blade design with a separate chassis manager in a 19” chassis with redundant PSUs, perfectly compatible with any traditional server room, unlike for example other earlier 21” Open Compute Project server designs. The total cost of ownership (TCO) for this hardware is significantly lower compared to traditional alternatives, which makes this is a very big incentive even for companies less prone to changes in how they handle their IT infrastructure.

Being open source, OCS designs can be produced by anyone, but this is an effort that only the larger hardware manufactures can effectively handle. Quanta in particular is investing actively in this space, with a product range that includes the OCS chassis on display at our Vancouver Summit booth.


Storage

“The Storage Area Network (SAN) is dead.” This is something that we keep hearing and if it’s experiencing  a long twilight it’s because vendors are still enjoying the profit margins it offers. SANs used to provide specialized hardware and software that has now moved to commodity hardware and operating systems. This move offers scalable and fault tolerant options such as Ceph or the SMB3 based Windows Scale-Out File Server, both employed in our solution.


The OCS chassis offers a convenient way of storing SAS, SATA or SSD storage in the form of “Just a Bunch of Disks” (JBOD) units that can be deployed alongside regular compute blades having the same form factor. Depending on the requirements, a mixture of typically inexpensive mechanical disks can be mixed with fast SSD units.


Bare metal deployment

There are still organizations and individuals out there who consider that the only way to install an operating system consists in connecting monitor, keyboard and mouse to a server, insert a DVD, configure it interactively and wait until it’s installed. In a cloud, regardless of being private or public, there are dozens, hundreds or thousands of servers to deploy at once, so manual deployments do not work. Besides this, we need all those servers to be consistently configured, without the unavoidable human errors that manual deployments always incur at scale.


That’s where the need for automated bare metal deployment comes in.

We chose two distinct projects for bare metal: MAAS and Ironic. We use MAAS (to which we contributed Windows support and imaging tools), to bootstrap the chassis, deploy OpenStack using Juju, including storage and KVM or Hyper-V compute nodes. The user can freely decide any time to redistribute the nodes among the individual roles, depending on how many compute or storage resources are needed.

We recently contributed support for the OCS chassis manager in Ironic, so users have also the choice to use Ironic in standalone mode or as part of an OpenStack deployment to deploy physical nodes.

The initial fully automated chassis deployment can be performed from any laptop, server or “jump box” connected to the chassis’ network without the need of installing anything. Even a USB stick with a copy of our v-magine tool is enough.


OpenStack

There are quite a few contenders in the IaaS cloud software arena, but none managed to generate as much interest as OpenStack, with almost all relevant names in the industry investing in its foundation and development.

There’s not much to say here that hasn’t been said elsewhere. OpenStack is becoming the de facto standard in private clouds, with companies like Canonical, RackSpace and HP basing their public cloud offerings on OpenStack as well.

OpenStack’s compute project, Nova, supports a wide range of hypervisors that can be employed in parallel on a single cloud deployment. Given the enterprise-oriented nature of this project, we opted for two hypervisors: KVM, which is the current standard in OpenStack, and Hyper-V, the Microsoft hypervisor (available free of charge). This is not a surprise as we have contributed and are actively developing all the relevant Windows and Hyper-V support in OpenStack in direct coordination with Microsoft Corporation.

The most common use case for this dual hypervisor deployment consists in hosting Linux instances on KVM, and Windows ones on Hyper-V. KVM support for Windows is notoriously shaky, while Windows Hyper-V components are already integrated in the OS and the platform is fully supported by Microsoft, making it a perfect choice for Windows. On the Linux side, while any modern Linux works perfectly fine on Hyper-V thanks to the Linux Integration Services (LIS) included in the upstream Linux kernel, KVM is still preferred by most users.


Software defined networking

Networking has enjoyed a large amount of innovation in recent years, especially in the areas of configuration and multi tenancy. Open vSwitch (OVS) is by far the leader in this domain, commonly identified as software defined networking (SDN). We recently ported OVS to Hyper-V, allowing the integration of Hyper-V in multi-hypervisor clouds and VXLAN as a common overlay standard.

Neutron includes also support for Windows specific SDN for both VLAN and NVGRE overlays in the ML2 plugin, which allows seamless integration with other solutions, including OVS.


Physical switches and open networking

Modern managed network switches provide computing resources that were simply unthinkable just a few years ago and today they’re able to natively run operating systems traditionally limited to server hardware.

Cumulus Linux, a network operating system for bare metal switches developed by Cumulus Networks, is a Linux distribution with hardware acceleration of switching and routing functions. The NOS seamlessly integrates with the host-based Open vSwitch and Hyper-V networking features outlined above.

Neutron takes care of orchestrating hosts and networking switches, allowing a high degree of flexibility, security and performance which become particularly critical when the size of the deployment increases.


Deploying OpenStack with Juju

 
One of the reasons for OpenStack’s success lies in its flexibility: the ability to support a very large amount of hypervisors, backend technologies, SDN solutions and so on. Most of the medium and large enterprise IT departments already adopted some of those technologies and want OpenStack to employ them, with the result that there’s not a single “recommended” way to deploy your stack.


Automation, probably the leading glue in all modern datacenter technologies, doesn’t play that well with flexibility: the higher the flexibility, the higher the amount of automation code that needs to be written and tested, requiring often very complex deployments that become soon unfeasible for any continuous integration framework.


Puppet, Chef, SaltStack and similar configuration management tools are very useful when it comes to automating a specific scenario, but are not particularly suitable for generic use cases, unless you add on top tools like RDO’s PackStack to orchestrate them. Finally, while command line tools are the bread-and-butter of every DevOp, they don’t do much to bring a user-friendly experience that a more general user base can successfully employ without having to resort to cloud specialists.

When looking for a suitable deployment and configuration solution, we recognized that Juju was fulfilling most of our requirements, with the exception of Windows and CentOS support which we contributed shortly afterwards. What we liked in particular is the strict decoupling between independent configurations (called Charms), and a killer GUI that makes this brave new automation world more accessible to less experienced users.


This model has the potential for a large impact on the usage spectrum, productivity improvement and the general TCO reduction. Furthermore, Juju offers also a wide and fast growing catalog of applications.


Applications and orchestration

People want applications, not virtual machines or containers. IaaS is nice to have, but what you do on top of it is what matters for most users. Juju comes to the rescue in this case as well, with a rich charms catalog. Additionally, we developed Windows specific charms to support all the main Microsoft related workloads: Active Directory, IIS, VDI, Windows Server Failover Clustering, SQL Server (including AlwaysOn), Exchange and SharePoint.

Besides Juju, we support Heat (providing many Heat templates for Windows, for example) and PaaS solutions like Cloud Foundry that can be easily deployed via Juju on top of OpenStack.


Cattle and Pets

Using the famous cattle vs pets analogy (a simplistic metaphor for what belongs to a cloud and what doesn’t), OpenStack is all about cattle. At the same time, a lot of enterprise workloads are definitely pets, so how can we create a product that serves both cases?


An easy way to distinguish pets and cattle is that pets are not disposable and require fault tolerant features at the host level, while cattle instances are individually disposable. Nova, OpenStack’s compute project, does not support pets, which means that failover cluster features are not available natively.

We solved this issue by adding one extra component that integrates Nova with the Microsoft Windows Failover Clustering when using Hyper-V. Other components, including storage and networking, are already fully redundant and fault tolerant, so this additional feature allows us to provide proper transparent support for pets without changes in the way the user manages instances in OpenStack. Cattle keep grazing unaffected.


Conclusions

Finding a reliable way to deploy OpenStack and managing it in all its inherent complexity with a straightforward and simple user experience is the ‘Holy Grail’ of today’s private cloud business. At Cloudbase Solutions, we believe we have succeeded in this ever elusive quest for simplicity of user experience by consolidating the leading open source technologies for setting up the bare metal right on to the top of the stack applications, including support for Enterprise Windows and Open source workloads deployed with Canonical’s Juju, and all this in perfect harmony.

The advantage for the user is straightforward: an easy, reliable and affordable way to deploy a private cloud, avoiding vendor lock-in, supporting Microsoft and Linux Enterprise workloads and bypassing the need for an expensive DevOps team on payroll.

Want to see a live demo? Come to our booth at the OpenStack Summit in Vancouver on May 18th-22nd!


The post The Open Enterprise Cloud – OpenStack’s Holy Grail? appeared first on Cloudbase Solutions.

How to easily deploy OpenStack Kilo with Puppet – Part 1

$
0
0

There are plenty of online resources about Puppet and OpenStack, but after a quick search I noticed that none of them was actually providing what people might actually be looking for: a simple manifest to deploy the latest and greatest OpenStack (Kilo at the time of this writing). This post is meant to solve this precise request starting with the easiest scenario: an “all in one” deployment (AiO).

All in One OpenStack on Ubuntu Server 14.04 LTS

OpenStack has a very modular architecture, with a lot of individual projects dealing with different aspects of a cloud, for example Keystone (identity), Nova (compute), Neutron (networking), Cinder (block storage) and so on. All in one simply means that all those components are deployed on a single host.

A detailed description of the OpenStack architecture goes beyond the scope of this post, but you can find all the documentation you need to get you started on the OpenStack foundation’s site.

The OpenStack community provides also official OpenStack Puppet modules:

What are missing are some samples showing how to bring all the pieces together and, to complicate things for the neophyte, there are tons of other Puppet modules available on Stackforge or on the Puppet forge with similar aims. The result is that getting lost when looking for a simple quickstart is very easy!

To put things straight, this post is not planning to showcase yet another Puppet module, but it’s rather focused on making good use of the existing official ones with a simple manifest, targeting the Kilo release and one of the most popular Linux OS choices: Ubuntu Server 14.04 LTS.

Let’s get started. Use git to clone your copy of the manifest:

git clone https://github.com/cloudbase/openstack-puppet-samples/tree/master/kilo
cd openstack-puppet-samples/kilo

Install all the dependencies (note that version 6 of the OpenStack Puppet modules refer to the Kilo release):

sudo apt-get install puppet -y
sudo puppet module install openstack/keystone --version ">=6.0.0 <7.0.0"
sudo puppet module install openstack/glance --version ">=6.0.0 <7.0.0"
sudo puppet module install openstack/cinder --version ">=6.0.0 <7.0.0"
sudo puppet module install openstack/nova --version ">=6.0.0 <7.0.0"
sudo puppet module install openstack/neutron --version ">=6.0.0 <7.0.0"
sudo puppet module install example42/network
sudo puppet module install saz/memcached

Now, just edit openstack-aio-ubuntu-single-nic.pp and replace the following variable values based on your environment, in particular $public_subnet_gateway and $public_subnet_allocation_pools if you want to have external network access from your OpenStack instances:

$interface = 'eth0'
$ext_bridge_interface = 'br-ex'
$dns_nameservers = ['8.8.8.8', '8.8.4.4']
# This is the network to assign to your instances
$private_subnet_cidr = '10.0.0.0/24'
# This must match a network to which the host is connected
$public_subnet_cidr = '192.168.209.0/24'
# The gateway must be in the range defined in $public_subnet_cidr
$public_subnet_gateway = '192.168.209.2'
# Must be a subset of the $public_subnet_cidr range
$public_subnet_allocation_pools = ['start=192.168.209.30,end=192.168.209.50']

Next, if you have a host with a single network adapter and configured with DHCP, the manifest will get the IP address from eth0 and do all the work for you, assigning a static address based on the discovered networking information (you may want to exclude this IP from your DHCP lease range afterwards), alternatively just assign the following variables:

$local_ip = "your host ip"
$gateway = "your gateway"

Note: this manifest expects that virtualization support is available and enabled on your host and KVM will be used as the hypervisor option in Nova. Although not recommended, this can be changed by setting “libvirt_virt_type” to “qemu“.

The basic configuration is done, let’s get started with the deployment:

sudo puppet apply --verbose openstack-aio-ubuntu-single-nic.pp

Access your OpenStack deployment

Your OpenStack dashboard is now accessible at http://<openstack_host>/horizon.

Yopu can login using one of the predefined users created by the manifest: admin or demo. All passwords are set to Passw0rd (this can be changed in the manifest of course).

Alternatively, using the shell just source one of the following files to access your admin or demo environments:

source /root/keystonerc_demo
source /root/keystonerc_admin

Create a keypair if you don’t have one already:

test -d ~/.ssh || mkdir ~/.ssh
nova keypair-add key1 > ~/.ssh/id_rsa_key1
chmod 600 ~/.ssh/id_rsa_key1

You can now boot an instance:

NETID=`neutron net-show private | awk '{if (NR == 5) {print $4}}'`
nova boot --flavor m1.tiny --image "cirros-0.3.4-x86_64" --key-name key1 --nic net-id=$NETID vm1

What’s next?

This is the first post in a series about Puppet and OpenStack. Expect to see more complex multi-node configurations and how to add Hyper-V compute nodes to work side by side with KVM!

The post How to easily deploy OpenStack Kilo with Puppet – Part 1 appeared first on Cloudbase Solutions.


How to add Hyper-V compute nodes to a Mirantis Fuel deployment

$
0
0

Our OpenStack Hyper-V Installer works with any OpenStack cloud, including clouds deployed using Mirantis Fuel.

The goal of this article is not to provide a guide to deploy Fuel (for that you can use the excellent documentation from Mirantis), but rather to guide you through the process of adding a Hyper-V compute node to an existing Fuel deployment.

OpenStack supports multiple types of hypervisors on a single cloud, which means that you can run KVM and Hyper-V side by side with complete interoperability. One of the great advantages is that you can have Windows instances running on Hyper-V, taking advantage of Microsoft’s support for your Windows guests, while keeping Linux instances on KVM in a totally transparent way for your users.


Adding a Hyper-V compute node

To begin with, all you need is a host running the freely available Microsoft Hyper-V Server 2012 R2 or alternatively Windows Server 2012 R2 with the Hyper-V Role enabled.

Networking

The Windows Server 2012 R2 / Hyper-V Server 2012 R2 should have a minimum of two network interfaces, one for management, connected to the public network defined in the Fuel deployment and the other one connected to the private network.

Example:  let’s assume the OpenStack controller deployed with Fuel has the following interfaces:fuel_net_list


In this example, the public interface of the Hyper-V host should be connected to the same network as eth1, and the private interface of the Hyper-V host should be connected to the same network as eth0.


Installing Hyper-V Nova Compute and Neutron Hyper-V Agent

Once the Windows Server / Hyper-V Server setup is complete, you can install the OpenStack Compute role using our OpenStack compute installer. Download the appropriate installer version and run it.

The setup is straightforward (full guide here), you will just need some credentials and service addresses / URLs from your OpenStack cloud.

You will also need a Hyper-V virtual switch, which can be created using the installer, making sure that the interface for the switch is the private one as defined above. To do that, list all the network interfaces, using for example PowerShell:

PS c:\> Get-NetAdapter

The results should be something like this:

netadapter_list


Check that the Mac address corresponds to the private interface and take note of the InterfaceDescription. Set up the Virtual Switch by selecting the proper interface name from the dropdown list as shown in the following image.

new_vswitch

Next, you’ll need the host addresses URLs for the Glance API and AMQP server as well as credentials for AMQP.

An easy way to get the API endpoint URLs is by using Horizon. Login as an administrator and navigate to the projects Access & Security section, API Access tab and select the URL corresponding to the Image service.


api_access

You will need to provide an Neutron API endpoint as well. The Neutron API endpoint can be obtained in the same way as the Glance one, listed as Network under the API Access tab in Horizon.

You will also be prompted for credentials for neutron authentication. The simplest way to find those credentials is to look on the controller node in /etc/nova/nova.conf, in the [neutron] section. The values you are looking for are:

[neutron]
admin_tenant_name
admin_username
admin_password

The AMQP RabbitMQ configuration can be retrieved from /etc/nova/nova.conf as well:

[oslo_messaging_rabbit]
rabbit_userid
rabbit_password
rabbit_hosts

After the installation, you can verify if the nova-compute service and the neutron hyper-v agent are up and running as expected by executing the following commands on the controller:

nova service-list
neutron agent-list

Enable the Hyper-V agent in Neutron

By default, Fuel does not enable the Hyper-V agent in the Neutron configuration. Simply edit the /etc/neutron/plugins/ml2/ml2_plugin.ini file and add hyperv to the list of enabled mechanism drivers:

mechanism_drivers = openvswitch,hyperv

After editing and saving the ml2_plugin.ini file, restart neutron-server:

service neutron-server restart

Congratulations, you have now a fully operational Hyper-V compute node added to your OpenStack Cloud!


Add Hyper-V guest images in Glance

When adding Hyper-V VHD or VHDX images to Glance, make sure to specify the hypervisor_type property to let the Nova scheduler know that you want to target Hyper-V:

glance image-create --property hypervisor_type=hyperv --name "Windows Server 2012 R2 Std" \
--container-format bare --disk-format vhd --file windows2012r2.vhdx

Similarly, for KVM / QEMU images specify hypervisor_type=qemu

We provide free evaluation versions of Windows Server guest images for OpenStack (KVM or Hyper-V) along with commercial support for fully updated and tested Windows production images.


Automation

The deployment and configuration described above can be fully automated with Puppet, Chef, SaltStack, DSC, etc. This is particularly useful in case you’d want to add and manage multiple Hyper-V hosts in your Fuel deployment.


The post How to add Hyper-V compute nodes to a Mirantis Fuel deployment appeared first on Cloudbase Solutions.

OpenStack + Windows Nano Server

$
0
0

Nano Server is a Windows OS created for the cloud age. It has been announced by Microsoft this April and is going to be shipped with Windows Server 2016.

What makes Nano Server special?

  • A very small disk footprint compared to traditional Windows Server deployments (a few hundred MB instead of multiple GB).
  • A very limited attack surface.
  • A very limited number of components, which means fewer updates and fewer reboots
  • Much faster virtual and bare-metal deployment times due to the reduced footprint.

How is this possible?

In short, the OS has been stripped from everything that is not needed in a cloud environment, in particular the GUI stack, the x86 subsystem (WOW64), MSI installer support and unnecessary API.
 

What about OpenStack support?

Nano Server and OpenStack are a perfect match in multiple scenarios, including:

  • Compute instances (virtual and bare-metal)
  • Heat orchestration
  • Hyper-V Nova compute nodes with native and OVS networking support
  • Cinder storage server, including Scale-out File Server clusters
  • Windows Containers host (Nova-Docker and soon Magnum)
  • Manila SMB3 file servers


Nano Server compute instances on OpenStack

Nano can be deployed on OpenStack like any other Windows or Linux guest OS. Currently it supports Hyper-V compute nodes, with KVM and other hypervisors as soon as drivers become available. Bare metal deployments using Ironic or MaaS are also supported.

Like in any other Linux or Windows instance case, a guest boot agent is required to take advantage of the OpenStack infrastructure.

I’m glad to announce that Cloudbase-Init is now fully supported on Nano Server!
 

How to create a Nano Server image for OpenStack?

Creating a Nano OpenStack image is easy and as usual we open sourced the scripts required to do that.

Disclaimer: please consider that Nano Server is still in technical preview, so things can change before the final release.

At the time of this writing the latest public available Nano Server install image can be obtained as part of the Windows Server 2016 TP3 ISO, available for download here.

The following steps need to be executed using PowerShell on Windows, we tested them on Windows 10, Windows Server 2016 TP3 and Hyper-V Server 2012 R2.

Let’s start by cloning our git scripts repository, checking out the nano-server-support branch:

git clone https://github.com/cloudbase/cloudbase-init-offline-install.git -b nano-server-support
cd cloudbase-init-offline-install

The following variables need to match your environment, in particular the folder where you’d like to put the generated Nano VHDX image, the location of your Windows Server 2016 technical preview ISO and the password to assign to the Administrator user. Please note that this password is only meant for troubleshooting and not for OpenStack tenants (more on this later).

$targetPath = "C:\VHDs\Nano"
$isoPath = "C:\ISO\Windows_Server_2016_Technical_Preview_3.ISO"
$password = ConvertTo-SecureString -AsPlaintext -Force "P@ssw0rd"

We can now build our Nano Server image:

$vhdxPath = .\NewNanoServerVHD.ps1 -IsoPath $isoPath -TargetPath $targetPath `
-AdministratorPassword $password

Download Cloudbase-Init:

$cloudbaseInitZipPath = Join-Path $pwd CloudbaseInitSetup_x64.zip
Start-BitsTransfer -Source "https://www.cloudbase.it/downloads/CloudbaseInitSetup_x64.zip" `
-Destination $cloudbaseInitZipPath

Install Cloudbase-Init and prepare the image for OpenStack:

.\CloudbaseInitOfflineSetup.ps1 -VhdPath $vhdxPath -CloudbaseInitZipPath $cloudbaseInitZipPath

Done!

We’re ready to upload our freshly built image in Glance:

glance image-create --property hypervisor_type=hyperv --name "Nano Server" ` 
--container-format bare --disk-format vhd --file $vhdxPath


Booting your first Nano Server OpenStack instance

If you don’t have Hyper-V nodes in your OpenStack environment, adding one is very easy. If you also don’t have an OpenStack deployment at hand, you can have one installed on your Windows server or laptop in a matter of minutes using v-magine.

Nano instances can be booted on OpenStack like any other OS, with one exception: Nano does not currently support DVDRom drives, so if you plan to use ConfigDrive, Nova compute on Hyper-V must be set to use RAW disks (ISO or VFAT).

Here’s a simple nova boot example, where $netId is the id of your private network. Make sure to pass a keypair if you want to obtain the password required to login!

nova boot --flavor m1.standard --image "Nano Server" --key-name key1 --nic net-id=$netId nano1

Once the system is booted, you can retrieve and decrypt the instance password using nova get-password, passing the path to the keypair’s private key:

nova get-password nano1 "\path\to\key1_rsa"

By the way, all the above steps can be performed in Horizon as well, here’s how a Nano instance console looks like:

Nano Horizon console
 

Connecting to Nano Server instances

Nano does not support RDP, since there’s no GUI stack, but it supports WinRM and PowerShell remoting. If you’re not familiar with WinRM, you can think of it as the rough equivalent of SSH for Windows.

In your security groups, you need to allow port 5986 used for WinRM HTTPS connections. Cloudbase-Init took care of configuring the instance’s WinRM HTTPS listener.

nova secgroup-add-rule default tcp 5986 5986 "0.0.0.0/0"

To enter a remote PowerShell session:

# Get your instance address, possibly by associating a floating IP: 
$ComputerName = "yourserveraddress"

# Your password obtained from "nova get-password" is used here  
$password = ConvertTo-SecureString -asPlainText -Force "your_password"
$c = New-Object System.Management.Automation.PSCredential("Admin", $password)

$opt = New-PSSessionOption -SkipCACheck -SkipCNCheck -SkipRevocationCheck
$session = New-PSSession -ComputerName $ComputerName -UseSSL -SessionOption $opt `
-Authentication Basic -Credential $c
Enter-PSSession $session

Done! You’re connected to Nano server!
Nano Server PSSession
 

Can I avoid passwords?

Windows supports password-less authentication using X509 certificates in a way conceptually similar to SSH public key authentication on Linux, here’s a blog posts that we wrote on this topic.
 

Customizing Nano with userdata scripts and Heat templates

Cloudbase-Init supports PowerShell and Windows batch userdata scripts on any Windows version, including Nano Server.  Heat templates are supported as well, in the limits of the features available on Nano of course, so trying to deploy an Active Directory controller won’t work on the current technical preview!

Here’s a very simple example PowerShell userdata script that can be provided to Nova when spawning an instance:

#ps1
echo "Hello OpenStack!" > C:\hello.txt


What’s next?

Cloudbase-Init integration was just the first step in getting Nano Server supported in OpenStack.

Coming next: Nova compute for Hyper-V, Open vSwitch and Cinder Windows storage support!


The post OpenStack + Windows Nano Server appeared first on Cloudbase Solutions.

Open vSwitch 2.4 on Hyper-V – Part 1

$
0
0

We are happy to announce the availability of the Open vSwitch (OVS) 2.4.0 beta for Microsoft Hyper-V Server 2012, 2012 R2 and 2016 (technical preview) thanks to the joint effort of Cloudbase Solutions, VMware and the rest of the Open vSwitch community. Furthermore, support for Open vSwitch on OpenStack Hyper-V compute nodes is also available starting with Kilo!

The OVS 2.4 0 release includes the Open vSwitch CLI tools and daemons (e.g. ovsdb-server, ovs-vswitchd, ovs-vsctl, ovs-ofctl etc), and an updated version of the OVS Hyper-V virtual switch forwarding extension, providing fully interoperable VXLAN and STT encapsulation between Hyper-V and Linux, including KVM based virtual machines.

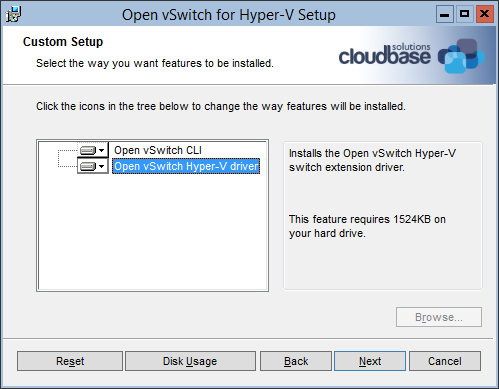
As usual, we also released an MSI installer that takes care of the Windows services for the ovsdb-server and ovs-vswitchd daemons along with all the required binaries and configurations.

All the Open vSwitch code is available as open source here:

https://github.com/openvswitch/ovs/tree/branch-2.4
https://github.com/cloudbase/ovs/tree/branch-2.4-ovs

Supported Windows operating systems:

  • Windows Server and Hyper-V Server 2012 and 2012 R2
  • Windows Server and Hyper-V Server 2016 (technical preview)
  • Windows 8, 8.1 and 10


Installing Open vSwitch on Hyper-V

The entire installation process is seamless. Download our installer and run it. You’ll be welcomed by the following screen:

Open vSwitch Windows Hyper-V

Click “Next”, accept the license, click “Next” again and you’ll have the option to install both the Hyper-V virtual switch extension driver and the command line tools. In case you’d like to install the command line tools only to connect remotely to a Windows or Linux OVS server, just deselect the driver option.


OVSHVSetup3


Click “Next” followed by “Install” and the installation will start. You’ll have to confirm that you want to install the signed kernel driver and the process will be completed in a matter of a few seconds, generating an Open vSwitch database and starting the ovsdb-server and ovs-vswitchd services.


OVSHVSetup3_1


The installer also adds the command line tools folder to the system path, available after the next logon or CLI shell execution.


Unattended installation

Fully unattended installation is also available(if you already have accepted/imported our certificate) in order to install Open vSwitch with Windows GPOs, Puppet, Chef, SaltStack, DSC or any other automated deployment solution:

msiexec /i openvswitch-hyperv-installer-beta.msi /l*v log.txt

Configuring Open vSwitch on Windows

Create a Hyper-V external virtual switch. Remember that if you want to take advantage of VXLAN or STT tunnelling you will have to create an external virtual switch with the AllowManagementOS flag set to true.

For example:

PS C:\package> Get-VMSwitch

Name     SwitchType NetAdapterInterfaceDescription
----     ---------- ------------------------------
external External   Intel(R) PRO/1000 MT Network Connection #2

PS C:\package> Get-VMNetworkAdapter -ManagementOS -SwitchName external

Name     IsManagementOs VMName SwitchName MacAddress   Status IPAddresses
----     -------------- ------ ---------- ----------   ------ -----------
external True                  external   000C293F2BCF {Ok}

To verify that the extension has been installed on our system:

PS C:\package> Get-VMSwitchExtension external

Id                  : EA24CD6C-D17A-4348-9190-09F0D5BE83DD
Name                : Microsoft NDIS Capture
Vendor              : Microsoft
Version             : 6.3.9600.16384
ExtensionType       : Monitoring
ParentExtensionId   :
ParentExtensionName :
SwitchId            : 42406c9a-7b64-432a-adcd-83aa60aefeb9
SwitchName          : external
Enabled             : False
Running             : False
ComputerName        : WIN-L8H4PEU1R8B
Key                 :
IsDeleted           : False

Id                  : E7C3B2F0-F3C5-48DF-AF2B-10FED6D72E7A
Name                : Microsoft Windows Filtering Platform
Vendor              : Microsoft
Version             : 6.3.9600.16384
ExtensionType       : Filter
ParentExtensionId   :
ParentExtensionName :
SwitchId            : 42406c9a-7b64-432a-adcd-83aa60aefeb9
SwitchName          : external
Enabled             : True
Running             : True
ComputerName        : WIN-L8H4PEU1R8B
Key                 :
IsDeleted           : False

Id                  : 583CC151-73EC-4A6A-8B47-578297AD7623
Name                : Open vSwitch Extension
Vendor              : Open vSwitch
Version             : 11.56.50.171
ExtensionType       : Forwarding
ParentExtensionId   :
ParentExtensionName :
SwitchId            : 42406c9a-7b64-432a-adcd-83aa60aefeb9
SwitchName          : external
Enabled             : False
Running             : False
ComputerName        : WIN-L8H4PEU1R8B
Key                 :
IsDeleted           : False

We can now enable the OVS extension on the external virtual switch:

PS C:\package> Enable-VMSwitchExtension "Open vSwitch Extension" -VMSwitchName external

Id                  : 583CC151-73EC-4A6A-8B47-578297AD7623
Name                : Open vSwitch Extension
Vendor              : Open vSwitch
Version             : 11.56.50.171
ExtensionType       : Forwarding
ParentExtensionId   :
ParentExtensionName :
SwitchId            : 42406c9a-7b64-432a-adcd-83aa60aefeb9
SwitchName          : external
Enabled             : True
Running             : True
ComputerName        : WIN-L8H4PEU1R8B
Key                 :
IsDeleted           : False

Please note that in the moment you enable the extension, the virtual switch will stop forwarding traffic until configured:

PS C:\package> ovs-vsctl.exe add-br br-tun
PS C:\package> ovs-vsctl.exe add-port br-tun external.1
PS C:\package> ovs-vsctl.exe add-port br-tun internal
PS C:\package> ping 10.13.10.30

Pinging 10.13.10.30 with 32 bytes of data:
Reply from 10.13.10.30: bytes=32 time=2ms TTL=64
Reply from 10.13.10.30: bytes=32 time<1ms TTL=64

Why is the above needed?

To seamlessly integrate Open vSwitch with the Hyper-V networking model we need to use Hyper-V virtual switch ports instead of tap devices (Linux). This is the main difference in the architectural model between Open vSwitch on Windows compared to its Linux counterpart.

From the OVS reference:

“In OVS for Hyper-V, we use ‘external’ as a special name to refer to the physical NICs connected to the Hyper-V switch. An index is added to this special name to refer to the particular physical NIC. Eg. ‘external.1’ refers to the first physical NIC on the Hyper-V switch. (…) Internal port is the virtual adapter created on the Hyper-V switch using the ‘AllowManagementOS’ setting. In OVS for Hyper-V, we use a ‘internal’ as a special name to refer to that adapter.”

Note: the above is subject to change. The actual adapter names will be used in an upcoming release (e.g. Ethernet1) in place of “external.x”.


Limitations

We currently support a single Hyper-V virtual switch in our forwarding extension. This is subject to change in the near future.


Openstack Integration with Open vSwitch on Windows

OpenStack is a very common use case for Open vSwitch on Hyper-V. The following example is based on a DevStack Kilo All-in-One deployment on Ubuntu 14.04 LTS with a Hyper-V compute node, but the concepts and the following steps apply to any OpenStack deployment.

Let’s install our SevStack node. Here’s a sample localrc configuration:

ubuntu@ubuntu:~/devstack$ cat localrc 
# Misc
HOST_IP=10.13.10.30
DATABASE_PASSWORD=Passw0rd
ADMIN_PASSWORD=Passw0rd
SERVICE_PASSWORD=Passw0rd
SERVICE_TOKEN=Passw0rd
RABBIT_PASSWORD=Passw0rd

KEYSTONE_BRANCH=stable/kilo
NOVA_BRANCH=stable/kilo
NEUTRON_BRANCH=stable/kilo
GLANCE_BRANCH=stable/kilo
HORIZON_BRANCH=stable/kilo
REQUIREMENTS_BRANCH=stable/kilo

# Reclone each time
RECLONE=yes

# Enable Logging
LOGFILE=/opt/stack/logs/stack.sh.log
VERBOSE=True
LOG_COLOR=True
SCREEN_LOGDIR=/opt/stack/logs

# Pre-requisite
ENABLED_SERVICES=rabbit,mysql,key

# Nova - Compute Service
ENABLED_SERVICES+=,n-api,n-crt,n-obj,n-cpu,n-cond,n-sch
IMAGE_URLS+=",https://launchpad.net/cirros/trunk/0.3.0/+download/cirros-0.3.0-x86_64-disk.img"

# Neutron - Networking Service
ENABLED_SERVICES+=,q-svc,q-agt,q-dhcp,q-l3,q-meta,neutron,g-api,g-reg

# Horizon
ENABLED_SERVICES+=,horizon

# VLAN configuration
Q_PLUGIN=ml2
Q_ML2_PLUGIN_MECHANISM_DRIVERS=openvswitch
ENABLE_TENANT_TUNNELS=True
Q_ML2_TENANT_NETWORK_TYPE=vxlan
TENANT_TUNNEL_RANGE=5000:10000

Networking:

ubuntu@ubuntu:~/devstack$ ifconfig eth1
eth1      Link encap:Ethernet  HWaddr 00:0c:29:87:f9:4a  
          inet addr:10.13.10.30  Bcast:10.13.10.255  Mask:255.255.255.0
          inet6 addr: fe80::20c:29ff:fe87:f94a/64 Scope:Link
          UP BROADCAST RUNNING MULTICAST  MTU:1500  Metric:1
          RX packets:1481 errors:0 dropped:0 overruns:0 frame:0
          TX packets:1642 errors:0 dropped:0 overruns:0 carrier:0
          collisions:0 txqueuelen:1000 
          RX bytes:101988 (101.9 KB)  TX bytes:112315 (112.3 KB)
          Interrupt:16 Base address:0x2000

After DevStack finishes installing we can add some Hyper-V VHD or VHDX images to Glance, for example our Windows Server 2012 R2 evaluation image. Additionally, since we are using VXLAN, the default guest MTU should be set to 1450. This can be done via a DHCP option if the guest supports it, as described here.

Now let’s move to the Hyper-V node. First we have to download the latest OpenStack compute installer:

PS C:\package> Start-BitsTransfer https://www.cloudbase.it/downloads/HyperVNovaCompute_Kilo_2015_1.msi

Full steps on how to install and configure OpenStack on Hyper-V are available here: Openstack on Windows installation.

In our example, the Hyper-V node will use the following adapter to connect to the OpenStack environment:

Ethernet adapter vEthernet (external):

   Connection-specific DNS Suffix  . :
   IPv6 Address. . . . . . . . . . . : fd1a:32:d256:0:7911:fd1e:32b8:1d50
   Link-local IPv6 Address . . . . . : fe80::7911:fd1e:32b8:1d50%19
   IPv4 Address. . . . . . . . . . . : 10.13.10.35
   Subnet Mask . . . . . . . . . . . : 255.255.255.0
   Default Gateway . . . . . . . . . :

This is the adapter bound to the external virtual switch, as created during the previous steps.

We can now verify our deployment by taking a look at the Nova services and Neutron agents status on the OpenStack controller and ensuring that they are up and running:

ubuntu@ubuntu:~/devstack$ nova service-list
+----+----------------+-----------------+----------+---------+-------+----------------------------+-----------------+
| Id | Binary         | Host            | Zone     | Status  | State | Updated_at                 | Disabled Reason |
+----+----------------+-----------------+----------+---------+-------+----------------------------+-----------------+
| 1  | nova-conductor | ubuntu          | internal | enabled | up    | 2015-09-17T10:02:15.000000 | -               |
| 2  | nova-cert      | ubuntu          | internal | enabled | up    | 2015-09-17T10:02:18.000000 | -               |
| 3  | nova-scheduler | ubuntu          | internal | enabled | up    | 2015-09-17T10:02:21.000000 | -               |
| 4  | nova-compute   | ubuntu          | nova     | enabled | up    | 2015-09-17T10:02:19.000000 | -               |
| 5  | nova-compute   | WIN-L8H4PEU1R8B | nova     | enabled | up    | 2015-09-17T10:02:17.000000 | -               |
+----+----------------+-----------------+----------+---------+-------+----------------------------+-----------------+
ubuntu@ubuntu:~/devstack$ neutron agent-list
+--------------------------------------+--------------------+-----------------+-------+----------------+---------------------------+
| id                                   | agent_type         | host            | alive | admin_state_up | binary                    |
+--------------------------------------+--------------------+-----------------+-------+----------------+---------------------------+
| 2cbf5b0c-5d31-40a5-8abc-c889663e2cb4 | L3 agent           | ubuntu          | :-)   | True           | neutron-l3-agent          |
| 4de21c7c-5e50-4835-96f3-d34228cf2480 | DHCP agent         | ubuntu          | :-)   | True           | neutron-dhcp-agent        |
| 530ace5c-bb03-4b56-a087-b2048261255a | Open vSwitch agent | ubuntu          | :-)   | True           | neutron-openvswitch-agent |
| 90c59a72-319c-4019-94aa-b808a4f3dfb0 | Metadata agent     | ubuntu          | :-)   | True           | neutron-metadata-agent    |
| fecf11f3-7a64-4b81-8c2d-11fdd1dddbd9 | HyperV agent       | WIN-L8H4PEU1R8B | :-)   | True           | neutron-hyperv-agent      |
+--------------------------------------+--------------------+-----------------+-------+----------------+---------------------------+

Next we can disable the Windows Hyper-V agent, which is not needed since we use OVS:

C:\package>sc config "neutron-hyperv-agent" start=disabled
[SC] ChangeServiceConfig SUCCESS

C:\package>sc stop "neutron-hyperv-agent"

SERVICE_NAME: neutron-hyperv-agent
        TYPE               : 10  WIN32_OWN_PROCESS
        STATE              : 1  STOPPED
        WIN32_EXIT_CODE    : 0  (0x0)
        SERVICE_EXIT_CODE  : 0  (0x0)
        CHECKPOINT         : 0x0
        WAIT_HINT          : 0x0

We need to create a new service called neutron-ovs-agent and put its configuration options in C:\Program Files (x86)\Cloudbase Solutions\OpenStack\Nova\etc\neutron_ovs_agent.conf. From a command prompt:

C:\Users\Administrator>sc create neutron-ovs-agent binPath= "\"C:\Program Files (x86)\Cloudbase Solutions\OpenStack\Nova\bin\OpenStackServiceNeutron.exe\" neutron-hyperv-agent \"C:\Program Files (x86)\Cloudbase Solutions\OpenStack\Nova\Python27\Scripts\neutron-openvswitch-agent.exe\" --config-file \"C:\Program Files (x86)\Cloudbase Solutions\OpenStack\Nova\etc\neutron_ovs_agent.conf\"" type= own start= auto  error= ignore depend= Winmgmt displayname= "OpenStack Neutron Open vSwitch Agent Service" obj= LocalSystem
[SC] CreateService SUCCESS

C:\Users\Administrator>notepad "c:\Program Files (x86)\Cloudbase Solutions\OpenStack\Nova\etc\neutron_ovs_agent.conf"

C:\Users\Administrator>sc start neutron-ovs-agent

SERVICE_NAME: neutron-ovs-agent
        TYPE               : 10  WIN32_OWN_PROCESS
        STATE              : 2  START_PENDING
                                (STOPPABLE, NOT_PAUSABLE, ACCEPTS_SHUTDOWN)
        WIN32_EXIT_CODE    : 0  (0x0)
        SERVICE_EXIT_CODE  : 0  (0x0)
        CHECKPOINT         : 0x1
        WAIT_HINT          : 0x0
        PID                : 2740
        FLAGS              :

Note: creating a service manually for the OVS agent won’t be necessary anymore starting with the next Nova Hyper-V MSI installer version.

Here’s the content of the neutron_ovs_agent.conf file:

[DEFAULT]
verbose=true
debug=true
control_exchange=neutron
policy_file=C:\Program Files (x86)\Cloudbase Solutions\OpenStack\Nova\etc\policy.json
rpc_backend=neutron.openstack.common.rpc.impl_kombu
rabbit_host=10.13.10.30
rabbit_port=5672
rabbit_userid=guest
rabbit_password=guest
logdir=C:\OpenStack\Log\
logfile=neutron-ovs-agent.log
[agent]
tunnel_types = vxlan
enable_metrics_collection=false
[SECURITYGROUP]
enable_security_group=false
[ovs]
local_ip = 10.13.10.35
tunnel_bridge = br-tun
integration_bridge = br-int
tenant_network_type = vxlan
enable_tunneling = true

Now if we run ovs-vsctl show, we can see a VXLAN tunnel in place:

PS C:\Users\Administrator> ovs-vsctl.exe show
01ee44a6-9fac-461a-a8c1-da77a09fae69
    Bridge br-tun
        fail_mode: secure
        Port patch-int
            Interface patch-int
                type: patch
                options: {peer=patch-tun}
        Port br-tun
            Interface br-tun
                type: internal
        Port internal
            Interface internal
        Port "vxlan-0a0d0a1e"
            Interface "vxlan-0a0d0a1e"
                type: vxlan
                options: {df_default="true", in_key=flow, local_ip="10.13.10.35", out_key=flow, remote_ip="10.13.10.30"}

        Port "external.1"
            Interface "external.1"
    Bridge br-int
        fail_mode: secure
        Port patch-tun
            Interface patch-tun
                type: patch
                options: {peer=patch-int}
        Port br-int
            Interface br-int
                type: internal

After spawning a Nova instance on the Hyper-V node you should see:

PS C:\Users\Administrator> get-vm

Name              State   CPUUsage(%) MemoryAssigned(M) Uptime   Status
----              -----   ----------- ----------------- ------   ------
instance-00000004 Running 4           2048              00:00:41 Operating normally


PS C:\Users\Administrator> Get-VMConsole instance-00000004
PS C:\Users\Administrator> ovs-vsctl.exe show
01ee44a6-9fac-461a-a8c1-da77a09fae69
    Bridge br-tun
        fail_mode: secure
        Port patch-int
            Interface patch-int
                type: patch
                options: {peer=patch-tun}
        Port br-tun
            Interface br-tun
                type: internal
        Port internal
            Interface internal
        Port "vxlan-0a0d0a1e"
            Interface "vxlan-0a0d0a1e"
                type: vxlan
                options: {df_default="true", in_key=flow, local_ip="10.13.10.35", out_key=flow, remote_ip="10.13.10.30"}

        Port "external.1"
            Interface "external.1"
    Bridge br-int
        fail_mode: secure
        Port patch-tun
            Interface patch-tun
                type: patch
                options: {peer=patch-int}
        Port br-int
            Interface br-int
                type: internal
        Port "dbc80e38-96a8-4e26-bc74-3aa03aea23f9"
            tag: 1
            Interface "dbc80e38-96a8-4e26-bc74-3aa03aea23f9"

In this example, “dbc80e38-96a8-4e26-bc74-3aa03aea23f9” is the OVS port name associated to the instance-00000004 VM vnic. You can find out the details by running the following PowerShell cmdlet:

PS C:\Users\Administrator> Get-VMByOVSPort -OVSPortName "dbc80e38-96a8-4e26-bc74-3aa03aea23f9"
...
ElementName                          : instance-00000004
...

The VM instance-00000004 got an IP address from the neutron DHCP agent, with fully functional networking between KVM and Hyper-V hosted virtual machines!

This is everything you need to get started with OpenStack, Hyper-V and OVS. In the next blog post we’ll show how to manage Hyper-V on OVS without OpenStack.


Notes

The beta installer is built by our Jenkins servers every time a new commit lands in the project repositories, so expect frequent updates.


The post Open vSwitch 2.4 on Hyper-V – Part 1 appeared first on Cloudbase Solutions.

Open vSwitch 2.4 on Hyper-V – Part 2

$
0
0

OVS VXLAN setup on Hyper-V without OpenStack

In the previous post we explained how to deploy Open vSwitch (OVS) on Hyper-V and integrate it in an OpenStack context. In this second part we’ll explain how to configure manually a VXLAN tunnel between VMs running on Hyper-V hosts and VMs running on KVM hosts.


KVM OVS configuration

In this example, KVM1 provides a VXLAN tunnel with local endpoint 10.13.10.30:

  • vxlan-0a0d0a23 connected to Hyper-V (10.13.10.35)
ubuntu@ubuntu:~$ sudo ovs-vsctl show
c387faab-80cc-493f-ac78-1c8de0fe51ad
    Bridge br-int
        fail_mode: secure
        Port "qr-136f09f9-fb"
            tag: 1
            Interface "qr-136f09f9-fb"
                type: internal
        Port br-int
            Interface br-int
                type: internal
        Port "tapc17fbf14-28"
            tag: 1
            Interface "tapc17fbf14-28"
                type: internal
        Port patch-tun
            Interface patch-tun
                type: patch
                options: {peer=patch-int}
    Bridge br-tun
        fail_mode: secure
        Port patch-int
            Interface patch-int
                type: patch
                options: {peer=patch-tun}
        Port "vxlan-0a0d0a23"
            Interface "vxlan-0a0d0a23"
                type: vxlan
                options: {df_default="true", in_key=flow, local_ip="10.13.10.30", out_key=flow, remote_ip="10.13.10.35"}
        Port br-tun
            Interface br-tun
                type: internal

Hyper-V OVS configuration

Let’s start by creating a VXLAN tunnel, our sample IP address assigned to the “vEthernet (external)” adapter is 10.13.10.35:

ovs-vsctl.exe add-port br0 vxlan-1
ovs-vsctl: Error detected while setting up 'vxlan-1'.  See ovs-vswitchd log for details.
ovs-vsctl.exe set Interface vxlan-1 type=vxlan
ovs-vsctl.exe set Interface vxlan-1 options:local_ip=10.13.10.35
ovs-vsctl.exe set Interface vxlan-1 options:remote_ip=10.13.10.30
ovs-vsctl.exe set Interface vxlan-1 options:in_key=flow
ovs-vsctl.exe set Interface vxlan-1 options:out_key=flow

Note: the error can be ignored, we are implementing a new event based mechanism and this error will disappear.

As you can see, all the commands are very familiar if you are used to OVS on Linux.

As introduced before, the main area where the Hyper-V implementation differs from its Linux counterpart is in how virtual machines are attached to a given OVS port. This is easily accomplished by using the Set-VMNetworkAdapterOVSPort PowerShell cmdlet provided with the installer (please refer to part1 for details on installing OVS).

Let’s say that we have a Hyper-V virtual machine called VM2 and that we want to connect it to the Hyper-V OVS switch. All we have to do for each VM network adapter is to connect it to the external switch as you would normally do, assign it to a given OVS port and create the corresponding ports in OVS:

$vnic = Get-VMNetworkAdapter instance-00000005
Connect-VMNetworkAdapter -VMNetworkAdapter $vnic -SwitchName external
$vnic | Set-VMNetworkAdapterOVSPort -OVSPortName vm2
ovs-vsctl.exe add-port br0 vm2 tag=1

Here’s how the resulting OVS configuration looks like on Hyper-V:

PS C:\Users\Administrator> ovs-vsctl.exe show
01ee44a6-9fac-461a-a8c1-da77a09fae69
    Bridge br-int
        fail_mode: secure
        Port "adb134bf-5312-4323-b574-d206c3cef740"
            tag: 1
            Interface "adb134bf-5312-4323-b574-d206c3cef740"
        Port br-int
            Interface br-int
                type: internal
        Port patch-tun
            Interface patch-tun
                type: patch
                options: {peer=patch-int}
        Port "vm2"
            tag: 1
            Interface "vm2"
    Bridge br-tun
        fail_mode: secure
        Port br-tun
            Interface br-tun
                type: internal
        Port "vxlan-1"
            Interface "vxlan-1"
                type: vxlan
                options: {in_key=flow, local_ip="10.13.10.35", out_key=flow, remote_ip="10.13.10.30"}
        Port patch-int
            Interface patch-int
                type: patch
                options: {peer=patch-tun}
        Port internal
            Interface internal
        Port "external.1"
            Interface "external.1"

Further control can be accomplished by applying flow rules, for example by configuring port / virtual machine networking access on each VXLAN tunnel.

Here are i.e. the flows on br-tun that can be used to enable communication using the VLAN tag “1”:

PS C:\Users\Administrator> ovs-ofctl.exe dump-flows br-tun
NXST_FLOW reply (xid=0x4):
 cookie=0x0, duration=1457.706s, table=0, n_packets=5710, n_bytes=1253743, idle_age=0, priority=1,in_port=3 actions=output:2
 cookie=0x0, duration=1457.687s, table=0, n_packets=5909, n_bytes=1215935, idle_age=0, priority=1,in_port=2 actions=output:3
 cookie=0x0, duration=1457.651s, table=0, n_packets=1393, n_bytes=129330, idle_age=0, priority=1,in_port=1 actions=resubmit(,2)
 cookie=0x0, duration=1451.280s, table=0, n_packets=1332, n_bytes=126624, idle_age=1, priority=1,in_port=8 actions=resubmit(,4)
 cookie=0x0, duration=1457.634s, table=0, n_packets=0, n_bytes=0, idle_age=1457, priority=0 actions=drop
 cookie=0x0, duration=1457.609s, table=2, n_packets=1327, n_bytes=125768, idle_age=0, priority=0,dl_dst=00:00:00:00:00:00/01:00:00:00:00:00 actions=resubmit(,20)
 cookie=0x0, duration=1457.595s, table=2, n_packets=66, n_bytes=3562, idle_age=1187, priority=0,dl_dst=01:00:00:00:00:00/01:00:00:00:00:00 actions=resubmit(,22)
 cookie=0x0, duration=1457.557s, table=3, n_packets=0, n_bytes=0, idle_age=1457, priority=0 actions=drop
 cookie=0x0, duration=1275.744s, table=4, n_packets=1332, n_bytes=126624, idle_age=1, priority=1,tun_id=0x410 actions=mod_vlan_vid:1,resubmit(,10)
 cookie=0x0, duration=1457.540s, table=4, n_packets=0, n_bytes=0, idle_age=1457, priority=0 actions=drop
 cookie=0x0, duration=1457.513s, table=10, n_packets=1332, n_bytes=126624, idle_age=1, priority=1 actions=learn(table=20,hard_timeout=300,priority=1,NXM_OF_VLAN_TCI[0..11],NXM_OF_ETH_DST[]=NXM_OF_ETH_SRC[],load:0->NXM_OF_VLAN_TCI[],load:NXM_NX_TUN_ID[]->NXM_NX_TUN_ID[],output:NXM_OF_IN_PORT[]),output:1
 cookie=0x0, duration=1248.963s, table=20, n_packets=1321, n_bytes=125258, hard_timeout=300, idle_age=0, hard_age=0, priority=1,vlan_tci=0x0001/0x0fff,dl_dst=fa:16:3e:86:b7:98 actions=load:0->NXM_OF_VLAN_TCI[],load:0x410->NXM_NX_TUN_ID[],output:8
 cookie=0x0, duration=1457.497s, table=20, n_packets=0, n_bytes=0, idle_age=1457, priority=0 actions=resubmit(,22)
 cookie=0x0, duration=1275.771s, table=22, n_packets=12, n_bytes=1294, idle_age=1187, dl_vlan=1 actions=strip_vlan,set_tunnel:0x410,output:8
 cookie=0x0, duration=1457.455s, table=22, n_packets=54, n_bytes=2268, idle_age=1280, priority=0 actions=drop

OVS based networking is now fully functional between KVM and Hyper-V hosted virtual machines!


The post Open vSwitch 2.4 on Hyper-V – Part 2 appeared first on Cloudbase Solutions.

How to add Hyper-V compute nodes to a Mirantis Fuel deployment

$
0
0

Our OpenStack Hyper-V Compute Driver works with any OpenStack cloud, including clouds deployed using Mirantis Fuel.

The goal of this article is not to provide a guide to deploy Fuel (for that you can use the excellent documentation from Mirantis), but rather to guide you through the process of adding a Hyper-V compute node to an existing Fuel deployment.

OpenStack supports multiple types of hypervisors on a single cloud, which means that you can run KVM and Hyper-V side by side with complete interoperability. One of the great advantages is that you can have Windows instances running on Hyper-V, taking advantage of Microsoft’s support for your Windows guests, while keeping Linux instances on KVM in a totally transparent way for your users.
 

Adding a Hyper-V compute node

To begin with, all you need is a host running the freely available Microsoft Hyper-V Server 2012 R2 or alternatively Windows Server 2012 R2 with the Hyper-V Role enabled.

Networking

The Windows Server 2012 R2 / Hyper-V Server 2012 R2 should have a minimum of two network interfaces, one for management, connected to the public network defined in the Fuel deployment and the other one connected to the private network.

Example:  let’s assume the OpenStack controller deployed with Fuel has the following interfaces:

Fuel net list

In this example, the public interface of the Hyper-V host should be connected to the same network as eth1, and the private interface of the Hyper-V host should be connected to the same network as eth0.

Installing Hyper-V Nova Compute and Neutron Hyper-V Agent

Once the Windows Server / Hyper-V Server setup is complete, you can install the OpenStack Compute role using our OpenStack compute installer. Download the appropriate installer version and run it.

The setup is straightforward (full guide here), you will just need some credentials and service addresses / URLs from your OpenStack cloud.

You will also need a Hyper-V virtual switch, which can be created using the installer, making sure that the interface for the switch is the private one as defined above. To do that, list all the network interfaces, using for example PowerShell:

PS c:\> Get-NetAdapter

The results should be something like this:

netadapter_list

Check that the Mac address corresponds to the private interface and take note of the InterfaceDescription. Set up the Virtual Switch by selecting the proper interface name from the dropdown list as shown in the following image.

new_vswitch

Next, you’ll need the host addresses URLs for the Glance API and AMQP server as well as credentials for AMQP.

An easy way to get the API endpoint URLs is by using Horizon. Login as an administrator and navigate to the projects Access & Security section, API Access tab and select the URL corresponding to the Image service.

api_access

You will need to provide an Neutron API endpoint as well. The Neutron API endpoint can be obtained in the same way as the Glance one, listed as Network under the API Access tab in Horizon.

You will also be prompted for credentials for neutron authentication. The simplest way to find those credentials is to look on the controller node in /etc/nova/nova.conf, in the [neutron] section. The values you are looking for are:

[neutron]
admin_tenant_name
admin_username
admin_password

The AMQP RabbitMQ configuration can be retrieved from /etc/nova/nova.conf as well:

[oslo_messaging_rabbit]
rabbit_userid
rabbit_password
rabbit_hosts

After the installation, you can verify if the nova-compute service and the neutron hyper-v agent are up and running as expected by executing the following commands on the controller:

nova service-list
neutron agent-list

Enable the Hyper-V agent in Neutron

By default, Fuel does not enable the Hyper-V agent in the Neutron configuration. Simply edit the /etc/neutron/plugins/ml2/ml2_plugin.ini file and add hyperv to the list of enabled mechanism drivers:

mechanism_drivers = openvswitch,hyperv

After editing and saving the ml2_plugin.ini file, restart neutron-server:

service neutron-server restart

Congratulations, you have now a fully operational Hyper-V compute node added to your OpenStack Cloud!


Add Hyper-V guest images in Glance

When adding Hyper-V VHD or VHDX images to Glance, make sure to specify the hypervisor_type property to let the Nova scheduler know that you want to target Hyper-V:

glance image-create --property hypervisor_type=hyperv --name "Windows Server 2012 R2 Std" \
--container-format bare --disk-format vhd --file windows2012r2.vhdx

Similarly, for KVM / QEMU images specify hypervisor_type=qemu

We provide free evaluation versions of Windows Server guest images for OpenStack (KVM or Hyper-V) along with commercial support for fully updated and tested Windows production images.


Automation

The deployment and configuration described above can be fully automated with Puppet, Chef, SaltStack, DSC, etc. This is particularly useful in case you’d want to add and manage multiple Hyper-V hosts in your Fuel deployment.


The post How to add Hyper-V compute nodes to a Mirantis Fuel deployment appeared first on Cloudbase Solutions.

OpenStack + Windows Nano Server

$
0
0

Nano Server is a Windows OS created for the cloud age. It has been announced by Microsoft this April and is going to be shipped with Windows Server 2016.

What makes Nano Server special?

  • A very small disk footprint compared to traditional Windows Server deployments (a few hundred MB instead of multiple GB).
  • A very limited attack surface.
  • A very limited number of components, which means fewer updates and fewer reboots
  • Much faster virtual and bare-metal deployment times due to the reduced footprint.

How is this possible?

In short, the OS has been stripped from everything that is not needed in a cloud environment, in particular the GUI stack, the x86 subsystem (WOW64), MSI installer support and unnecessary API.

What about OpenStack support?

Nano Server and OpenStack are a perfect match in multiple scenarios, including:

  • Compute instances (virtual and bare-metal)
  • Heat orchestration
  • Hyper-V Nova compute nodes with native and OVS networking support
  • Cinder storage server, including Scale-out File Server clusters
  • Windows Containers host (Nova-Docker and soon Magnum)
  • Manila SMB3 file servers

Nano Server compute instances on OpenStack

Nano can be deployed on OpenStack like any other Windows or Linux guest OS. Currently it supports Hyper-V compute nodes, with KVM and other hypervisors as soon as drivers become available. Bare metal deployments using Ironic or MaaS are also supported.

Like in any other Linux or Windows instance case, a guest boot agent is required to take advantage of the OpenStack infrastructure.

I’m glad to announce that Cloudbase-Init is now fully supported on Nano Server!

How to create a Nano Server image for OpenStack?

Creating a Nano OpenStack image is easy and as usual we open sourced the scripts required to do that.

Disclaimer: please consider that Nano Server is still in technical preview, so things can change before the final release.

At the time of this writing the latest public available Nano Server install image can be obtained as part of the Windows Server 2016 TP3 ISO, available for download here.

The following steps need to be executed using PowerShell on Windows, we tested them on Windows 10, Windows Server 2016 TP3 and Hyper-V Server 2012 R2.

Let’s start by cloning our git scripts repository, checking out the nano-server-support branch:

git clone https://github.com/cloudbase/cloudbase-init-offline-install.git -b nano-server-support
cd cloudbase-init-offline-install

The following variables need to match your environment, in particular the folder where you’d like to put the generated Nano VHDX image, the location of your Windows Server 2016 technical preview ISO and the password to assign to the Administrator user. Please note that this password is only meant for troubleshooting and not for OpenStack tenants (more on this later).

$targetPath = "C:\VHDs\Nano"
$isoPath = "C:\ISO\Windows_Server_2016_Technical_Preview_3.ISO"
$password = ConvertTo-SecureString -AsPlaintext -Force "P@ssw0rd"

We can now build our Nano Server image:

.\NewNanoServerVHD.ps1 -IsoPath $isoPath -TargetPath $targetPath `
-AdministratorPassword $password

Download Cloudbase-Init:

$cloudbaseInitZipPath = Join-Path $pwd CloudbaseInitSetup_x64.zip
Start-BitsTransfer -Source "https://www.cloudbase.it/downloads/CloudbaseInitSetup_x64.zip" `
-Destination $cloudbaseInitZipPath

Install Cloudbase-Init and prepare the image for OpenStack:

$vhdxPath = "C:\VHDs\Nano\Nano.vhdx"
.\CloudbaseInitOfflineSetup.ps1 -VhdPath $vhdxPath -CloudbaseInitZipPath $cloudbaseInitZipPath

Done!

We’re ready to upload our freshly built image in Glance:

glance image-create --property hypervisor_type=hyperv --name "Nano Server" `
--container-format bare --disk-format vhd --file $vhdxPath

Booting your first Nano Server OpenStack instance

If you don’t have Hyper-V nodes in your OpenStack environment, adding one is very easy. If you also don’t have an OpenStack deployment at hand, you can have one installed on your Windows server or laptop in a matter of minutes using v-magine.

Nano instances can be booted on OpenStack like any other OS, with one exception: Nano does not currently support DVDRom drives, so if you plan to use ConfigDrive, Nova compute on Hyper-V must be set to use RAW disks (ISO or VFAT).

Here’s a simple nova boot example, where $netId is the id of your private network. Make sure to pass a keypair if you want to obtain the password required to login!

nova boot --flavor m1.standard --image "Nano Server" --key-name key1 --nic net-id=$netId nano1

Once the system is booted, you can retrieve and decrypt the instance password using nova get-password, passing the path to the keypair’s private key:

nova get-password nano1 "\path\to\key1_rsa"

By the way, all the above steps can be performed in Horizon as well, here’s how a Nano instance console looks like:

Nano Horizon Console

Nano Horizon Console

Connecting to Nano Server instances

Nano does not support RDP, since there’s no GUI stack, but it supports WinRM and PowerShell remoting. If you’re not familiar with WinRM, you can think of it as the rough equivalent of SSH for Windows.

In your security groups, you need to allow port 5986 used for WinRM HTTPS connections. Cloudbase-Init took care of configuring the instance’s WinRM HTTPS listener.

nova secgroup-add-rule default tcp 5986 5986 "0.0.0.0/0"

To enter a remote PowerShell session:

# Get your instance address, possibly by associating a floating IP:
$ComputerName = "yourserveraddress"

# Your password obtained from "nova get-password" is used here
$password = ConvertTo-SecureString -asPlainText -Force "your_password"
$c = New-Object System.Management.Automation.PSCredential("Admin", $password)

$opt = New-PSSessionOption -SkipCACheck -SkipCNCheck -SkipRevocationCheck
$session = New-PSSession -ComputerName $ComputerName -UseSSL -SessionOption $opt `
-Authentication Basic -Credential $c
Enter-PSSession $session

Done! You’re connected to Nano server!

Nano Server PSSession

Nano Server PSSession

Can I avoid passwords?

Windows supports password-less authentication using X509 certificates in a way conceptually similar to SSH public key authentication on Linux, here’s a blog posts that we wrote on this topic.

Customizing Nano with userdata scripts and Heat templates

Cloudbase-Init supports PowerShell and Windows batch userdata scripts on any Windows version, including Nano Server. Heat templates are supported as well, in the limits of the features available on Nano of course, so trying to deploy an Active Directory controller won’t work on the current technical preview!

Here’s a very simple example PowerShell userdata script that can be provided to Nova when spawning an instance:

#ps1
echo "Hello OpenStack!" > C:\hello.txt

What’s next?

Cloudbase-Init integration was just the first step in getting Nano Server supported in OpenStack.

Coming next: Nova compute for Hyper-V, Open vSwitch and Cinder Windows storage support!


The post OpenStack + Windows Nano Server appeared first on Cloudbase Solutions.

Open vSwitch 2.4 on Hyper-V – Part 1

$
0
0

We are happy to announce the availability of the Open vSwitch (OVS) 2.4.0 beta for Microsoft Hyper-V Server 2012, 2012 R2 and 2016 (technical preview) thanks to the joint effort of Cloudbase Solutions, VMware and the rest of the Open vSwitch community. Furthermore, support for Open vSwitch on OpenStack Hyper-V compute nodes is also available starting with Kilo!

The OVS 2.4 0 release includes the Open vSwitch CLI tools and daemons (e.g. ovsdb-server, ovs-vswitchd, ovs-vsctl, ovs-ofctl etc), and an updated version of the OVS Hyper-V virtual switch forwarding extension, providing fully interoperable VXLAN and STT encapsulation between Hyper-V and Linux, including KVM based virtual machines.

As usual, we also released an MSI installer that takes care of the Windows services for the ovsdb-server and ovs-vswitchd daemons along with all the required binaries and configurations.

All the Open vSwitch code is available as open source here:

https://github.com/openvswitch/ovs/tree/branch-2.4
https://github.com/cloudbase/ovs/tree/branch-2.4-ovs

Supported Windows operating systems:

  • Windows Server and Hyper-V Server 2012 and 2012 R2
  • Windows Server and Hyper-V Server 2016 (technical preview)
  • Windows 8, 8.1 and 10


Installing Open vSwitch on Hyper-V

The entire installation process is seamless. Download our installer and run it. You’ll be welcomed by the following screen:

open_vswitch_windows_hyper-v


Click “Next”, accept the license, click “Next” again and you’ll have the option to install both the Hyper-V virtual switch extension driver and the command line tools. In case you’d like to install the command line tools only to connect remotely to a Windows or Linux OVS server, just deselect the driver option.


OVSHVSetup3


Click “Next” followed by “Install” and the installation will start. You’ll have to confirm that you want to install the signed kernel driver and the process will be completed in a matter of a few seconds, generating an Open vSwitch database and starting the ovsdb-server and ovs-vswitchd services.


OVSHVSetup3_1


The installer also adds the command line tools folder to the system path, available after the next logon or CLI shell execution.


Unattended installation

Fully unattended installation is also available(if you already have accepted/imported our certificate) in order to install Open vSwitch with Windows GPOs, Puppet, Chef, SaltStack, DSC or any other automated deployment solution:

msiexec /i openvswitch-hyperv-installer-beta.msi /l*v log.txt

Configuring Open vSwitch on Windows

Create a Hyper-V external virtual switch. Remember that if you want to take advantage of VXLAN or STT tunnelling you will have to create an external virtual switch with the AllowManagementOS flag set to true.

For example:

PS C:\package> Get-VMSwitch

Name     SwitchType NetAdapterInterfaceDescription
----     ---------- ------------------------------
external External   Intel(R) PRO/1000 MT Network Connection #2

PS C:\package> Get-VMNetworkAdapter -ManagementOS -SwitchName external

Name     IsManagementOs VMName SwitchName MacAddress   Status IPAddresses
----     -------------- ------ ---------- ----------   ------ -----------
external True                  external   000C293F2BCF {Ok}

To verify that the extension has been installed on our system:

PS C:\package> Get-VMSwitchExtension external

Id                  : EA24CD6C-D17A-4348-9190-09F0D5BE83DD
Name                : Microsoft NDIS Capture
Vendor              : Microsoft
Version             : 6.3.9600.16384
ExtensionType       : Monitoring
ParentExtensionId   :
ParentExtensionName :
SwitchId            : 42406c9a-7b64-432a-adcd-83aa60aefeb9
SwitchName          : external
Enabled             : False
Running             : False
ComputerName        : WIN-L8H4PEU1R8B
Key                 :
IsDeleted           : False

Id                  : E7C3B2F0-F3C5-48DF-AF2B-10FED6D72E7A
Name                : Microsoft Windows Filtering Platform
Vendor              : Microsoft
Version             : 6.3.9600.16384
ExtensionType       : Filter
ParentExtensionId   :
ParentExtensionName :
SwitchId            : 42406c9a-7b64-432a-adcd-83aa60aefeb9
SwitchName          : external
Enabled             : True
Running             : True
ComputerName        : WIN-L8H4PEU1R8B
Key                 :
IsDeleted           : False

Id                  : 583CC151-73EC-4A6A-8B47-578297AD7623
Name                : Open vSwitch Extension
Vendor              : Open vSwitch
Version             : 11.56.50.171
ExtensionType       : Forwarding
ParentExtensionId   :
ParentExtensionName :
SwitchId            : 42406c9a-7b64-432a-adcd-83aa60aefeb9
SwitchName          : external
Enabled             : False
Running             : False
ComputerName        : WIN-L8H4PEU1R8B
Key                 :
IsDeleted           : False

We can now enable the OVS extension on the external virtual switch:

PS C:\package> Enable-VMSwitchExtension "Open vSwitch Extension" -VMSwitchName external

Id                  : 583CC151-73EC-4A6A-8B47-578297AD7623
Name                : Open vSwitch Extension
Vendor              : Open vSwitch
Version             : 11.56.50.171
ExtensionType       : Forwarding
ParentExtensionId   :
ParentExtensionName :
SwitchId            : 42406c9a-7b64-432a-adcd-83aa60aefeb9
SwitchName          : external
Enabled             : True
Running             : True
ComputerName        : WIN-L8H4PEU1R8B
Key                 :
IsDeleted           : False

Please note that in the moment you enable the extension, the virtual switch will stop forwarding traffic until configured:

PS C:\package> ovs-vsctl.exe add-br br-tun
PS C:\package> ovs-vsctl.exe add-port br-tun external.1
PS C:\package> ovs-vsctl.exe add-port br-tun internal
PS C:\package> ping 10.13.10.30

Pinging 10.13.10.30 with 32 bytes of data:
Reply from 10.13.10.30: bytes=32 time=2ms TTL=64
Reply from 10.13.10.30: bytes=32 time<1ms TTL=64

Why is the above needed?

To seamlessly integrate Open vSwitch with the Hyper-V networking model we need to use Hyper-V virtual switch ports instead of tap devices (Linux). This is the main difference in the architectural model between Open vSwitch on Windows compared to its Linux counterpart.

From the OVS reference:

“In OVS for Hyper-V, we use ‘external’ as a special name to refer to the physical NICs connected to the Hyper-V switch. An index is added to this special name to refer to the particular physical NIC. Eg. ‘external.1’ refers to the first physical NIC on the Hyper-V switch. (…) Internal port is the virtual adapter created on the Hyper-V switch using the ‘AllowManagementOS’ setting. In OVS for Hyper-V, we use a ‘internal’ as a special name to refer to that adapter.”

Note: the above is subject to change. The actual adapter names will be used in an upcoming release (e.g. Ethernet1) in place of “external.x”.


Limitations

We currently support a single Hyper-V virtual switch in our forwarding extension. This is subject to change in the near future.


Openstack Integration with Open vSwitch on Windows

OpenStack is a very common use case for Open vSwitch on Hyper-V. The following example is based on a DevStack Kilo All-in-One deployment on Ubuntu 14.04 LTS with a Hyper-V compute node, but the concepts and the following steps apply to any OpenStack deployment.

Let’s install our SevStack node. Here’s a sample localrc configuration:

ubuntu@ubuntu:~/devstack$ cat localrc
# Misc
HOST_IP=10.13.10.30
DATABASE_PASSWORD=Passw0rd
ADMIN_PASSWORD=Passw0rd
SERVICE_PASSWORD=Passw0rd
SERVICE_TOKEN=Passw0rd
RABBIT_PASSWORD=Passw0rd

KEYSTONE_BRANCH=stable/kilo
NOVA_BRANCH=stable/kilo
NEUTRON_BRANCH=stable/kilo
GLANCE_BRANCH=stable/kilo
HORIZON_BRANCH=stable/kilo
REQUIREMENTS_BRANCH=stable/kilo

# Reclone each time
RECLONE=yes

# Enable Logging
LOGFILE=/opt/stack/logs/stack.sh.log
VERBOSE=True
LOG_COLOR=True
SCREEN_LOGDIR=/opt/stack/logs

# Pre-requisite
ENABLED_SERVICES=rabbit,mysql,key

# Nova - Compute Service
ENABLED_SERVICES+=,n-api,n-crt,n-obj,n-cpu,n-cond,n-sch
IMAGE_URLS+=",https://launchpad.net/cirros/trunk/0.3.0/+download/cirros-0.3.0-x86_64-disk.img"

# Neutron - Networking Service
ENABLED_SERVICES+=,q-svc,q-agt,q-dhcp,q-l3,q-meta,neutron,g-api,g-reg

# Horizon
ENABLED_SERVICES+=,horizon

# VLAN configuration
Q_PLUGIN=ml2
Q_ML2_PLUGIN_MECHANISM_DRIVERS=openvswitch
ENABLE_TENANT_TUNNELS=True
Q_ML2_TENANT_NETWORK_TYPE=vxlan
TENANT_TUNNEL_RANGE=5000:10000

Networking:

ubuntu@ubuntu:~/devstack$ ifconfig eth1
eth1      Link encap:Ethernet  HWaddr 00:0c:29:87:f9:4a
          inet addr:10.13.10.30  Bcast:10.13.10.255  Mask:255.255.255.0
          inet6 addr: fe80::20c:29ff:fe87:f94a/64 Scope:Link
          UP BROADCAST RUNNING MULTICAST  MTU:1500  Metric:1
          RX packets:1481 errors:0 dropped:0 overruns:0 frame:0
          TX packets:1642 errors:0 dropped:0 overruns:0 carrier:0
          collisions:0 txqueuelen:1000
          RX bytes:101988 (101.9 KB)  TX bytes:112315 (112.3 KB)
          Interrupt:16 Base address:0x2000

After DevStack finishes installing we can add some Hyper-V VHD or VHDX images to Glance, for example our Windows Server 2012 R2 evaluation image. Additionally, since we are using VXLAN, the default guest MTU should be set to 1450. This can be done via a DHCP option if the guest supports it, as described here.

Now let’s move to the Hyper-V node. First we have to download the latest OpenStack compute installer:

PS C:\package> Start-BitsTransfer https://www.cloudbase.it/downloads/HyperVNovaCompute_Kilo_2015_1.msi

Full steps on how to install and configure OpenStack on Hyper-V are available here: Openstack on Windows installation.

In our example, the Hyper-V node will use the following adapter to connect to the OpenStack environment:

Ethernet adapter vEthernet (external):

   Connection-specific DNS Suffix  . :
   IPv6 Address. . . . . . . . . . . : fd1a:32:d256:0:7911:fd1e:32b8:1d50
   Link-local IPv6 Address . . . . . : fe80::7911:fd1e:32b8:1d50%19
   IPv4 Address. . . . . . . . . . . : 10.13.10.35
   Subnet Mask . . . . . . . . . . . : 255.255.255.0
   Default Gateway . . . . . . . . . :

This is the adapter bound to the external virtual switch, as created during the previous steps.

We can now verify our deployment by taking a look at the Nova services and Neutron agents status on the OpenStack controller and ensuring that they are up and running:

ubuntu@ubuntu:~/devstack$ nova service-list
+----+----------------+-----------------+----------+---------+-------+----------------------------+-----------------+
| Id | Binary         | Host            | Zone     | Status  | State | Updated_at                 | Disabled Reason |
+----+----------------+-----------------+----------+---------+-------+----------------------------+-----------------+
| 1  | nova-conductor | ubuntu          | internal | enabled | up    | 2015-09-17T10:02:15.000000 | -               |
| 2  | nova-cert      | ubuntu          | internal | enabled | up    | 2015-09-17T10:02:18.000000 | -               |
| 3  | nova-scheduler | ubuntu          | internal | enabled | up    | 2015-09-17T10:02:21.000000 | -               |
| 4  | nova-compute   | ubuntu          | nova     | enabled | up    | 2015-09-17T10:02:19.000000 | -               |
| 5  | nova-compute   | WIN-L8H4PEU1R8B | nova     | enabled | up    | 2015-09-17T10:02:17.000000 | -               |
+----+----------------+-----------------+----------+---------+-------+----------------------------+-----------------+
ubuntu@ubuntu:~/devstack$ neutron agent-list
+--------------------------------------+--------------------+-----------------+-------+----------------+---------------------------+
| id                                   | agent_type         | host            | alive | admin_state_up | binary                    |
+--------------------------------------+--------------------+-----------------+-------+----------------+---------------------------+
| 2cbf5b0c-5d31-40a5-8abc-c889663e2cb4 | L3 agent           | ubuntu          | :-)   | True           | neutron-l3-agent          |
| 4de21c7c-5e50-4835-96f3-d34228cf2480 | DHCP agent         | ubuntu          | :-)   | True           | neutron-dhcp-agent        |
| 530ace5c-bb03-4b56-a087-b2048261255a | Open vSwitch agent | ubuntu          | :-)   | True           | neutron-openvswitch-agent |
| 90c59a72-319c-4019-94aa-b808a4f3dfb0 | Metadata agent     | ubuntu          | :-)   | True           | neutron-metadata-agent    |
| fecf11f3-7a64-4b81-8c2d-11fdd1dddbd9 | HyperV agent       | WIN-L8H4PEU1R8B | :-)   | True           | neutron-hyperv-agent      |
+--------------------------------------+--------------------+-----------------+-------+----------------+---------------------------+

Next we can disable the Windows Hyper-V agent, which is not needed since we use OVS:

C:\package>sc config "neutron-hyperv-agent" start=disabled
[SC] ChangeServiceConfig SUCCESS

C:\package>sc stop "neutron-hyperv-agent"

SERVICE_NAME: neutron-hyperv-agent
        TYPE               : 10  WIN32_OWN_PROCESS
        STATE              : 1  STOPPED
        WIN32_EXIT_CODE    : 0  (0x0)
        SERVICE_EXIT_CODE  : 0  (0x0)
        CHECKPOINT         : 0x0
        WAIT_HINT          : 0x0

We need to create a new service called neutron-ovs-agent and put its configuration options in C:\Program Files (x86)\Cloudbase Solutions\OpenStack\Nova\etc\neutron_ovs_agent.conf. From a command prompt:

C:\Users\Administrator>sc create neutron-ovs-agent binPath= "\"C:\Program Files (x86)\Cloudbase Solutions\OpenStack\Nova\bin\OpenStackServiceNeutron.exe\" neutron-hyperv-agent \"C:\Program Files (x86)\Cloudbase Solutions\OpenStack\Nova\Python27\Scripts\neutron-openvswitch-agent.exe\" --config-file \"C:\Program Files (x86)\Cloudbase Solutions\OpenStack\Nova\etc\neutron_ovs_agent.conf\"" type= own start= auto  error= ignore depend= Winmgmt displayname= "OpenStack Neutron Open vSwitch Agent Service" obj= LocalSystem
[SC] CreateService SUCCESS

C:\Users\Administrator>notepad "c:\Program Files (x86)\Cloudbase Solutions\OpenStack\Nova\etc\neutron_ovs_agent.conf"

C:\Users\Administrator>sc start neutron-ovs-agent

SERVICE_NAME: neutron-ovs-agent
        TYPE               : 10  WIN32_OWN_PROCESS
        STATE              : 2  START_PENDING
                                (STOPPABLE, NOT_PAUSABLE, ACCEPTS_SHUTDOWN)
        WIN32_EXIT_CODE    : 0  (0x0)
        SERVICE_EXIT_CODE  : 0  (0x0)
        CHECKPOINT         : 0x1
        WAIT_HINT          : 0x0
        PID                : 2740
        FLAGS              :

Note: creating a service manually for the OVS agent won’t be necessary anymore starting with the next Nova Hyper-V MSI installer version.

Here’s the content of the neutron_ovs_agent.conf file:

[DEFAULT]
verbose=true
debug=true
control_exchange=neutron
policy_file=C:\Program Files (x86)\Cloudbase Solutions\OpenStack\Nova\etc\policy.json
rpc_backend=neutron.openstack.common.rpc.impl_kombu
rabbit_host=10.13.10.30
rabbit_port=5672
rabbit_userid=guest
rabbit_password=guest
logdir=C:\OpenStack\Log\
logfile=neutron-ovs-agent.log
[agent]
tunnel_types = vxlan
enable_metrics_collection=false
[SECURITYGROUP]
enable_security_group=false
[ovs]
local_ip = 10.13.10.35
tunnel_bridge = br-tun
integration_bridge = br-int
tenant_network_type = vxlan
enable_tunneling = true

Now if we run ovs-vsctl show, we can see a VXLAN tunnel in place:

PS C:\Users\Administrator> ovs-vsctl.exe show
01ee44a6-9fac-461a-a8c1-da77a09fae69
    Bridge br-tun
        fail_mode: secure
        Port patch-int
            Interface patch-int
                type: patch
                options: {peer=patch-tun}
        Port br-tun
            Interface br-tun
                type: internal
        Port internal
            Interface internal
        Port "vxlan-0a0d0a1e"
            Interface "vxlan-0a0d0a1e"
                type: vxlan
                options: {df_default="true", in_key=flow, local_ip="10.13.10.35", out_key=flow, remote_ip="10.13.10.30"}

        Port "external.1"
            Interface "external.1"
    Bridge br-int
        fail_mode: secure
        Port patch-tun
            Interface patch-tun
                type: patch
                options: {peer=patch-int}
        Port br-int
            Interface br-int
                type: internal

After spawning a Nova instance on the Hyper-V node you should see:

PS C:\Users\Administrator> get-vm

Name              State   CPUUsage(%) MemoryAssigned(M) Uptime   Status
----              -----   ----------- ----------------- ------   ------
instance-00000004 Running 4           2048              00:00:41 Operating normally


PS C:\Users\Administrator> Get-VMConsole instance-00000004
PS C:\Users\Administrator> ovs-vsctl.exe show
01ee44a6-9fac-461a-a8c1-da77a09fae69
    Bridge br-tun
        fail_mode: secure
        Port patch-int
            Interface patch-int
                type: patch
                options: {peer=patch-tun}
        Port br-tun
            Interface br-tun
                type: internal
        Port internal
            Interface internal
        Port "vxlan-0a0d0a1e"
            Interface "vxlan-0a0d0a1e"
                type: vxlan
                options: {df_default="true", in_key=flow, local_ip="10.13.10.35", out_key=flow, remote_ip="10.13.10.30"}

        Port "external.1"
            Interface "external.1"
    Bridge br-int
        fail_mode: secure
        Port patch-tun
            Interface patch-tun
                type: patch
                options: {peer=patch-int}
        Port br-int
            Interface br-int
                type: internal
        Port "dbc80e38-96a8-4e26-bc74-3aa03aea23f9"
            tag: 1
            Interface "dbc80e38-96a8-4e26-bc74-3aa03aea23f9"

In this example, “dbc80e38-96a8-4e26-bc74-3aa03aea23f9” is the OVS port name associated to the instance-00000004 VM vnic. You can find out the details by running the following PowerShell cmdlet:

PS C:\Users\Administrator> Get-VMByOVSPort -OVSPortName "dbc80e38-96a8-4e26-bc74-3aa03aea23f9"
...
ElementName                          : instance-00000004
...

The VM instance-00000004 got an IP address from the neutron DHCP agent, with fully functional networking between KVM and Hyper-V hosted virtual machines!

This is everything you need to get started with OpenStack, Hyper-V and OVS. In the next blog post we’ll show how to manage Hyper-V on OVS without OpenStack.


Notes

The beta installer is built by our Jenkins servers every time a new commit lands in the project repositories, so expect frequent updates.


The post Open vSwitch 2.4 on Hyper-V – Part 1 appeared first on Cloudbase Solutions.


Open vSwitch 2.4 on Hyper-V – Part 2

$
0
0

OVS VXLAN setup on Hyper-V without OpenStack

In the previous post we explained how to deploy Open vSwitch (OVS) on Hyper-V and integrate it in an OpenStack context. In this second part we’ll explain how to configure manually a VXLAN tunnel between VMs running on Hyper-V hosts and VMs running on KVM hosts.


KVM OVS configuration

In this example, KVM1 provides a VXLAN tunnel with local endpoint 10.13.10.30:

  • vxlan-0a0d0a23 connected to Hyper-V (10.13.10.35)

ubuntu@ubuntu:~$ sudo ovs-vsctl show
c387faab-80cc-493f-ac78-1c8de0fe51ad
    Bridge br-int
        fail_mode: secure
        Port "qr-136f09f9-fb"
            tag: 1
            Interface "qr-136f09f9-fb"
                type: internal
        Port br-int
            Interface br-int
                type: internal
        Port "tapc17fbf14-28"
            tag: 1
            Interface "tapc17fbf14-28"
                type: internal
        Port patch-tun
            Interface patch-tun
                type: patch
                options: {peer=patch-int}
    Bridge br-tun
        fail_mode: secure
        Port patch-int
            Interface patch-int
                type: patch
                options: {peer=patch-tun}
        Port "vxlan-0a0d0a23"
            Interface "vxlan-0a0d0a23"
                type: vxlan
                options: {df_default="true", in_key=flow, local_ip="10.13.10.30", out_key=flow, remote_ip="10.13.10.35"}
        Port br-tun
            Interface br-tun
                type: internal

Hyper-V OVS configuration

Let’s start by creating a VXLAN tunnel, our sample IP address assigned to the “vEthernet (external)” adapter is 10.13.10.35:

ovs-vsctl.exe add-port br0 vxlan-1
ovs-vsctl: Error detected while setting up 'vxlan-1'.  See ovs-vswitchd log for details.
ovs-vsctl.exe set Interface vxlan-1 type=vxlan
ovs-vsctl.exe set Interface vxlan-1 options:local_ip=10.13.10.35
ovs-vsctl.exe set Interface vxlan-1 options:remote_ip=10.13.10.30
ovs-vsctl.exe set Interface vxlan-1 options:in_key=flow
ovs-vsctl.exe set Interface vxlan-1 options:out_key=flow

Note: the error can be ignored, we are implementing a new event based mechanism and this error will disappear.

As you can see, all the commands are very familiar if you are used to OVS on Linux.

As introduced before, the main area where the Hyper-V implementation differs from its Linux counterpart is in how virtual machines are attached to a given OVS port. This is easily accomplished by using the Set-VMNetworkAdapterOVSPort PowerShell cmdlet provided with the installer (please refer to part1 for details on installing OVS).

Let’s say that we have a Hyper-V virtual machine called VM2 and that we want to connect it to the Hyper-V OVS switch. All we have to do for each VM network adapter is to connect it to the external switch as you would normally do, assign it to a given OVS port and create the corresponding ports in OVS:

$vnic = Get-VMNetworkAdapter instance-00000005
Connect-VMNetworkAdapter -VMNetworkAdapter $vnic -SwitchName external
$vnic | Set-VMNetworkAdapterOVSPort -OVSPortName vm2
ovs-vsctl.exe add-port br0 vm2 tag=1

Here’s how the resulting OVS configuration looks like on Hyper-V:

PS C:\Users\Administrator> ovs-vsctl.exe show
01ee44a6-9fac-461a-a8c1-da77a09fae69
    Bridge br-int
        fail_mode: secure
        Port "adb134bf-5312-4323-b574-d206c3cef740"
            tag: 1
            Interface "adb134bf-5312-4323-b574-d206c3cef740"
        Port br-int
            Interface br-int
                type: internal
        Port patch-tun
            Interface patch-tun
                type: patch
                options: {peer=patch-int}
        Port "vm2"
            tag: 1
            Interface "vm2"
    Bridge br-tun
        fail_mode: secure
        Port br-tun
            Interface br-tun
                type: internal
        Port "vxlan-1"
            Interface "vxlan-1"
                type: vxlan
                options: {in_key=flow, local_ip="10.13.10.35", out_key=flow, remote_ip="10.13.10.30"}
        Port patch-int
            Interface patch-int
                type: patch
                options: {peer=patch-tun}
        Port internal
            Interface internal
        Port "external.1"
            Interface "external.1"

Further control can be accomplished by applying flow rules, for example by configuring port / virtual machine networking access on each VXLAN tunnel.

Here are i.e. the flows on br-tun that can be used to enable communication using the VLAN tag “1”:

PS C:\Users\Administrator> ovs-ofctl.exe dump-flows br-tun
NXST_FLOW reply (xid=0x4):
 cookie=0x0, duration=1457.706s, table=0, n_packets=5710, n_bytes=1253743, idle_age=0, priority=1,in_port=3 actions=output:2
 cookie=0x0, duration=1457.687s, table=0, n_packets=5909, n_bytes=1215935, idle_age=0, priority=1,in_port=2 actions=output:3
 cookie=0x0, duration=1457.651s, table=0, n_packets=1393, n_bytes=129330, idle_age=0, priority=1,in_port=1 actions=resubmit(,2)
 cookie=0x0, duration=1451.280s, table=0, n_packets=1332, n_bytes=126624, idle_age=1, priority=1,in_port=8 actions=resubmit(,4)
 cookie=0x0, duration=1457.634s, table=0, n_packets=0, n_bytes=0, idle_age=1457, priority=0 actions=drop
 cookie=0x0, duration=1457.609s, table=2, n_packets=1327, n_bytes=125768, idle_age=0, priority=0,dl_dst=00:00:00:00:00:00/01:00:00:00:00:00 actions=resubmit(,20)
 cookie=0x0, duration=1457.595s, table=2, n_packets=66, n_bytes=3562, idle_age=1187, priority=0,dl_dst=01:00:00:00:00:00/01:00:00:00:00:00 actions=resubmit(,22)
 cookie=0x0, duration=1457.557s, table=3, n_packets=0, n_bytes=0, idle_age=1457, priority=0 actions=drop
 cookie=0x0, duration=1275.744s, table=4, n_packets=1332, n_bytes=126624, idle_age=1, priority=1,tun_id=0x410 actions=mod_vlan_vid:1,resubmit(,10)
 cookie=0x0, duration=1457.540s, table=4, n_packets=0, n_bytes=0, idle_age=1457, priority=0 actions=drop
 cookie=0x0, duration=1457.513s, table=10, n_packets=1332, n_bytes=126624, idle_age=1, priority=1 actions=learn(table=20,hard_timeout=300,priority=1,NXM_OF_VLAN_TCI[0..11],NXM_OF_ETH_DST[]=NXM_OF_ETH_SRC[],load:0->NXM_OF_VLAN_TCI[],load:NXM_NX_TUN_ID[]->NXM_NX_TUN_ID[],output:NXM_OF_IN_PORT[]),output:1
 cookie=0x0, duration=1248.963s, table=20, n_packets=1321, n_bytes=125258, hard_timeout=300, idle_age=0, hard_age=0, priority=1,vlan_tci=0x0001/0x0fff,dl_dst=fa:16:3e:86:b7:98 actions=load:0->NXM_OF_VLAN_TCI[],load:0x410->NXM_NX_TUN_ID[],output:8
 cookie=0x0, duration=1457.497s, table=20, n_packets=0, n_bytes=0, idle_age=1457, priority=0 actions=resubmit(,22)
 cookie=0x0, duration=1275.771s, table=22, n_packets=12, n_bytes=1294, idle_age=1187, dl_vlan=1 actions=strip_vlan,set_tunnel:0x410,output:8
 cookie=0x0, duration=1457.455s, table=22, n_packets=54, n_bytes=2268, idle_age=1280, priority=0 actions=drop

OVS based networking is now fully functional between KVM and Hyper-V hosted virtual machines!


The post Open vSwitch 2.4 on Hyper-V – Part 2 appeared first on Cloudbase Solutions.

Hyper-Converged OpenStack on Windows Nano Server

$
0
0


Introducing the first fully Hyper-Converged Windows® server and OpenStack based cloud infrastructure that eliminates the need for expensive dedicated storage hardware, enabling distributed data across individual cloud servers. In this configuration all nodes have compute, storage and networking roles, increasing scalability and fault tolerance to new levels while drastically reducing the costs.


Hyper-Converged Design

In our Hyper-Converged design, components are fully distributed and entirely based on commodity hardware with an unprecedented low TCO for the enterprise, on-premises as well as on public clouds. The core components for this solution are OpenStack, Microsoft’s Windows Nano Server, Hyper-V and Storage Spaces Direct, deployed starting from the bare metal up with Cloudbase Solution’s Juju charms for Windows and v-magine™.


hyper-c-gfx


Nano Server

Microsoft’s Nano Server is the new lightweight member of the Windows server family available with Windows Server 2016, introduced as a “purpose-built operating system designed to run born-in-the-cloud applications and containers”, optimized for cloud workloads and with an extremely small footprint. It has been designed to enable super fast bare metal deployments, limited number of updates (and thus reboots), better usage of resources, a much tighter security, limited memory and storage footprints (both being hot commodities in the cloud). Nano Server is currently available in technical preview and scheduled for release in 2016.


Hyper-V

Hyper-V, included in Nano Server, is Microsoft’s hypervisor technology, fully integrated in OpenStack thanks to Cloudbase Solutions’s Nova compute driver technology. Hyper-V in Windows Server 2016 includes new unique features like Shielded VMs, Windows Containers and nested virtualization enforcing its leading position in the enterprise market.


Storage Spaces Direct

Storage Spaces Direct (S2D) is a revolutionary software defined storage solution included in Windows Server 2016, offering the same advantages of the Storage Spaces feature added in Windows Server 2012 R2 but without the need for shared storage, which previously required large investments in hardware. Storage Spaces Directed is fully supported in OpenStack with Cloudbase Solutions’s Cinder SMB3 driver.

Fault tolerance is achieved by mirroring data across multiple hosts and leveraging the Scale-Out File Server feature integrated with Windows Server Failover Clustering. For optimal performance, SMB Direct / RDMA enabled network adapters are supported to manage storage related traffic with a minimum impact on the host CPUs.

Juju-S2D

Networking

This platform supports distributed virtual routing based on Windows Server 2016, OpenStack Neutron and Open vSwitch (ported by Cloudbase Solutions to Hyper-V in conjunction with VMWare and the OVS community), with support for other leading third party networking solutions planned for the near future.


Deployment

The components are easily deployed by using Cloudbase Solutions’ v-magine™, a 1-click OpenStack deployment-in-a-box platform together with Juju, the game-changing service modelling tool that lets you build entire cloud environments with only a few commands.

Fully automated fabric deployment, management and monitoring is included, meaning that users will just need to bring their servers, letting the tools do all the deployment work.


Support

Microsoft supports Windows instances running on Hyper-V, regardless of the fabric controller in use, including also OpenStack. All you need is any familiar Microsoft licensing options like SPLA or Volume Licensing. Selected leading Linux distributions with LIS components are also supported.

Cloudbase Solutions offers managed and unmanaged support for OpenStack and Windows Server integration, along with orchestration solutions based on OpenStack Heat templates or Juju for all the leading Microsoft based workloads: Active Directory, SQL Server, SharePoint, Exchange, Windows Failover Clustering and more.


Availability

The OpenStack Hyper-Converged Hyper-V cloud is currently available for technical preview and will be released in conjunction with the Windows Server 2016 release. Contact us for a trial copy and for more information!

If you are attending the OpenStack Summit in Tokyo, between October 27th – 30th 2015, come to our booth (#T32) for a live demo!

The post Hyper-Converged OpenStack on Windows Nano Server appeared first on Cloudbase Solutions.

Hyper-Converged OpenStack on Windows Nano Server – Part 2

$
0
0

In the previous article in this series we gave you a quick overview of why OpenStack and Windows Nano Server provide some of the most exciting elements in the current Windows ecosystem. In this article we are going to expand on those elements, and also give you the tools you need to deploy your own Hyper-Converged cloud using our OpenStack Windows Liberty components along with Ubuntu’s OpenStack Linux ones!


Why is everyone so excited about Windows Nano Server?

Nano Server is a new installation option for Windows Server 2016, reducing the overall footprint to just a few hundreds MB of disk space. The resulting deployed OS is thus way faster to deploy and to boot, reducing drastically also the overall amount of updates and reboots required during daily management. In short, it’s an OS built for a cloud age and huge leap forward compared to traditional GUI based Windows deployments.

Nano images are designed to be purpose built for each deployment. That means that if you want a Windows Server that is just a hypervisor, you can build the image just with that role installed and nothing else. In this article we are going to focus on three main roles:

  • Compute (Cloudbase OpenStack components and Hyper-V)
  • Clustering
  • Storage (Storage Spaces Direct)


Storage Spaces Direct (S2D)

Aside from Nano itself, this is one of the features I am most excited about and a key element in allowing a hyper-converged scenario on Windows Server. Storage Spaces Direct is an evolution of Storage Spaces introduced in Windows Server 2012, with one important difference – it allows you to use locally attached storage. This means that you can use commodity hardware to build you own scale out storage at a fraction of the cost of a normal enterprise storage solution. This also means that we can create a hyper-converged setup where all Hyper-V compute nodes are clustered together and become bricks in a scale-out storage system.


hyper-c-gfx

Ok, Ok…lets deploy already!

Before we begin, a word of warning. Windows Nano Server is in Technical Preview (it will be released as part of Windows Server 2016). The following deployment instructions have been tested and validated on the current Technical Preview 4 and subject to possible changes in the upcoming releases.


Prerequisites

We want to deploy an OpenStack cloud on bare metal. We will use Juju for orchestration and MaaS (Metal as a Service) as a bare metal provider. Here’s our requirements list. We kept the number of resources to the bare minimum, which means that some features, like full components redundancy are left for one of the next blog posts:

  • MaaS install
  • Windows Server 2016 TP4 ISO
  • A Windows 10 or Windows Server 2016 installation. You will need this to build MaaS images.
  • One host to be used for MaaS and controller related services
    • Should have at least three NICs (management, data, external)
  • At least 4 hosts that will be used as Hyper-V compute nodes
    • Each compute node must have at least two disks
    • Each compute node should have at least two NICs (management and data)

As an example, our typical lab environment uses Intel NUC servers. They are great for testing and have been our trusty companions throughout many demos and OpenStack summits. These are the new NUCs that have one mSATA port and an one M.2 port. We will use the M.2 disk as part of the storage spaces direct storage pool. Each NUC has one extra USB 3 ethernet NIC that acts as a data port.

Here’s a detailed list of the nodes configuration.

  • Node 1
    • Ubuntu 14.04 LTS MaaS on bare metal with 4 VMs running on KVM.
    • 3 NICs, each one attached to a standard linux bridge.
      • eth0 (attached to br0) is the MaaS publicly accessible NIC. It will be used by neutron as an external NIC.
      • eth1 (attached to br1) is connected to an isolated physical switch. This will be the management port for nodes deployed using MaaS.
      • eth2 (attached to br2) is connected to an isolated physical switch. This will be the data port used for tenant traffic.
    • The MaaS node hosts 4 virtual machines:
      • VM01
        • tags: state
        • purpose: this will be the Juju state machine
        • NICs
          • eth0 attached to br1
        • Minimum recommended resources:
          • 2 CPU cores ( 1 should do as well)
          • 2 GB RAM
          • 20 GB disk space
      • VM02
        • tags: s2d-proxy
        • purpose: This manages the Nano Server S2D cluster.
        • NICs
          • eth0 attached to br1
        • Minimum recommended resources:
          • 2 CPU cores
          • 2 GB RAM
          • 20 GB disk
      • VM03
        • tags: services
        • purpose: OpenStack controller
        • NICs:
          • eth0 attached to br1 (maas management)
          • eth1 attached to br2 (isolated data port)
          • eth3 attached to br0 (external network)
        • Minimum recommended resources:
          • 4 CPU cores
          • 8 GB RAM
          • 80 GB disk space
      • VM04
        • tags: addc
        • purpose: Active Directory controller
        • NICs:
          • eth0 attached to br1
        • Minimum recommended resources:
          • 2 CPU cores
          • 2 GB RAM
          • 20 GB disk
  • Node 2,3,4,5
    • each node has:
      • 2 NICs available
        • one NIC attached to the MaaS management switch (PXE booting must be enabled and set as first boot option)
        • one NIC attached to the isolated data switch
      • 2 physical disks (SATA, SAS, SSD)
      • 16 GB RAM (recommended, minimum 4GB)
    • tags: nano
    • purpose: Nano Server Hyper-V compute nodes with Cloudbase OpenStack components

Install MaaS

We are not going to go into too much detail over this as the installation process has been very well documented in the official documentation. Just follow this article, it’s very simple and straightforward. Make sure to configure your management network for both DHCP and DNS. After installing MaaS, it’s time to register your nodes in MaaS. You can do so by simply powering them on once. MaaS will automatically enlist them.

You can log in the very simple and intuitive MaaS web UI available at http://<MaaS>/MAAS and check that you nodes are properly enlisted.

Assign tags to your MaaS nodes

Tags allow Juju to request hardware with specific requirements to MaaS for specific charms. For example the Nano Server nodes will have a “nano” tag. This is not necessary if your hardware is completely homogenous. We listed the tags in the prerequisite section.

This can be done either with the UI by editing each individual node or with the following Linux CLI instructions.

Register a tag with MaaS:

maas root tags new name='state'

And assign it to a node:

# <system_id> is the node's system ID. You can fetch it from MaaS
# using:
# maas root nodes list
# and usually has the form of:
# node-2e8f4d32-7859-11e5-8ee5-b8aeed71df42
# You can also get the ID of the node from the MaaS web ui by clicking on the node.
# The ID will be displayed in the browsers URL bar.
maas root tag update-nodes state add="<system_id>"


Build Windows images

After you have installed MaaS, we need to build Windows images. For this purpose, we have a set of PowerShell CmdLets that will aid you in building the images. Log into your Windows 10 / Windows Server 2016 machine and open an elevated PowerShell prompt.


First lets download some required packages:

# install Chocolatey package provider
Get-PackageProvider -Name chocolatey -ForceBootstrap
Set-PackageSource -Name Chocolatey -Trusted:$true

# Install Git
Install-Package -Source Chocolatey git

# Install Notepad++ (optional). Any other good editor will do as well.
Install-Package -Source Chocolatey notepadplusplus

# Add git to your path
$env:PATH +=  ";${env:ProgramFiles}\Git\cmd"

# check that git works
git --version

# If you wish to make the change to your $env:PATH permanent
# you can run:
# setx PATH $env:PATH

Download the required resources:

$ErrorActionPreference = "Stop"
mkdir $HOME\hyper-c -ErrorAction SilentlyContinue
cd $HOME\hyper-c

# Fetch scripts and commandlets
Invoke-WebRequest https://bit.ly/FastWebRequest -OutFile FastWebRequest.psm1
Import-Module .\FastWebRequest.psm1

Invoke-FastWebRequest -Uri "https://the.earth.li/~sgtatham/putty/latest/x86/pscp.exe"
Invoke-FastWebRequest -Uri "https://the.earth.li/~sgtatham/putty/latest/x86/putty.exe"

# Fetch nano image tools
git clone https://github.com/cloudbase/cloudbase-init-offline-install.git nano-image-tools
pushd nano-image-tools
git checkout nano-server-support
git submodule init
git submodule update
popd

# Fetch Windows imaging tools
git clone https://github.com/gabriel-samfira/windows-openstack-imaging-tools.git windows-imaging-tools
pushd windows-imaging-tools
git checkout experimental
popd

You should now have two extra folders in your home folder:

  • generate-nano-image
  • windows-openstack-imaging-tools-experimental

Generate the Nano image

Lets generate the Nano image first:

cd $HOME\hyper-c\nano-image-tools

# Change this to your actual ISO location
$isoPath = "$HOME\Downloads\Windows_Server_2016_Technical_Preview_4.ISO"
# This will be your default administrator password. Change this to whatever you prefer
$password = ConvertTo-SecureString -AsPlaintext -Force "P@ssw0rd"
# This is the path of your Nano baremetal image
$targetPath = "$HOME\DiskImages\Nano.raw.tgz"

# If your hardware needs extra drivers for NIC or storage, you can add it by
# passing the -ExtraDriversPaths option to the script.
.\NewNanoServerImage.ps1 -IsoPath $isoPath -TargetPath $targetPath `
-AdministratorPassword $password -Platform BareMetal `
-Compute -Storage -Clustering -MaxSize 1500MB `
-AddCloudbaseInit -AddMaaSHooks

cd ..

# Change to match you MaaS host address
$MAAS_HOST = "192.168.200.10"

# Copy the Nano image to the MaaS host, change the credentials accordingly
.\pscp.exe "$targetPath" "cloudbase@${MAAS_HOST}:"

Now, SSH into your MaaS node and upload the image in MaaS using the following commands:

# Get your user's MAAS API key from the following URL: http://${MAAS_HOST}/MAAS/account/prefs/
# Note: the following assumes that your MaaS user is named "root", replace it as needed
maas login root http://${MAAS_HOST}/MAAS
# Upload image to MaaS
# At the time of this writing, MaaS was version 1.8 in the stable ppa
# Windows Server 2016 and Windows Nano support has been added in the next stable release.
# as such, the images we are uploading, will be "custom" images in MaaS. With version >= 1.9
# of MaaS, the name of the image will change from win2016nano to windows/win2016nano
# and the title will no longer be necessary
maas root boot-resources create name=win2016nano title="Windows Nano server" architecture=amd64/generic filetype=ddtgz content@=$HOME/Nano.raw.tgz

The name is important. It must be win2016nano. This is what juju expects when requesting the image from MaaS for deployment.


Generate a Windows Server 2016 image

This will generate a MaaS compatible image starting from a Windows ISO, it requires Hyper-V:

cd $HOME\hyper-c\windows-imaging-tools

# Mount Windows Server 2016 TP4 ISO
# Change path to actual ISO
$isoPath = $HOME\Downloads\WindowsServer2016TP4.iso

# Mount the ISO
$driveLetter = (Mount-DiskImage $isoPath -PassThru | Get-Volume).DriveLetter
$wimFilePath = "${driveLetter}:\sources\install.wim"

Import-Module .\WinImageBuilder.psm1

# Check what images are supported in this Windows ISO
$images = Get-WimFileImagesInfo -WimFilePath $wimFilePath

# Get the Windows images available in the ISO
$images | select ImageName

# Select the first one. Note: this will generate an image of Server Core.
# If you want a full GUI, or another image, choose from the list above
$image = $images[0]

$targetPath = "$HOME\DiskImages\Win2016.raw.tgz"

# Generate a Windows Server 2016 image, this will take some time!
# This requires Hyper-V for running the instance and installing Windows updates
# If your hardware needs extra drivers for NIC or storage, you can add it by
# passing the -ExtraDriversPath option to the script.
# You also have the option to install Windows Updates by passing in the -InstallUpdates option
New-MaaSImage -WimFilePath $wimFilePath -ImageName $image.ImageName `
-MaaSImagePath $targetPath -SizeBytes 20GB -Memory 2GB `
-CpuCores 2

cd ..

# Copy the Nano image to the MaaS host
.\pscp.exe "$targetPath" "cloudbase@${MAAS_HOST}:"

Upload the image to MaaS:

# upload image to MaaS
# At the time of this writing, MaaS was version 1.8 in the stable ppa
# Windows Server 2016 and Windows Nano support has been added in the next stable release.
# as such, the images we are uploading, will be "custom" images in MaaS. With version >= 1.9
# of MaaS, the name of the image will change from win2016 to windows/win2016
# and the title will no longer be necessary
maas root boot-resources create name=win2016 title="Windows 2016 server" architecture=amd64/generic filetype=ddtgz content@=$HOME/Win2016.raw.tgz

As with the Nano image, the name is important. It must be win2016.


Setting up Juju

Now the fun stuff begins. We need to fetch the OpenStack Juju charms and juju-core binaries, and bootstrap the juju state machine. This process is a bit more involved, because it requires that you copy the agent tools on a web server (any will do). A simple solution is to just copy the tools to /var/www/html on your MaaS node, but you can use any web server at your disposal .

For the juju deployment you will need to use an Ubuntu machine. We generally use the MaaS node directly in our demo setup, but if you are running Ubuntu already, you can use your local machine.

Fetch the charms and tools

For your convenience we have compiled a modified version of the agent tools and client binaries that you need to run on Nano Server. This is currently necessary as we’re still submitting upstream the patches for Nano Server support, so this step won’t be needed by the time Windows Server 2016 is released.

From your Ubuntu machine:

# install some dependencies
# add the juju stable ppa. We need this to get juju-deployer
sudo apt-add-repository -y ppa:juju/stable
# install packages
sudo apt-get update
sudo apt-get -y install unzip git juju-deployer

mkdir -p $HOME/hyper-c
cd $HOME/hyper-c

# Download juju-core with Nano support and the Hyper-C charms
git clone https://github.com/cloudbase/hyper-c.git hyper-c-master
wget "https://github.com/cloudbase/hyper-c/releases/download/hyper-c/juju-core.zip"
unzip juju-core.zip

# Add the client folder to the $PATH. You can make this change permanend
# for the current user by adding:
# export PATH="$HOME/hyper-c/juju-core/client:$PATH"
# to $HOME/.bashrc
export PATH="$HOME/hyper-c/juju-core/client:$PATH"
# test that the juju client is in your path
juju version


If everything worked as expected, the last command should give you the Juju version.

Configuring the Juju environment

If you look inside $HOME/hyper-c/juju-core you will see a folder called tools. You need to copy that folder to the web server of your choice. It will be used to bootstrap the state machine. Lets copy it to the MaaS node:

# NOTE: If you are following this article directly on your MAAS node,
# you can skip these steps
cd $HOME/hyper-c
scp -r $HOME/hyper-c/juju-core/tools cloudbase@$MAAS_HOST:~/

Now, ssh into your MaaS node and copy these files in a web accessible location:

sudo cp -a $HOME/hyper-c/juju-core/tools /var/www/html/
sudo chmod 755 -R  /var/www/html/tools

Back on your client machine, create the juju environments boilerplate:

juju init

This will create a folder $HOME/.juju. Inside it you will have a file called environments.yaml that we need to edit.

Edit the environments file:

nano $HOME/.juju/environments.yaml

We only care about the MaaS provider. You will need to navigate over to your MaaS server under http://${MAAS_HOST}/MAAS/account/prefs/ and retrieve the MaaS API key like you did before.

Replace your environments.yaml to make it look like the following:

default: maas

environments:
    maas:
        type: maas
        # this is your MaaS node. Replace "MAAS_IP" with the actual hostname or IP
        maas-server: 'http://MAAS_IP/MAAS/'
        # This is where you uploaded the tools in the previous step. Replace "MAAS_IP" with actual hostname or IP
        agent-metadata-url: "http://MAAS_IP/tools"
        agent-stream: "released"
        maas-oauth: 'maas_API_key'
        # This will become you juju administrative user password
        # you may use this password to log into the juju GUI
        admin-secret: 'your_secret_here'
        disable-network-management: false
        bootstrap-timeout: 1800

Before you bootstrap the environment, it’s important to know if the newly bootstrapped state machine will be reachable from your client machine. For example, If you have a lab environment where all your nodes are in a private network behind MaaS, where MaaS is also the router for the network it manages, you will need to do two things:

  • enable NAT and ip_forward on your MaaS node
  • create a static route entry on your client machine that uses the MaaS node as a gateway for the network you configured in MaaS for your cluster

Enable NAT on MaaS:

# enable MASQUARADE
# br0 publicly accessible interface
# br1 MaaS management interface (PXE for nodes)
/sbin/iptables -t nat -A POSTROUTING -o br0 -j MASQUERADE
/sbin/iptables -A FORWARD -i br0 -o br1 -m state --state RELATED,ESTABLISHED -j ACCEPT
/sbin/iptables -A FORWARD -i br1 -o br0 -j ACCEPT

# enable ip_forward
echo 'net.ipv4.ip_forward=1' >> /etc/sysctl.conf
sysctl -p

Add a static route on your client:

# $MAAS_HOST was defined above in the sections regarding image generation
# NOTE: this is not needed if you are running the juju client directly on your MaaS node
route add -net 192.168.2.0 255.255.255.0 gw $MAAS_HOST

You are now ready to bootstrap your environment:

# Adapt the tags constraint to your environment
juju bootstrap --debug --show-log --constraints tags=state

Deploy the charms

You should now have a fully functional juju environment with Windows Nano Server support. Time to deploy the charms!

This is the last step in the deployment process. For your convenience, we have made a bundle file available inside the repository. You can find it in:

$HOME/hyper-c/hyper-c-master/openstack.yaml

Make sure you edit the file and set whatever options applies to your environment. For example, the bundle file expects to find nodes with certain tags. Here is an example:

s2d-proxy:
  num_units: 1
  charm: local:win2016/s2d-proxy
  branch: lp:cloudbaseit/s2d-proxy
  options:
    # Change this to an IP address that matches your environment.
    # This IP address should be in the same network as the IP addresses
    # you configured your MaaS cluster to assign to your nodes. Make sure
    # that this IP cannot be allocated to any other node. This can be done
    # by leaving a few IP addresses out of the static and dynamic ranges MaaS
    # allocates from.
    # For example: 192.168.2.10-192.168.2.100 where 192.168.2.0-192.168.2.9
    # are left for you to decide where to allocate them.
    static-address: 192.168.2.9
  # change this tag to match a node you want to target
  constraints: "tags=s2d-proxy"
nova-hyperv:
  num_units: 4
  charm: local:win2016nano/nova-hyperv
  branch: lp:cloudbaseit/nova-hyperv
  options:
    use-bonding: false
    # These are all the MAC addresses from all the nodes that are supposed to be
    # used as data ports. You can find these ports in MaaS under node details
    # Make sure you change this to match your environment.
    data-port: "3c:18:a0:05:cd:1c 3c:18:a0:05:cd:07 3c:18:a0:05:cd:22 3c:18:a0:05:cd:1e"
    network-type: "hyperv"
    openstack-version: "liberty"
  constraints: "tags=nano"

Pay close attention to every definition in this file. It should precisely mirror your environment (tags, MAC addresses, IP addresses, etc). A misconfiguration will yield unpredictable results.

Use juju-deployer to deploy everything with just one command:

cd $HOME/hyper-c/hyper-c-master
juju-deployer -L -S -c openstack.yaml

It will take a while for everything to run, so sit back and relax while your environment deploys. There is one more thing worth mentioning. Juju has a gorgeous web GUI. Its not resource intensive, so you can deploy it to your state machine. Simply:

juju deploy juju-gui --to 0

You will be able to access it using the IP of the state machine. To get the ip simply do:

juju status --format tabular

The user name will be admin and the password will be the value you set for admin-secret, set in juju’s environments.yaml.

At the end of this you will have the following setup:

  • Liberty OpenStack cloud (with Ubuntu and Cloudbase components)
  • Active Directory controller
  • Hyper-V compute nodes
  • Storage Spaces Direct

Access your OpenStack environment

Get the IP of your Keystone endpoint

juju status --format tabular | grep keystone

Export the required OS_* variables (you can also put them in your .bashrc):

export OS_USERNAME=cbsdemo
export OS_PASSWORD=Passw0rd
export OS_TENANT_NAME=admin
export OS_AUTH_URL=http://<keysone_ip>:35357/v2.0/

# Let's list the Nova services, including the four Nano Server compute nodes
apt-get install python-novaclient -y
nova service-list

You can access also Horizon by fetching its IP from Juju and open it in your web browser:

juju status --format tabular | grep openstack-dashboard

What if something went wrong?

The great thing in automated deployments is that you can always destroy them and start over!

juju-deployer -TT -c openstack.yaml

Form here you can run again:

juju-deployer -L -S -c openstack.yaml

What’s next?

Stay tuned, in the next posts, we’ll show how to add Cinder volume on top of Storage Spaces Direct and how to easily add fault tolerance to your controller node (the Nano Server nodes are already fault tolerant).

You can also start deploying some great guest workload on top of your OpenStack cloud, like SQL Server, Active Directory, SharePoint, Exchange etc using our Juju charms!

I know this has been a long post, so if you managed to get this far, congratulations and thank you! We are curious to hear how you will use Nano Server and storage spaces direct!

The post Hyper-Converged OpenStack on Windows Nano Server – Part 2 appeared first on Cloudbase Solutions.

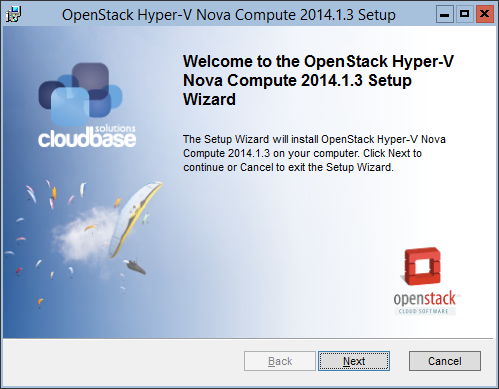
Nano Server on KVM and ESXi

$
0
0

There’s quite some documentation already available on how to run Windows Nano Server on Hyper-V or bare metal, but what about other hypervisors?

Here at Cloudbase Solutions we often need to build images for different platforms, so why not automate the process in a simple way for all relevant scenarios, including, to begin with: bare metal, Hyper-V, KVM and VMware?

Just clone this git repository…

git clone https://github.com/cloudbase/cloudbase-init-offline-install.git `
-b nano-server-support

…and run the following PowerShell script, which will generate a Nano Server QcoW2 image ready for OpenStack and other clouds on KVM compute nodes:

$isoPath = "C:\ISO\Windows_Server_2016_Technical_Preview_4.ISO"
$password = ConvertTo-SecureString -AsPlaintext -Force "P@ssw0rd"

.\NewNanoServerImage.ps1 -IsoPath $isoPath `
-TargetPath "C:\VHDs\Nano.qcow2" `
-Platform "KVM" `
-AdministratorPassword $password `
-AddCloudbaseInit `
-MaxSize 800MB

The interesting thing is that NewNanoServerImage.ps1 will take care of all the details, including downloading and adding the right VirtIO drivers, adding Cloudbase-Init, etc.

If you need an image for a different platform, just choose among Hyper-V, VMware, KVM or BareMetal:

-Platform BareMetal

or

-Platform VMware

The image is automatically converted to the target format provided in the TartgetPath extension, including: VHD, VHDX, RAW, RAW.GZ, RAW.TGZ, VMDK and QCOW2.

Additional Nano standard packages can be added by providing the corresponding command line switches, for example:

-Compute
-Storage
-Clustering
-Containers

On bare metal, you might want to add some extra network or storage drivers. Just include the path were you downloaded the drivers:

-ExtraDriversPaths C:\Dev\Drivers\NUC_2015_Intel_ndis64

Talking about bare metal, there’s also MAAS support baked in!

-AddMaaSHooks

This should be enough to get you started. There are also many more available command line options for additional use cases!

The post Nano Server on KVM and ESXi appeared first on Cloudbase Solutions.

Announcing project Coriolis – Cloud Migration as a Service

$
0
0

coriolis-diagramMigrating existing workloads between clouds is a necessity for a large number of use cases, especially for user moving from traditional virtualization technologies like VMware vSphere or Microsoft System Center VMM to Azure / AzureStackOpenStack, Amazon AWS or Google Cloud. Furthermore, cloud to cloud migrations, like AWS to Azure are also a common requirement.

Project Coriolis™ addresses exactly those requirements, in particular migrating Linux (Ubuntu, Red Hat / CentOS, Oracle Linux, SUSE, Debian, Fedora) and Windows virtual machine, templates, storage and networking configurations.

There are some tricky scenarios where Coriolis excels: to begin with, virtual machines need to be moved between different hypervisors, which means including new operating system drivers and tools, for example cloud-init / cloudbase-init in the OpenStack use case, LIS kernel modules on Hyper-V and Azure and so on.

The goal of this project is to make sure that the process is completely seamless for the user and Cloudbase Solutions has a large experience and track record in addressing those scenarios, so the next natural step was to ensure it can be fully automated!


cloudbase coriolis


Scalability and fault tolerance

What about having multiple tenants migrating hundreds of virtual machines in parallel? To address that, Coriolis is based on a microservices architecture with scalability and fault tolerance as a primary goal in mind.

Identity management is based on Keystone, to allow easy integration with OpenStack, Active Directory and Azure, offering easy project based multi-tenancy.

Last but not least, security plays an important role. Where do we store the secrets containing the credentials required to connect to a cloud in a secure way? For this we are primarily leveraging OpenStack’s Barbican project, Azure Key Vault or other market standard solutions thanks to a flexible interface.

We’re also leveraging lots of OpenStack Oslo components for most of the services, from the WSGI based APIs down to AMQP messaging.

Coriolis provides a simple and powerful REST API, that can be consumed with a web, command line or custom interface.


Cloud bursting

Additionally, Coriolis can allow hybrid scenarios where the target cloud is used for handling workload expansions on a public cloud while still maintaining an on-premise infrastructure.


Where can I learn more?

The project is available on Github and appliances for every major public and private clouds will be available soon for commercial use, contact us for more info!

Command-line client tools are available on Pypi.

Here’s also a set of Youtube videos showing how to use Coriolis to migrate Windows Server, Ubuntu, RHEL, SUSE, CentOS and Debian virtual machines from VMware vSphere to OpenStack.


What about the name?

The Coriolis effect is a force that in meteorology affects the migration of air masses (and thus, clouds) forming the familiar rotating patterns visible in satellite images. Since this project is about cloud migrations, that’s how it started and the name stuck!


The post Announcing project Coriolis – Cloud Migration as a Service appeared first on Cloudbase Solutions.

Viewing all 83 articles
Browse latest View live