Quantcast
Channel: Cloudbase Solutions
Viewing all 84 articles
Browse latest View live

Join us at the OpenStack Summit in Austin!

$
0
0


Next week, we’ll be at the OpenStack Summit in Austin, Texas, for the five-day conference for developers, users, and administrators of OpenStack Cloud Software!

If you’re planning on browsing the Marketplace, come by our booth at #A17 and learn more about the world of OpenStack on Windows, as well as our wide range of Enterprise products and services that will revolutionize your cloud infrastructure!


Check out our sessions!


Interested in finding out more about Windows on OpenStack? Then join us for the “What’s new in Windows Server 2016” session, scheduled for Tuesday, April 26, starting 5:30 PM! This talk is meant to guide the attendees through all the major new cloud features relevant for OpenStack, and will be presented by our CEO – Alessandro Pilotti, together with Peter Pouliot from Microsoft!


When it comes to cloud deployments, if you’re running mixed-operating system workloads, KVM is possibly not the best hypervisor choice. Attend the session “A little of what you fancy: multi-hypervisor cloud deployment with Hyper-V, KVM and LXD” and find out more about how you can deploy and use OpenStack clouds that make use of multiple hypervisors in a single compute region in a seamless way, providing the ability to deploy each type of workload on the best hypervisor choice. The session will be presented by our very own Gabriel Samfira together with James Page from Canonical, on Wednesday, April 27, from 3:30 PM!


Live demos and booth activity


Come by our booth (#A17) to see a live demo of our Enterprise Hyper-Converged Windows Server and OpenStack powered cloud infrastructure! We can show you how our solution eliminates the need for expensive dedicated storage hardware by enabling distributed data across individual cloud servers. In this configuration all nodes have compute, storage and networking roles, bringing scalability and fault-tolerance to new levels while drastically reducing the costs.

Also, find out more about Coriolis – Cloud Migration as a Service! Coriolis addresses the need for migrating existing Windows and Linux workloads between clouds, especially when moving from traditional virtualization technologies like VMware vSphere or Microsoft System Center VMM to Azure / Azure Stack, OpenStack, Amazon AWS or Google Cloud; but also when dealing with cloud to cloud migrations, like AWS to Azure.


You can read more about our products and services here!

See you in Austin!

The post Join us at the OpenStack Summit in Austin! appeared first on Cloudbase Solutions.


Hyper-V Failover Cluster in OpenStack

$
0
0

We’re very pleased to announce that starting with the Mitaka release we have introduced a new Openstack Nova Compute Driver, the Hyper-V Failover Cluster Driver, offering host based fault tolerance to tenants. The main advantage is that non high-available applications running in virtual machines can rely on the cluster for fault tolerance, a very common scenario in the enterprise IT world.

This feature is based on Windows Server Failover Clustering (WSFC) and is very useful when you need services that are always available, even if the Hyper-V compute hosts go offline due to planned maintenance or unplanned hardware or software issues. Thanks to this feature, the virtual machines are fault-tolerant and get automatically migrated to other nodes in the same cluster, where they continue to work unaffected.

All of this is now integrated with OpenStack, with the Hyper-V Compute Driver seamlessly notifying Nova about any failovers in the cluster, ensuring that instance status is properly up-to-date.

Windows Clustering is fully supported and automatically configured in our OpenStack Hyper-V hyper-converged product offer.

In the remaining part of this post, we’re showcasing the Failover Clustering feature in a quick demo that will work on any Mitaka OpenStack deployment. All you need is a minimum of two Hyper-V nodes (joined to an Active Directory domain) to add to your deployment.

Firstly, let’s boot some instances on the Hyper-V Cluster.

nova boot --image cirros_vhd --flavor m1.small test1
nova boot --image cirros_vhd --flavor m1.small test2
nova boot --image cirros_vhd --flavor m1.small test3

We can see the 3 instances with nova list:

nova_list

And the same 3 instances in the Failover Cluster Manager:

cluster_manager1

Now, we’re going to forcefully restart the HV12R202 Hyper-V host server where two of the three instances are hosted. Being a planned restart, the instances hosted on this node will live migrate to other Hyper-V nodes in the cluster without any downtime. This is the so-called “node drain” feature. If instead the Hyper-V server undergoes an unplanned shutdown, the instances will failover to other nodes.

PS > shutdown -r -t 0

The instances have been live migrated to the other nodes in the cluster as we can see in the Cluster Manager shown in the following snapshot:

cluster_manager2
A snippet from the Hyper-V Nova Compute logs, showcasing the occurring failover events.

2016-04-22 07:50:08.865 4108 INFO hyperv.nova.cluster.clusterops [-] Checking instance failover instance-00000001 to HV12R201 from host HV12R202.
2016-04-22 07:50:09.009 4108 INFO nova.compute.manager [-] [instance: 2991095f-9fc0-4a64-9b35-ef5637e1757a] VM Started (Lifecycle Event)
2016-04-22 07:50:09.586 4108 INFO nova.compute.manager [req-f9e2d6cd-8ad1-42d8-82e1-5e98bd052596 - - - - -] [instance: 2991095f-9fc0-4a64-9b35-ef5637e1757a] During the sync_power process the instance has moved from host HV12R202 to host HV12R201
2016-04-22 07:50:10.141 4108 INFO hyperv.nova.cluster.clusterops [-] Instance instance-00000001  failover to HV12R201.
2016-04-22 07:50:11.142 4108 WARNING oslo.service.loopingcall [-] Function 'hyperv.nova.cluster.clusterops._looper' run outlasted interval by 0.28 sec
2016-04-22 07:50:11.150 4108 INFO hyperv.nova.cluster.clusterops [-] Checking instance failover instance-00000003 to HV12R201 from host HV12R202.
2016-04-22 07:50:12.130 4108 INFO hyperv.nova.cluster.clusterops [-] Instance instance-00000003  failover to HV12R201.

The changes are consistent with Nova and the instances location has been updated.

instance1_migrated instance2_migrated

Of course, you can try out this feature yourself. We’re going to explain the setup in the following part.

Requirements

  • OpenStack Mitaka deployment
  • Active Directory
  • At least 2 Hyper-V compute nodes in the same Active Directory, running Windows Hyper-V / Server 2012 R2 or newer, including Nano Server
  • Install the OpenStack Hyper-V Compute Driver on the Hyper-V nodes
  • Optionally, you can add Scale-Out File Server storage nodes, also joined to the Active Directory domain and part of the same cluster.

Setup

  1. Run the following PowerShell script on a server in the Active Directory domain. This script will configure the Failover Clustering service on each Hyper-V compute node along with a SMB share, where the instances’ disks and configurations will be hosted on, since they will have to be accessible from each node. The shared storage used by Hyper-V can be either based on SMB or CSV, for this basic demo we’ll just use a simple SMB share, take a look at our OpenStack Hyper-V hyper-converged offer for a full Scale-Out File Server storage configuration.
    ########################
    # Windows Server 2012 R2
    # setting up server for share
    
    # please setup your own configurations here.
    $hyperv_nodes = @("HYPERV_NODE_01.DOMAIN", "HYPERV_NODE_02.DOMAIN")
    $cluster_name = "CLUSTER_NAME"
    $cluster_user = "DOMAIN\USER"
    $smb_path = "S:\SMB_SHARE"
    $smb_name = "SMB_SHARE"
    
    # install locally
    Install-WindowsFeature File-Services, FS-FileServer
    
    # this will install the features necessary, including the Failover Clustering feature.
    Invoke-Command -ComputerName $hyperv_nodes {Install-WindowsFeature File-Services, FS-FileServer, Failover-Clustering}
    
    New-Cluster –Name $cluster_name -Node $hyperv_nodes
    
    # Create share folder
    MD "$smb_path"
    # Create file share
    New-SmbShare -Name $smb_name -Path $smb_path -FullAccess $cluster_user
    # Set NTFS permissions from the file share permissions
    Set-SmbPathAcl –ShareName $smb_name
  2. On each Hyper-V compute node, we must configure the nova-compute service to use the Hyper-V Cluster Driver along with a shared instances configuration path. Update these configuration options with your own values and add them to their appropriate sections:
    # add extra configs in nova.conf
    [DEFAULT]
    compute_driver=hyperv.nova.cluster.driver.HyperVClusterDriver
    instances_path=\\SHARE_HOST_IP\SHARE_PATH\Instances
  3. (Optional) Install the OpenStack Mitaka Cinder Storage driver, enabling SMB3 block storage volumes on clustered storage with Windows Server Scale-Out File Server enabled.
  4. Done! Now you can create and use your OpenStack Hyper-V instances as usual, with the additional peace of mind provided by the Hyper-V Clustering feature working behind the scenes.

We hope you enjoy this feature and if you have any questions or suggestions, please let us know!

The post Hyper-V Failover Cluster in OpenStack appeared first on Cloudbase Solutions.

Cloudbase Solutions™ and Mirantis Integrate Hyper-V and OpenStack® for Windows® Workloads

$
0
0

Cloudbase Solutions™ and Mirantis Integrate Hyper-V and OpenStack® for Windows® Workloads

Cloudbase Solutions announced a partnership with Mirantis that will let enterprises use OpenStack Hyper-V Compute Driver on Mirantis OpenStack, with complete interoperability and support. The joint solution enables Hyper-V compute nodes to work side-by-side with KVMs in Mirantis OpenStack deployments, so that companies can manage heterogenous Windows workloads on OpenStack at the click of a button.

http://www.prweb.com/releases/2016/03/prweb13274568.htm


The post Cloudbase Solutions™ and Mirantis Integrate Hyper-V and OpenStack® for Windows® Workloads appeared first on Cloudbase Solutions.

Cloudbase Solutions Achieves Industry’s First Windows on OpenStack Certification with Red Hat OpenStack Platform

$
0
0

Cloudbase Solutions Achieves Industry’s First Windows on OpenStack Certification with Red Hat OpenStack Platform

Today at the OpenStack Summit, Cloudbase Solutions announced a collaboration with Red Hat to enable enterprise support for Windows guests on Red Hat OpenStack Platform clouds and include the guest initialization agent Cloudbase-Init along with VirtIO Windows drivers.

http://www.prweb.com/releases/2016/04/prweb13366355.htm 


The post Cloudbase Solutions Achieves Industry’s First Windows on OpenStack Certification with Red Hat OpenStack Platform appeared first on Cloudbase Solutions.

Cloudbase Solutions Announces Enterprise Cloud Migration as a Service

$
0
0

Cloudbase Solutions Announces Enterprise Cloud Migration as a Service

Cloudbase Solutions, the leader of enterprise OpenStack® on Windows® products, announced the release of their product Coriolis – Cloud Migration as a Service!
Migrating existing Windows and Linux workloads between clouds is a necessity for a large number of use cases, especially for a user moving from traditional virtualization technologies like VMware vSphere or Microsoft System Center VMM to Azure / Azure Stack, OpenStack, Amazon AWS or Google Cloud.

http://www.prweb.com/releases/2016/04/prweb13369842.htm


The post Cloudbase Solutions Announces Enterprise Cloud Migration as a Service appeared first on Cloudbase Solutions.

Open vSwitch 2.5 on Hyper-V (OpenStack) – Part 1

$
0
0

We are happy to announce the availability of Open vSwitch 2.5 (OVS) for Microsoft Hyper-V Server 2012, 2012 R2 and 2016 (technical preview) thanks to the joint effort of Cloudbase Solutions, VMware and the rest of the Open vSwitch community.

The OVS 2.5 release includes the Open vSwitch CLI tools and services (e.g. ovsdb-server, ovs-vswitchd, ovs-vsctl, ovs-ofctl, etc.), and an updated version of the OVS Hyper-V virtual switch forwarding extension, providing fully interoperable GRE, VXLAN and STT encapsulation between Hyper-V and Linux, including KVM based virtual machines.

As usual, we also released an MSI installer that takes care of the Windows services for ovsdb-server and ovs-vswitchd daemons along with all the required binaries and configurations.

All the Open vSwitch code is available as open source here:

https://github.com/openvswitch/ovs/tree/branch-2.5
https://github.com/cloudbase/ovs/tree/branch-2.5-cloudbase

Supported Windows operating systems:

  • Windows Server and Hyper-V Server 2012 and 2012 R2.
  • Windows Server and Hyper-V Server 2016 (technical preview).
  • Windows 8, 8.1 and 10.


Installing Open vSwitch on Hyper-V

The entire installation process is seamless. Download our installer and run it. You will be welcomed by the following screen:


Windows

Click “Next”, accept the license, click “Next” again and you’ll have the option to install both the Hyper-V virtual switch extension driver and the command line tools. If you want to install only the command line tools (in order to be able to connect to a Linux or Windows server), just deselect the driver option.


Open vSwitch 2.5 Hyper-V Setup on Windows


Click “Next” followed by “Install” and the installation will start. You will have to confirm that you want to install the signed kernel driver and the process will be completed in a matter of a few seconds, generating an Open vSwitch database and starting the ovsdb-server and ovs-vswitchd services.


OVSHVSetup3_1


The installer also adds the command line tools folder to the system path, available after the next logon or CLI shell execution.


Unattended installation

Fully unattended installation is also available (if you already have accepted/imported our certificate). This helps to install Open vSwitch with Windows GPOs, Puppet, Chef, SaltStack, DSC or any other automated deployment solution:

msiexec /i openvswitch-hyperv-2.5.0.msi /l*v log.txt


Configuring Open vSwitch on Windows

Let us assume that we have the following environment: a host with four Ethernet cards in which we shall bind a Hyper-V Virtual Switch on top of one of them.

The list of adapters:

PS C:\package> Get-NetAdapter

Name                      InterfaceDescription                    ifIndex Status       MacAddress             LinkSpeed
----                      --------------------                    ------- ------       ----------             ---------
port3                     Intel(R) 82574L Gigabit Network Co...#3      26 Up           00-0C-29-40-8B-EA         1 Gbps
nat                       Intel(R) 82574L Gigabit Network Co...#4      27 Up           00-0C-29-40-8B-E0         1 Gbps
port2                     Intel(R) 82574L Gigabit Network Co...#2      18 Up           00-0C-29-40-8B-D6         1 Gbps
port1                     Intel(R) 82574L Gigabit Network Conn...      17 Up           00-0C-29-40-8B-CC         1 Gbps

Create a Hyper-V external virtual switch. Remember that if you want to take advantage of GRE, VXLAN or STT tunneling you will have to create an external virtual switch with the AllowManagementOS flag set to false.

For example:

PS C:\package> New-VMSwitch -Name vSwitch -NetAdapterName port1 -AllowManagementOS $false

Name    SwitchType NetAdapterInterfaceDescription
----    ---------- ------------------------------
vSwitch External   Intel(R) 82574L Gigabit Network Connection

To verify that the extension has been installed on our system:

PS C:\package> Get-VMSwitchExtension -VMSwitchName vSwitch -Name "Open vSwitch Extension"

Id                  : 583CC151-73EC-4A6A-8B47-578297AD7623
Name                : Open vSwitch Extension
Vendor              : Open vSwitch
Version             : 13.43.16.16
ExtensionType       : Forwarding
ParentExtensionId   :
ParentExtensionName :
SwitchId            : 5844f4dd-b3d7-496c-81cb-481a64fa7f58
SwitchName          : vSwitch
Enabled             : False
Running             : False
ComputerName        : HYPERV_NORMAL_1
Key                 :
IsDeleted           : False

We can now enable the OVS extension on the vSwitch virtual switch:

PS C:\package> Enable-VMSwitchExtension -VMSwitchName vSwitch -Name "Open vSwitch Extension"

Id                  : 583CC151-73EC-4A6A-8B47-578297AD7623
Name                : Open vSwitch Extension
Vendor              : Open vSwitch
Version             : 13.43.16.16
ExtensionType       : Forwarding
ParentExtensionId   :
ParentExtensionName :
SwitchId            : 5844f4dd-b3d7-496c-81cb-481a64fa7f58
SwitchName          : vSwitch
Enabled             : True
Running             : True
ComputerName        : HYPERV_NORMAL_1
Key                 :
IsDeleted           : False

Please note that when you enable the extension, the virtual switch will stop forwarding traffic until it is configured (adding the Ethernet adapter under a bridge).

i.e.

PS C:\package> ovs-vsctl.exe add-br br-port1
PS C:\package> ovs-vsctl.exe add-port br-port1 port1

Let us talk in more detail about the two commands issued above.

The first command:

PS C:\package> ovs-vsctl.exe add-br br-port1

will add a new adapter on the host, which is disabled by default:

PS C:\package> Get-NetAdapter

Name                      InterfaceDescription                    ifIndex Status       MacAddress             LinkSpeed
----                      --------------------                    ------- ------       ----------             ---------
br-port1                  Hyper-V Virtual Ethernet Adapter #2          47 Disabled     00-15-5D-00-62-79        10 Gbps
port3                     Intel(R) 82574L Gigabit Network Co...#3      26 Up           00-0C-29-40-8B-EA         1 Gbps
nat                       Intel(R) 82574L Gigabit Network Co...#4      27 Up           00-0C-29-40-8B-E0         1 Gbps
port2                     Intel(R) 82574L Gigabit Network Co...#2      18 Up           00-0C-29-40-8B-D6         1 Gbps
port1                     Intel(R) 82574L Gigabit Network Conn...      17 Up           00-0C-29-40-8B-CC         1 Gbps

This adapter can be used as an IP-able device:

PS C:\package> Enable-NetAdapter br-port1
PS C:\package> New-NetIPAddress -IPAddress 14.14.14.2 -InterfaceAlias br-port1 -PrefixLength 24

IPAddress         : 14.14.14.2
InterfaceIndex    : 47
InterfaceAlias    : br-port1
AddressFamily     : IPv4
Type              : Unicast
PrefixLength      : 24
PrefixOrigin      : Manual
SuffixOrigin      : Manual
AddressState      : Tentative
ValidLifetime     : Infinite ([TimeSpan]::MaxValue)
PreferredLifetime : Infinite ([TimeSpan]::MaxValue)
SkipAsSource      : False
PolicyStore       : ActiveStore

IPAddress         : 14.14.14.2
InterfaceIndex    : 47
InterfaceAlias    : br-port1
AddressFamily     : IPv4
Type              : Unicast
PrefixLength      : 24
PrefixOrigin      : Manual
SuffixOrigin      : Manual
AddressState      : Invalid
ValidLifetime     : Infinite ([TimeSpan]::MaxValue)
PreferredLifetime : Infinite ([TimeSpan]::MaxValue)
SkipAsSource      : False
PolicyStore       : PersistentStore

The second command:

PS C:\package> ovs-vsctl.exe add-port br-port1 port1

will allow the bridge to use the actual physical NIC on which the Hyper-V vSwitch was created (port1).

Users from Linux are familiar with the setup above because it is similar to a linux bridge.

Limitations

  • We currently support a single Hyper-V virtual switch in our forwarding extension.
  • Multiple host nics with LACP support is experimental in this release.


OpenStack Integration with Open vSwitch on Windows

OpenStack is a very common use case for Open vSwitch on Hyper-V. The following example is based on a DevStack Mitaka All-in-One deployment on Ubuntu 14.04 LTS with a Hyper-V compute node, but the concepts and the following steps apply to any OpenStack deployment.

Let us install our DevStack node. Here is a sample local.conf configuration:

ubuntu@ubuntu:~/devstack$ cat local.conf
[[local|localrc]]
# Set this to your management IP
HOST_IP=14.14.14.1
FORCE=yes

#Services to be started
disable_service n-net

enable_service rabbit mysql
enable_service key
enable_service n-api n-crt n-obj n-cond n-sch n-cauth n-cpu
enable_service neutron q-svc q-agt q-dhcp q-l3 q-meta q-fwaas q-lbaas
enable_service horizon
enable_service g-api g-reg

disable_service heat h-api h-api-cfn h-api-cw h-eng
disable_service cinder c-api c-vol c-sch
disable_service tempest

ENABLE_TENANT_TUNNELS=False
Q_PLUGIN=ml2
Q_ML2_TENANT_NETWORK_TYPE=vxlan
Q_ML2_PLUGIN_MECHANISM_DRIVERS=openvswitch,hyperv
OVS_ENABLE_TUNNELING=True

LIBVIRT_TYPE=kvm

API_RATE_LIMIT=False

DATABASE_PASSWORD=Passw0rd
RABBIT_PASSWORD=Passw0rd
SERVICE_TOKEN=Passw0rd
SERVICE_PASSWORD=Passw0rd
ADMIN_PASSWORD=Passw0rd

SCREEN_LOGDIR=$DEST/logs/screen
LOGFILE=$DEST/logs/stack.sh.log
VERBOSE=True
LOGDAYS=2

RECLONE=no

KEYSTONE_BRANCH=stable/mitaka
NOVA_BRANCH=stable/mitaka
NEUTRON_BRANCH=stable/mitaka
SWIFT_BRANCH=stable/mitaka
GLANCE_BRANCH=stable/mitaka
CINDER_BRANCH=stable/mitaka
HEAT_BRANCH=stable/mitaka
TROVE_BRANCH=stable/mitaka
HORIZON_BRANCH=stable/mitaka

[[post-config|$NEUTRON_CONF]]
[database]
min_pool_size = 5
max_pool_size = 50
max_overflow = 50

Networking:

ubuntu@ubuntu:~/devstack$ ifconfig eth3
eth3      Link encap:Ethernet  HWaddr 00:0c:29:25:db:8c  
          inet addr:14.14.14.1  Bcast:14.14.14.255  Mask:255.255.255.0
          inet6 addr: fe80::20c:29ff:fe25:db8c/64 Scope:Link
          UP BROADCAST RUNNING MULTICAST  MTU:1500  Metric:1
          RX packets:2209 errors:0 dropped:0 overruns:0 frame:0
          TX packets:1007 errors:0 dropped:0 overruns:0 carrier:0
          collisions:0 txqueuelen:1000
          RX bytes:336185 (336.1 KB)  TX bytes:153402 (153.4 KB)

After DevStack finishes installing we can add some Hyper-V VHD or VHDX images to Glance, for example our Windows Server 2012 R2 evaluation image. Additionally, since we are using VXLAN, the default guest MTU should be set to 1450. This can be done via DHCP option if the guest supports it, as described here.

Now let us move to the Hyper-V node. First we have to download the latest OpenStack compute installer:

PS C:\package> Start-BitsTransfer https://cloudbase.it/downloads/HyperVNovaCompute_Mitaka_13_0_0.msi

Full steps on how to install and configure OpenStack on Hyper-V are available here: OpenStack on Windows installation.

In our example, the Hyper-V node will use the following adapter to connect to the OpenStack environment:

Ethernet adapter br-port1:

   Connection-specific DNS Suffix  . :
   Link-local IPv6 Address . . . . . : fe80::9c1a:f185:bb09:62e2%47
   IPv4 Address. . . . . . . . . . . : 14.14.14.2
   Subnet Mask . . . . . . . . . . . : 255.255.255.0
   Default Gateway . . . . . . . . . :

This is the internal adapter bound to the vSwitch virtual switch, as created during the previous steps (ovs-vsctl add-br br-port1).

We can now verify our deployment by taking a look at the Nova services and Neutron agents status in the OpenStack controller and ensuring that they are up and running:

ubuntu@ubuntu:~/devstack$ nova service-list
+----+------------------+-----------------+----------+---------+-------+----------------------------+-----------------+
| Id | Binary           | Host            | Zone     | Status  | State | Updated_at                 | Disabled Reason |
+----+------------------+-----------------+----------+---------+-------+----------------------------+-----------------+
| 5  | nova-conductor   | ubuntu          | internal | enabled | up    | 2016-04-26T20:09:44.000000 | -               |
| 6  | nova-cert        | ubuntu          | internal | enabled | up    | 2016-04-26T20:09:39.000000 | -               |
| 7  | nova-scheduler   | ubuntu          | internal | enabled | up    | 2016-04-26T20:09:45.000000 | -               |
| 8  | nova-consoleauth | ubuntu          | internal | enabled | up    | 2016-04-26T20:09:46.000000 | -               |
| 9  | nova-compute     | ubuntu          | nova     | enabled | up    | 2016-04-26T20:09:48.000000 | -               |
| 10 | nova-compute     | hyperv_normal_1 | nova     | enabled | up    | 2016-04-26T20:09:39.000000 | -               |
+----+------------------+-----------------+----------+---------+-------+----------------------------+-----------------+
ubuntu@ubuntu:~/devstack$ neutron agent-list
+--------------------------------------+--------------------+-----------------+-------------------+-------+----------------+---------------------------+
| id                                   | agent_type         | host            | availability_zone | alive | admin_state_up | binary                    |
+--------------------------------------+--------------------+-----------------+-------------------+-------+----------------+---------------------------+
| 1bb8eccc-ad8c-43c2-a54e-d84c6cd7acd4 | DHCP agent         | ubuntu          | nova              | :-)   | True           | neutron-dhcp-agent        |
| 3d89e79d-3cb4-4a10-ae01-773b86f83fb2 | Loadbalancer agent | ubuntu          |                   | :-)   | True           | neutron-lbaas-agent       |
| 7777a901-0c58-4180-8d01-4ea3296621a4 | Open vSwitch agent | ubuntu          |                   | :-)   | True           | neutron-openvswitch-agent |
| 93d6390a-19d2-4c79-8f76-90736bc47f5f | HyperV agent       | hyperv_normal_1 |                   | :-)   | True           | neutron-hyperv-agent      |
| c3af1d4b-5bba-47b0-b0db-b3c0d49bb41a | Metadata agent     | ubuntu          |                   | :-)   | True           | neutron-metadata-agent    |
| ec9bc28c-a5ee-4733-8b9c-3a1f99c42f08 | L3 agent           | ubuntu          | nova              | :-)   | True           | neutron-l3-agent          |
+--------------------------------------+--------------------+-----------------+-------------------+-------+----------------+---------------------------+

Next we can disable the Windows Hyper-V agent, which is not needed since we use neutron Open vSwitch agent.

From a command prompt (cmd.exe), issue the following commands:

C:\package>sc config "neutron-hyperv-agent" start=disabled
[SC] ChangeServiceConfig SUCCESS

C:\package>sc stop "neutron-hyperv-agent"

SERVICE_NAME: neutron-hyperv-agent
        TYPE               : 10  WIN32_OWN_PROCESS
        STATE              : 1  STOPPED
        WIN32_EXIT_CODE    : 0  (0x0)
        SERVICE_EXIT_CODE  : 0  (0x0)
        CHECKPOINT         : 0x0
        WAIT_HINT          : 0x0

We need to create a new service called neutron-ovs-agent and put its configuration options in C:\Program Files\Cloudbase Solutions\OpenStack\Nova\etc\neutron_ovs_agent.conf. From a command prompt:

C:\Users\Administrator>sc create neutron-ovs-agent binPath= "\"C:\Program Files\Cloudbase Solutions\OpenStack\Nova\bin\OpenStackServiceNeutron.exe\" neutron-hyperv-agent \"C:\Program Files\Cloudbase Solutions\OpenStack\Nova\Python27\Scripts\neutron-openvswitch-agent.exe\" --config-file \"C:\Program Files\Cloudbase Solutions\OpenStack\Nova\etc\neutron_ovs_agent.conf\"" type= own start= auto error= ignore depend= Winmgmt displayname= "OpenStack Neutron Open vSwitch Agent Service" obj= LocalSystem
[SC] CreateService SUCCESS

C:\Users\Administrator>notepad "c:\Program Files\Cloudbase Solutions\OpenStack\Nova\etc\neutron_ovs_agent.conf"

C:\Users\Administrator>sc start neutron-ovs-agent

SERVICE_NAME: neutron-ovs-agent
        TYPE               : 10  WIN32_OWN_PROCESS
        STATE              : 2  START_PENDING
                                (STOPPABLE, NOT_PAUSABLE, ACCEPTS_SHUTDOWN)
        WIN32_EXIT_CODE    : 0  (0x0)
        SERVICE_EXIT_CODE  : 0  (0x0)
        CHECKPOINT         : 0x1
        WAIT_HINT          : 0x0
        PID                : 2740
        FLAGS              :

Note: creating a service manually for the OVS agent won’t be necessary anymore starting with the next Nova Hyper-V MSI installer version.

Here is the content of the neutron_ovs_agent.conf file:

[DEFAULT]
verbose=true
debug=false
control_exchange=neutron
policy_file=C:\Program Files\Cloudbase Solutions\OpenStack\Nova\etc\policy.json
rpc_backend=neutron.openstack.common.rpc.impl_kombu
rabbit_host=14.14.14.1
rabbit_port=5672
rabbit_userid=stackrabbit
rabbit_password=Passw0rd
logdir=C:\OpenStack\Log\
logfile=neutron-ovs-agent.log
[agent]
tunnel_types = vxlan
enable_metrics_collection=false
[SECURITYGROUP]
enable_security_group=false
[ovs]
local_ip = 14.14.14.2
tunnel_bridge = br-tun
integration_bridge = br-int
tenant_network_type = vxlan
enable_tunneling = true

Now if we run ovs-vsctl show, we can see a VXLAN tunnel in place:

PS C:\> ovs-vsctl.exe show
a81a54fc-0a3c-4152-9a0d-f3cbf4abc3ca
    Bridge br-int
        fail_mode: secure
        Port patch-tun
            Interface patch-tun
                type: patch
                options: {peer=patch-int}
        Port br-int
            Interface br-int
                type: internal
    Bridge br-tun
        fail_mode: secure
        Port br-tun
            Interface br-tun
                type: internal
        Port patch-int
            Interface patch-int
                type: patch
                options: {peer=patch-tun}
        Port "vxlan-0e0e0e01"
            Interface "vxlan-0e0e0e01"
                type: vxlan
                options: {df_default="true", in_key=flow, local_ip="14.14.14.2", out_key=flow, remote_ip="14.14.14.1"}
    Bridge "br-port1"
        Port "port1"
            Interface "port1"
        Port "br-port1"
            Interface "br-port1"
                type: internal

After spawning a Nova instance on the Hyper-V node you should see:

PS C:\> get-vm

Name              State   CPUUsage(%) MemoryAssigned(M) Uptime   Status
----              -----   ----------- ----------------- ------   ------
instance-00000003 Running 0           512               00:01:09 Operating normally


PS C:\Users\Administrator> Get-VMConsole instance-00000003
PS C:\> ovs-vsctl.exe show
a81a54fc-0a3c-4152-9a0d-f3cbf4abc3ca
    Bridge br-int
        fail_mode: secure
        Port "f44f4971-4a75-4ba8-9df7-2e316f799155"
            tag: 1
            Interface "f44f4971-4a75-4ba8-9df7-2e316f799155"
        Port patch-tun
            Interface patch-tun
                type: patch
                options: {peer=patch-int}
        Port br-int
            Interface br-int
                type: internal
    Bridge br-tun
        fail_mode: secure
        Port br-tun
            Interface br-tun
                type: internal
        Port patch-int
            Interface patch-int
                type: patch
                options: {peer=patch-tun}
        Port "vxlan-0e0e0e01"
            Interface "vxlan-0e0e0e01"
                type: vxlan
                options: {df_default="true", in_key=flow, local_ip="14.14.14.2", out_key=flow, remote_ip="14.14.14.1"}
    Bridge "br-port1"
        Port "port1"
            Interface "port1"
        Port "br-port1"
            Interface "br-port1"
                type: internal

In this example, “f44f4971-4a75-4ba8-9df7-2e316f799155” is the OVS port name associated to the instance-00000003 VM vnic. You can find out the details by running the following PowerShell cmdlet:

PS C:\Users\Administrator> Get-VMByOVSPort -OVSPortName "f44f4971-4a75-4ba8-9df7-2e316f799155"
...
ElementName                          : instance-00000003
...

The VM instance-00000003 got an IP address from the neutron DHCP agent, with fully functional networking between KVM and Hyper-V hosted virtual machines!

This is everything you need to get started with OpenStack, Hyper-V and OVS.

In the next blog post we will show you how to manage Hyper-V on OVS without OpenStack using a VXLAN tunnel.

The post Open vSwitch 2.5 on Hyper-V (OpenStack) – Part 1 appeared first on Cloudbase Solutions.

What’s new in Mitaka for Hyper-V

$
0
0

Whats New in Mitaka for Hyper-V

As you may already know, OpenStack Mitaka has been recently released. It has been quite an eventful cycle, full of new features, increased performance and overall reliability improvements on our Windows and Hyper-V OpenStack drivers.

 
In this blog post, we’d like to present some of the most meaningful changes and updates that come with this release:


Fibre Channel

Users owning a Fibre Channel (FC) infrastructure have shown their interest in exposing it to Hyper-V instances in OpenStack. We are pleased to announce that this feature is now available!

The Hyper-V driver can now seamlessly attach FC volumes as pass-through disks transparently to the guest, including booting from FC based volumes.


Nova Driver iSCSI / Fibre Channel MPIO

Starting with this release, the Hyper-V driver can establish multipath iSCSI sessions, a requirement for highly available storage. Depending on the MPIO policy, load balancing can also be provided.

The deployer can now configure which HBAs will be used for the iSCSI sessions.


Hyper-V Cluster

If you desire instances with host level fault tolerance, the new Hyper-V Cluster Driver is the perfect solution for you. Thanks to the Windows Server Failover Clustering feature available for Hyper-V, instances will be able to automatically migrate from faulty compute nodes to healthy ones within the same cluster and continue working. The driver ensures that Nova is aware of the migration and the instance status will be updated accordingly. From a SDN perspective, The Hyper-V Cluster Driver works with both L2 agents: neutron-hyperv-agent and openvswitch-agent.

For more details about this feature, requirements and configuration, check out this blog post.


Open vSwitch (OVS) 2.5

The recently released OVS 2.5 is now available for Microsoft Windows / Hyper-V Server 2012, 2012 R2, and 2016 due to the joint effort of Cloudbase Solutions, VMWare, and the rest of the Open vSwitch community. It includes all the OVS CLI tools and services, and an updated version of the OVS Hyper-V virtual switch forwarding extension. OVS offers full OVSDB and OpenFlow support along with native VXLAN, GRE, STT, MPLS encapsulation fully interoperable with Linux hosts and SDN controllers like OpenDaylight, OVN or NSX.

For more details on the release and how to install it, you can read this blog post.


New Features in Windows / Hyper-V Server 2016

Windows / Hyper-V Server 2016 is just right around the corner. We ensure that every Technical Preview released by Microsoft is compatible with OpenStack, including the recently released TP5.

There are quite a few important updates and features that come with this new release. Some of the features we’re most excited about are:


  • Shielded VMs
    Highly secure VMs which guarantee that only the users with the proper guest OS credentials can access their encrypted content. Host administrators cannot access the shielded VMs content or console, thus providing significantly better protection against compromised hosts. Jump to the Shielded VMs section.


  • Nano Server
    Extremely thin Windows image which greatly reduced the deployment times. It can be used in various OpenStack scenarios: Hyper-V Nova compute nodes, Cinder storage servers, Windows Containers, Manila SMB3 file servers and many others. More about this in the Nano Server section.


  • RemoteFX new capabilities
    This feature allows you to share host GPUs across virtual instances by adding virtual graphics devices, this is in particular very useful for VDI scenarios. Windows / Hyper-V Server 2016 greatly improves this feature. More about it in the RemoteFX section.


  • Windows / Hyper-V Containers
    We already have OpenStack support for Windows Containers in nova-docker and are working towards adding support for Windows Containers in Magnum in the upcoming cycle.


  • Nested Virtualization
    This feature is also present in the latest versions of Windows 10. It allows you to create VMs in which you can run nested Hyper-V VMs (seen Inception yet?)


  • New Networking Controller
    Windows Server 2016 comes with a new SDN stack. It includes many new capabilities, including VXLAN support. Other features include: Software Load Balancer Management, RAS Gateway Management, new Firewall Management, and so on. We will add support for this networking stack during the Newton cycle, with the intent of allowing it as an alternative to Open vSwitch in OpenStack deployments. You can read more about this here.


  • Linux Secure Boot VMs
    Previously, only Windows guests were able to boot with Secure Boot enabled, now this is also supported on Linux VMs and implemented in OpenStack.


  • ReFS
    Microsoft’s Resilient File System (ReFS) is recommended for Hyper-V hosts in Server 2016. It is much faster for certain operations used by Hyper-V: creating fixed-size VHDx, file merge, snapshots, etc.


  • Larger VMs
    Pimp your flavors! 🙂 VMs can now be spawned with up to 64 vCPUs, 1 TB RAM, 64 TB virtual hard drives and up to 256 virtual SCSI disks.


For a comprehensive list of features and updates that come with the new Windows Server, you can find them here.


Hyper-V Shielded VMs

Shielded VMs offer a very unique new feature added in Windows / Hyper-V Server 2016 to provide a secure context for virtual machines in scenarios where the underlying Hyper-V hosts cannot be fully trusted. This is implemented by taking advantage of various Windows Server OS features, including Isolated User Mode, BitLocker, TPM support along with support for virtual TPM (vTPM) in Hyper-V and new Windows Server roles and features.

This is an amazing feature that could not have been missed in our OpenStack Hyper-V driver, which is why we have a dedicated blog post coming out soon with all the details!


RemoteFX support for Windows / Hyper-V Server 2016

We’ve added support for RemoteFX for Windows / Hyper-V Server 2012 R2 back in Kilo, but the highly anticipated Windows / Hyper-V Server 2016 comes with some new nifty features which we’re very excited about! Hyper-V remains by far one of the best choices when it comes to VDI deployments.

In case you are not familiar with this feature, RemoteFX allows you to virtualize your GPUs and share them across instances by adding virtual graphics devices. This leads to a richer RDP experience, as well as the benefit of having a GPU on your instances, enhancing GPU-intensive applications.

Some of the new features for RemoteFX in Windows / Hyper-V Server 2016 are:

  • 4K resolution option
  • 1GB dedicated VRAM (available choices: 64MB, 128MB, 256MB, 512MB, 1GB) and up to another 1GB shared VRAM
  • Support for Generation 2 VMs
  • OpenGL and OpenCL API support
  • H.264/AVC codec investment
  • Improved performance


Nano Server support

Nano Server is an extremely thin Windows OS install option available in Windows Server 2016. It has a very small disk size (a few hundreds of MB), which greatly reduce the deployment times. It can be used in OpenStack in various ways: Hyper-V Nova compute nodes, Cinder storage servers, Windows Containers, Manila SMB3 file servers and many others. For more information, click here.

You can also build a Nano Server images for KVM, ESXi, or BareMetal. Go here to learn how to do it.


Hyper-V Driver and Neutron vif plug events

Until now, nova-compute and neutron-hyperv-agent worked completely asynchronously. In Mitaka, we’ve enabled the Hyper-V Compute Driver to wait until its vNICs are properly bound. Neutron generates network-vif-plugged events when neutron-hyperv-agent reports a port as being bound. This won’t impact on performance mainly thanks to recent changes to the neutron-hyperv-agent which enable it to bind ports with improved parallelism.

Controlling this behaviour in the Hyper-V Compute Driver can be done with the following config options on your compute nodes

nova.conf:

[DEFAULT]
# how many seconds to wait for neutron network-vif-plugged events.
# the Hyper-V Compute Driver will not wait for neutron events if the config option is set to 0.
vif_plugging_timeout = 60

# if set to True, an error will be generated if the Hyper-V Compute Driver does not
# receive the needed neutron events within the vif_plugging_timeout time limit.
vif_plugging_is_fatal = False


Winstackers and os-win

During the Mitaka cycle, the OpenStack Foundation created an official team under OpenStack’s governance called Winstackers, lead by our development team. The mission is to facilitate the integration of Hyper-V, Windows and related components into OpenStack.

os-win is the first project which we created under the Winstackers umbrella. It’s a library containing Windows / Hyper-V related code that is being used in various OpenStack projects like: nova, cinder, neutron, networking_hyperv, compute_hyperv, and ceilometer; it will also be included in future projects. This library is meant to simplify the process for adding new features in OpenStack projects, as well as making it easier for us to maintain the existing ones.


PyMI

PyMI is a library we’ve added in this cycle, and is a drop-in replacement for the old, WMI Python module. The new module maintains the same interface, so that it can work as a drop in replacement, while providing better error handling, better multithreading support, better performance as well as a higher reliability. It is based on the Windows Management Infrastructure API introduced in Windows Server 2012.

PyMI is officially accepted as a requirement in OpenStack, and it is required by os-win.

Performance-wise, it is very easy to observe the gains brought by using PyMI (see more below). For example, when binding VMs to neutron networks, the neutron-hyperv-agent has to process a series of operations: connect its vNICs to vSwitches, bind VLANs, bind security group rules to the vSwitch ports; all of which can take time, especially adding the security group rules. By simply using PyMI instead of wmi, everything is processed roughly 6 times faster, which is very helpful!

Because PyMI offers the same interface as the old wmi module, it can even be used on previous OpenStack releases (e.g. Juno, Kilo, Liberty)! All you need to do is to run this simple command on your compute nodes:

pip install -U PyMI


Performance & Rally

We have updated the way the neutron-hyperv-agent works, it is now able to bind and process neutron ports in parallel using workers. This leads to a significant increase in performance. Including the benefits of using PyMI, the overall performance gain over the previous implementation is roughly 12x.

WMI, PyMI, and Native Threads workersWMI, PyMI, and Native Threads workers


As you can see from the graph, the difference between the old implementation using WMI and the new one that uses PyMI and Native Thread workers is quite impressive!

The number of workers is configurable, you will have to set the following configuration option on your compute node’s neutron_hyperv_agent.conf file:

[AGENT]
worker_count = 12

The recommended value for this config option is the number of CPUs on your compute node. Our studies on a compute node with 32 processors show that there is no significant performance gain beyond 12-16 workers.

Additionally, Windows provides power configuration options. By default, it is set to “Balanced“, but setting it to “High Performance” will result in an overall performance gain, including improved VMs performance. This has been observed in particular after running Rally Hadoop scenarios, where the execution time has been lowered by ~10-15%. In order to set the “High Performance” power configuration option, all you need to do is to run the following command on your nodes:

PowerCfg.exe /S 8C5E7FDA-E8BF-4A96-9A85-A6E23A8C635C

Significant performance improvements have been made into the Hyper-V Compute Driver as well. There are fewer MI queries being executed, and the ones which are done are now a lot more efficient.

After including all the above improvements, the execution time for IaaS intensive Rally scenarios has been greatly reduced, with the result that Hyper-V is now one of the fastest OpenStack compute options available.

We have also tested Hadoop Rally scenarios. We’re happy to see that Hyper-V comes out at the top of this category in those tests as well!


Removed support for Windows / Hyper-V Server 2008 R2

The support for Windows / Hyper-V Server 2008 R2 compute nodes has been deprecated in previous releases, with Liberty being the last one that still supports this hypervisor version.

Fortunately, all you have to do is update the compute nodes to Windows / Hyper-V Server 2012 or above (2012 R2 or 2016 is highly recommended).


Fuel + Hyper-V

We recently announced a new partnership wth Mirantis which now allows enterprises to use the OpenStack Hyper-V Compute Driver on Mirantis OpenStack, with complete interoperability and support.
You can read more about the announcement here and you should also check out this blog post about how you can add Hyper-V nodes to a Fuel deployment.

It is our belief that open source is the best way for cloud computing and software in general to evolve into something bigger and better, and the way to show it is through our dedicated products and services for the world of OpenStack on Windows. We recommend to check out our Hyper-Converged OpenStack Hyper-V product offer to fully take advantage of Hyper-V including all the the new features included in Mitaka!

The post What’s new in Mitaka for Hyper-V appeared first on Cloudbase Solutions.

Hyper-V Shielded VMs – Part 1

$
0
0

Shielded virtual machines use several features to make it harder for datacenter administrators and malware to inspect, tamper with, or steal data and the state of these virtual machines. Data and state is encrypted, Hyper-V administrators can’t see the video output and disks, and the virtual machines run only on known, healthy hosts, as determined by a Host Guardian Server.


Why use Shielded VMs?

Shielded VMs in Windows Server 2016 protect virtual machines from Hyper-V administrators with the help of encryption technologies. Attaching vTPM devices to the Hyper-V VMs offers users the possibility to enhance their security and system integrity. The Hyper-V administrator can only turn the VM on or off. In short, even if the administrator of the hypervisor host is compromised, all the existent virtual machine data is safe.

A shielded VM provides the following benefits:

  • BitLocker encrypted disks (keys protected by its vTPM)
  • A hardened VM worker process (VMWP) that helps prevent inspection and tampering
  • Automatically encrypted live migration traffic as well as encryption of its runtime state file, saved state, checkpoints and even Hyper-V Replica files
  • No console access in addition to blocking PowerShell Direct, Guest File Copy Integration Components and other services that provide possible paths from a user or process with administrative privileges to the VM


Requirements


4 NODES
  • Guarded Host: WS2016 TP5 Datacenter (Secure Boot enabled)

  • Host Guardian Service Host: WS2016 TP5 (Secure Boot enabled)

  • AD Domain Controller Host: WS2008R2/WS2012R2/WS2016 TP5

  • Tenant Host: Windows 10/WS2016 TP5

Note: System Center VMM is not needed in this deployment.


Setup

Windows Server 2016 comes with Host Guardian Service role, providing Attestation and Key Protection services so that guarded hosts can run Shielded VMs. HGS Remote Attestation verifies the state of host configuration and if it’s guarded. HGS Key Protection enables distributed access to encrypted transport keys to enable Guarded Hosts to unlock and run Shielded VMs.

During the installation of HGS Server, it’s mandatory to specify a domain and the node will be promoted to that domain controller. HGS requires a one-way cross forest trust from the HGS domain to an AD domain controller which contains an AD group with all the nodes considered secured. That AD group will be attested to HGS Server and any member will be considered a guarded host, a node which is secure and ready to run Shielded VMs.


AD Configuration


Create an AD group containing all the hosts that are considered secure and will run Shielded VMs:


$GuardedGroupName='Guarded Hosts Group'

# hostname of a secure node which will run Shielded VMs
$guardedhost='guarded'

$guardedGroup = New-ADGroup -Name $GuardedGroupName -SamAccountName 'GuardedHosts' `
-GroupCategory Security -GroupScope Global

# $GroupMember should look similar to "CN=$cn, DC=$dc"
# ex: "CN=guarded,CN=Computers,DC=dev,DC=com"
Add-ADGroupMember -Identity $GuardedGroupName -Members $GroupMember

# $guardedGroup.sid.Value will be used as an Identifier when setting up the attestation for HGS
$guardedGroup.sid.Value


HGS Configuration
Install HGS role:


Install-WindowsFeature -Name HostGuardianServiceRole –IncludeManagementTools -Restart


Install HGS Server:

# $HGSDomainName is the Host Guardian Service domain set up during HGS installation
# the node will be promoted to a domain controller for the specified domain

$AdminPass = 'Password'
$HGSDomainName = 'hgs.com'

$adminPassword = ConvertTo-SecureString -AsPlainText $AdminPass –Force

Install-HgsServer -HgsDomainName $HGSDomainName `
-SafeModeAdministratorPassword $adminPassword -Restart


Initialize the HGS Server:


$certificatePasswd = 'Password'
$signingCertPath = 'C:\signingCert.pfx'
$encryptionCertPath = 'C:\encryptionCert.pfx'
$certStoreLocation = 'Cert:\LocalMachine\My'

$certificatePassword = ConvertTo-SecureString -AsPlainText $certificatePasswd –Force

$signingCert = New-SelfSignedCertificate -DnsName "signing.$env:userdnsdomain" `
-CertStoreLocation $certStoreLocation

Export-PfxCertificate -Cert $signingCert -Password $certificatePassword `
-FilePath $signingCertPath

$encryptionCert = New-SelfSignedCertificate -DnsName "encryption.$env:userdnsdomain" `
-CertStoreLocation $certStoreLocation

Export-PfxCertificate -Cert $encryptionCert -Password $certificatePassword `
-FilePath $encryptionCertPath

Initialize-HGSServer -HgsServiceName $HgsServiceName `
-SigningCertificatePath $signingCertPath `
-SigningCertificatePassword $certificatePassword `
-EncryptionCertificatePath $encryptionCertPath `
-EncryptionCertificatePassword $certificatePassword -TrustActiveDirectory -Force


Adds the AD domain controller IP address to the list of forwarders on the local DNS server:


Add-DnsServerForwarder –IPAddress $ADDnsIpAddress


Create trust between HGS and AD:


$HGSDomainName = 'hgs.com'
$ADDomainName = 'dev.com'
$ADDomainUser = 'Administrator'
$ADAdminPasswd = 'Password'

netdom trust $HGSDomainName /domain:$ADDomainName /userD:$ADDomainName\$ADDomainUser `
/passwordD:$ADAdminPasswd /add


Add the AD group as HgsAttestationHostGroup in order to all the host members of the group to become guarded and considered by HGS as secure:


Add-HgsAttestationHostGroup -Name "Guarded Hosts" -Identifier "$GuardedGroupSID"


GuardedHost Configuration
Install the necessary roles:


Install-WindowsFeature -Name HostGuardian
Install-WindowsFeature -Name RSAT-Shielded-VM-Tools
Install-WindowsFeature -Name FabricShieldedTools -Restart


For Guarded Hosts to be able to resolve the HGS server names, add a DNS forwarder so that the guarded host to be able to attest to HGS:


Add-DnsServerConditionalForwarderZone -Name $HgsDomainName -ReplicationScope "Forest" `
-MasterServers $HgsServerIP


Configure the Hyper-V host to attest to the HGS server:


Set-HgsClientConfiguration -AttestationServerUrl "http://$HGSDomainName/Attestation" `
-KeyProtectionServerUrl "http://$HGSDomainName/KeyProtection" -confirm:$false


Check the attestation status. If the host is guarded, it’s ready to run shielded VMs:


Get-HgsClientConfiguration


BOOTING A SHIELDED VM

These steps must be completed on a tenant Hyper-V node and not on the guarded host.

In order to generate a shielded VM, it’s required a shielded VM template and a pdk file containing the data regarding the guarded hosts, certificates and other information regarding the Shielded VM.


Install the following roles:


Install-WindowsFeature -Name RSAT-Shielded-VM-Tools
Install-WindowsFeature -Name FabricShieldedTools -Restart


Generate a shielded template

Currently, Windows Server 2016 Technical Preview 5 is the only supported guest OS when using signed disk templates. Make sure that the disk meets the following BitLocker requirements:

  • Is formatted with the NTFS file system.
  • Does not use Dynamic Volume.
  • Has at least two partitions. One partition must include the drive on which Windows is installed. This is the drive that BitLocker will encrypt. The other partition is the active partition, which remains unencrypted so that the VM can be started.


Generate a self-signed certificate to sign the disk:


$certificate = New-SelfSignedCertificate -DnsName publisher.signingcertificate.com `
-CertStoreLocation $certStoreLocation -KeyExportPolicy Exportable


Create a signed disk template:


# $certificate is used to sign the template disk
# Specify a disk name and version
# .VHDX image is modified by embedding the .VSC file in it so making a copy of the image is recommended

$TemplatePath = 'C:\protected_template.vhdx'
$TemplateName = 'MyTemplate'
$Version = '1.1.1.1'

Protect-ServerVHDX -Path $TemplatePath -TemplateName $TemplateName -Version $Version `
-Certificate $certificate

For creating a signed disk template without Powershell, use the C:\Windows\System32\TemplateDiskWizard.exe

1 2 3 4

Generate a pdk file

Once HGS has been configured, the guardian key metadata can be accessed at the following URL:
“http://$HGSDomain/KeyProtection/service/metadata/2014-07/metadata.xml”
Create a HGS guardian:


$url="http://$HGSDomain/KeyProtection/service/metadata/2014-07/metadata.xml"
(New-Object System.Net.WebClient).DownloadFile($url, $GuardianMetadataPath)
New-HgsGuardian –Name $OwnerName -GenerateCertificates
Import-HgsGuardian -Path $GuardianMetadataPath -Name $GuardianName -AllowUntrustedRoot


Extract the VSC file from the signed disk template:


$TemplatePath = 'C:\protected_template.vhdx'
$VSCPath = 'c:\vsc.vsc'

# The VSC file describes the template that the .PDK file can be applied to
Save-VolumeSignatureCatalog -TemplateDiskPath $signedTemplate `
-VolumeSignatureCatalogPath $VSCPath


Create a remote desktop certificate to log on to the Shielded VMs as a personal information file (.PFX) file.


# $rdpcertificate.thumbprint will be added in the unattended file
$rdpcertificate = New-SelfSignedCertificate -DnsName ts.examplerdpcertificate.com `
-CertStoreLocation $certStoreLocation -KeyExportPolicy Exportable

$rdpcertificatepassword = ConvertTo-SecureString -AsPlainText $rdpCertPasswd -Force
Export-PfxCertificate -Cert $rdpcertificate -Password $rdpcertificatepassword `
-FilePath $rdpPath

$rdpcertificate.thumbprint


An Unattend.XML file containing the secret information to include in the Shielded VM is required when generating a PDK file. The rpd certificate thumbprint and password should be included in the unattended.

Here you can download an Unattended.xml sample.


Generate a pdk file:


$owner = Get-HgsGuardian -Name $OwnerName
$guardian = Get-HgsGuardian -Name $GuardianName

# Policy can be either EncryptionSupported or Shielded
Protect-ShieldingDataFile -ShieldingDataFilePath $PdkOutputPath -Owner $owner `
-VolumeIDQualifier (New-VolumeIdQualifier -VolumeSignatureCatalogFilePath $VscPath `
-VersionRule Equals) -WindowsUnattendFile $UnattendedPath -OtherFile $RdpCertPath `
-Guardian $guardian -Policy Shielded


For creating a signed disk template without Powershell, use the C:\Windows\System32\ShieldingDataFileWizard.exe.

shielding_wizard1shielding_wizard2shielding_wizard3shielding_wizard4shielding_wizard5shielding_wizard6shielding_wizard7

Boot a Shielded VM:


$vm = New-VM -Name $VMName -Generation 2 -VHDPath $TemplateVhdxPath -SwitchName "external"
$pdk = Invoke-CimMethod -ClassName Msps_ProvisioningFileProcessor -Namespace root\msps `
-MethodName PopulateFromFile -Arguments @{FilePath=$pdkFilePath }

# the Key Protector contains the data regarding guarded hosts
# it's mandatory to pass a KeyProtector in order to enable the vtpm
$kp = $pdk.ProvisioningFile.KeyProtector
$vm | Set-VMKeyProtector -KeyProtector $kp

# If during generating the pdk, the Policy was set to Shielded then $isShielded is $True
$vm | Set-VMSecurityPolicy -Shielded $isShielded
$vm | Enable-VMTPM

# The unattended file can contain substitution strings for ComputerName, TimeZone, ProductKey.
# The corresponding values or SpecializationDataPairs must be specified and will be added to a .fsk file
New-ShieldedVMSpecializationDataFile -ShieldedVMSpecializationDataFilePath $fskFilePath `
-SpecializationDataPairs @{"@@ComputerName@@"="MyNewComputer"; `
"@@TimeZone@@"="Pacific Standard Time"}

Initialize-ShieldedVM -ShieldingDataFilePath $pdkFilePath `
-ShieldedVMSpecializationDataFilePath $fskFilePath `
-VirtualMachine $vm


If you check vm’s settings, you’ll see that the vm is shielded. The vm can be migrated on any host, but only the guarded ones will have access to vm’s data.


vm


Happy Shielding!


The post Hyper-V Shielded VMs – Part 1 appeared first on Cloudbase Solutions.


Hyper-V Shielded VMs – Part 2

$
0
0

A Shielded VM is a Hyper-V generation 2 VM that has a virtual TPM, is encrypted using BitLocker and can only run on healthy and approved hosts in the fabric. It is protected from inspection, tampering and theft from malicious fabric admins and host malware, guaranteeing the security of the virtual machines running in an OpenStack environment.


Shielded VMs in OpenStack

In order to create a Shielded VM, a signed template and a PDK file containing VM configuration information are required.
Check here how to create a signed template and generate a PDK file.


1) Provide a reference to a Barbican container containing the PDK file.

PDKUtil stores a PDK file to a Barbican container. Install PDKUtil:

pip install pdkutil

PDKUtil uses Keystone for identity management. Credentials and endpoints must be provided via environment variables or command line parameters in the same way supported by most OpenStack command line interface (CLI) tools, e.g.:

export OS_AUTH_URL=http://example.com:5000/v2.0
export OS_USERNAME=admin
export OS_PASSWORD=password
export OS_TENANT_NAME=admin

Store the specified PDK file into a Barbican container:

pdkutil store /home/ubuntu/shielded_pdk.pdk shielded_pdk_container
+---------------------+--------------------------------------------------------------------+
| Field               |  Value                                                             |
+---------------------+--------------------------------------------------------------------+
| PDK_file            |  /home/ubuntu/shielded_pdk.pdk                                     |
| container_name      |  shielded_pdk_container                                            |
| container_reference |  http://IP:9311/v1/containers/34b0694c-a66c-4383-80aa-dd87448fd746 |
+---------------------+--------------------------------------------------------------------+

The PDK container’s reference is mandatory to be passed as an image property or meta when booting a OpenStack VM.


2) Create a glance image from the signed template.

The signed template will be uploaded to Glance. The shielding data file (PDK file) will assure that the VM will be created in the way the tenant intended. For example, it can’t be used a different VHDX when creating the shielded OpenStack VM, because the shielding data file contains the signatures of the trusted disk that shielded VMs can be created from. Moreover, if shielded option is requested when creating the image, the PDK reference must be of a shielding data file having a security policy set to shielded.


In order to create a shielded OpenStack VM, the image must have the following properties:

  • os_shielded_vms set to required. For adding a vtpm with encryption option enabled, the image must have the os_vtpm_vms property set to required. A shielded vm implies encryption.
  • hw_machine_type set to hyperv-gen2 as vTPM can only be added for Generation 2 VMs.
  • os_secure_boot or os:secure_boot flavor extra spec to required as secure boot must be enforced.
  • img_pdk_reference  containing a reference to a PDK Barbican container. (img_pdk_reference can be passed via nova boot metadata option as well, overriding the image property)

glance image-create --disk-format vhd --container-format bare --name shielded_template  \
--property hw_machine_type=hyperv-gen2 --property hypervisor_version_requires='>=10.0'  \
--property os_type=windows --property os_secure_boot=required \
--property os_shielded_vm=required --property \
img_pdk_reference=" http://IP:9311/v1/containers/b31320ad-ea02-43d1-8a79-bcb509f59e63"  \
--file img/unused_template.vhdx


3) Boot a Shielded VM

An unattended file is used to specialize the shielded instance during the provisioning process. As unattended files are added when creating the shielding data files, they will be used on every VM created using that PDK file. In order not to hard code any VM-specific information into the unattended files, substitution strings can be used in the unattend file to handle specialization values that may change from VM to VM.

When using substitution strings, it is important to ensure that the strings will be populated during the VM provisioning process. The substitution strings corresponding values can be added as metadata boot options.

nova boot --image shielded_template --flavor m1.medium --meta \
img_pdk_reference='http://IP:9311/v1/containers/b31320ad-ea02-43d1-8a79-bcb509f59e63' \
--meta fsk:ComputerName='shieldedvm' --availability-zone nova:guarded \
--nic net-id="adde07f4-6e54-4f8d-b5c9-6955e40d51e0" shieldedvm

That’s all, your shielded VM is getting deployed!

If you prefer to use the Horizon web interface instead of the command line, here’s also a video showing how to perform the same steps.

The post Hyper-V Shielded VMs – Part 2 appeared first on Cloudbase Solutions.

Coriolis v2 – Adding DRaaS to Cloud Migrations

$
0
0


We’re excited to announce that our Coriolis cloud migration project introduced earlier this year just reached a new important milestone. With the addition of new features specifically aimed at business continuity and Disaster Recovery as a Service (DRaaS), Coriolis now offers both one-off migrations as well as constantly up to date replicas of virtual workloads between different clouds.


Business continuity in cloud migrations and DRaaS

Coriolis v2 introduces the concept of migration replicas. A migration replica is a complete copy of one or more virtual machines on a separate cloud environment. For example, VMware virtual machines can be replicated on OpenStack, AWS or Azure. The replica is obtained by copying (replicating) incrementally the virtual machines data from the source environment to the target, without interfering with any running workload. A migration replica can then be finalized by automatically applying the required changes to adapt it to the target environment (migration phase).

Here are the objectives that we set for Coriolis V2:


  • No agent is needed inside the virtual machine itself: the user’s workload is a “black box” which means that Coriolis doesn’t require any guest access or credentials.


  • Guest OS independent: supports Windows, Linux, etc


  • Virtual machines can be either powered on or off when replicating data, the replication must not impact the business continuity.


  • Replica data transfers must be incremental to allow synchronization between source and destination with the minimum amount of network IO.


  • In case of running VMs, the replicated content must retain an application consistent state when available (e.g. VMware snapshot quiescing, VSS app consistency, etc).


  • All operations must be resilient as transient failures are to be expected in the cloud world.


  • Source and target hypervisor technology can differ: e.g. ESXi on a source vSphere, and KVM or Hyper-V on a target OpenStack.


  • In case of unavailability of the source environment (e.g. an unrecoverable failure), the virtual machines must be able to start on the target, retaining data and configurations, allowing a fast recovery.


  • Scalability: any number of replicas can be performed at a given time, limited only by the underlying resource availability, storage or network IO and QoS rules.


  • Testing: replicated VMs can be started anytime on the target environment to perform integration testing of guest operating systems and applications, without impacting the replica process or the source environment.


  • Run anywhere: all Coriolis components can be deployed as virtual, physical or containerized workloads / appliances anywhere, including directly on the source or target cloud.

Coriolis implements all the above requirements by leveraging the available cloud and virtualization technology (e.g. Changed Block Tracking in VMware) and cloud API abstractions (e.g. Cinder Storage Snapshot API in OpenStack) with a scalable and fully automated microservice based architecture.


How can Coriolis migration replicas be created and managed?

Coriolis offers a rich REST API, that can be consumed with our CLI tools, web GUI (coming soon) or any 3rd party tools.
Coriolis identity and authentication are managed via Keystone, which allows a large number of backends including common options like OpenLDAP, Active Directory, Azure Federation, etc.
Source or target cloud credentials can be managed via Barbican, another project originating within the OpenStack ecosystem, for the added security benefits.

ReplicaMigration

Create a new replica

In this example two VMware VMs named “WebServer” and “DBServer” are going to be replicated to OpenStack (on any hypervisor, e.g.: KVM, Hyper-V or ESXi). The following command will create a configuration for the consistent replication of our “WebServer” and “DBServer” instances:

coriolis replica create --origin-provider vmware_vsphere --destination-provider openstack --origin-connection-secret $VMWARE_SECRET_REF --destination-connection-secret $OPENSTACK_SECRET_REF --instance DBServer --instance WebServer --target-environment "$TARGET_ENV"

Credentials for the source or target clouds can be securely stored in Barbican and safely referenced to Coriolis via their href:

barbican secret store -n "vsphere_connection_info" -t "text/plain" -p '{"host": "vsphere.local", "port": 443, "username": "user@vsphere.local", "password": "MyPassword", "allow_untrusted": true}'

barbican secret store -n "openstack_connection_info" -t "text/plain" -p '{"identity_api_version": 3, "username": "demo", "password": "MyPassword", "project_name": "demo", "user_domain_name": "default", "project_domain_name": "default", "auth_url": "http://openstack.local:35357/v3", "allow_untrusted": true}'

Note: if OpenStack credentials are omitted, the same Keystone token used by Coriolis is employed.

Lastly, the “target environment” parameter contains information about how to map virtual resources (such as networks, flavors etc) between source and target environments:

TARGET_ENV='{"network_map": {"VM Network Local": "public", "VM Network": "private"}, "flavor_name": "m1.small"}'

Replica configurations can be easily managed with the following commands:

replica list
replica show
replica create
replica delete


Executing the replica

A replica can be executed at any time, e.g. on a weekly, daily or hourly basis, or even continuously:

coriolis replica execute $REPLICA_ID

The replica execution is fully asynchronous and divided in multiple steps, each of which may be monitored with:

coriolis replica execution show $REPLICA_ID $EXECUTION_ID

During the first execution, a full data replication is performed while subsequent runs involve only the changes that occurred since the previous successful replica execution.

Optionally, you can also automatically shutdown the source VM before the replication starts by adding the “–shutdown-instances” command line option.

The replica process may involve the creation of temporary resources (such as virtual machines and volumes) both on the source and target infrastructures similar to what may be seen in the following replica execution output snippet:

id: b60ea340-da5e-40c7-9d2b-087c86fc952a
task_type: DEPLOY_REPLICA_TARGET_RESOURCES
instance: DBServer
status: COMPLETED
depends_on: b0cbd181-dba9-4908-89f5-1519f15fe3eb
progress_updates:
2016-08-29T08:29:31.000000 Creating migration worker instance keypair
2016-08-29T08:29:32.000000 Creating migration worker instance Neutron port
2016-08-29T08:29:34.000000 Adding migration worker instance floating IP
2016-08-29T08:29:45.000000 Adding migration worker instance security group
2016-08-29T08:29:47.000000 Waiting for connectivity on host: 10.89.13.211:22
2016-08-29T08:30:06.000000 Attaching volume to worker instance

id: bc04e461-ca2d-482e-90c4-70378522dfe7
task_type: REPLICATE_DISKS
instance: DBServer
status: COMPLETED
depends_on: 68674a95-7bb8-40ad-8cbc-d9598237ea91, b60ea340-da5e-40c7-9d2b-087c86fc952a
exception_details:
progress_updates:
2016-08-29T08:30:26.000000 Creating snapshot
2016-08-29T08:30:32.000000 Performing incremental CBT replica for disk: [afsan1] Windows 2012 R2/Disk1.vmdk. Disk size: 14,294,967,296. Changed blocks size: 1,983,040
2016-08-29T08:30:40.000000 Disk [afsan1] Windows 2012 R2/Disk1.vmdk replica progress: 100%
2016-08-29T08:30:48.000000 Removing snapshot

The replication process will perform an app consistent snapshot on the guest OS when available (e.g. VMware quiescing). This ensures that the replicated data is application consistent in case of transactional activities running in the guest OS (e.g. Oracle, MS SQL Server, Exchange Server, etc).


How to start a replicated VM on the target cloud

Here’s where Coriolis truly excels: getting virtual machines to run across a wide range of hypervisors and clouds. Replicating the content of a VM is just a part of the process, getting the machine to actually run on the target cloud also requires actions particular to the underlying target hypervisor and cloud deployment tools. For example, some guest operating systems will require specific synthetic drivers to run in the best possible way on each of the individual hypervisors such KVM, ESXi or Hyper-V, while OpenStack needs cloud-init / cloudbase-init configured for proper guest initialization, Azure the WALinuxAgent, etc. All the required steps are fully automated and transparent for the user.

Once the replication is completed, the source environment becomes redundant thanks to the replica made available on the destination cloud. Thus, in the event of an actual disaster (the source VM became deleted, corrupted, etc), we may quickly bring the system back up on our target cloud with minimal loss to continuity.
The following command will snapshot the migrated disks / volumes and start the migration process asynchronously:

coriolis migration deploy replica $REPLICA_ID

Here’s some sample output:

task_type: CREATE_REPLICA_DISK_SNAPSHOTS
instance: WebServer
status: COMPLETED
depends_on:
exception_details:
progress_updates:
2016-08-28T21:06:30.000000 Creating replica disk snapshots

id: be587123-f01e-4ddc-a9e2-1474d7b6ca4c
task_type: DEPLOY_REPLICA_INSTANCE
instance: WebServer
status: COMPLETED
depends_on: f3bc535b-70b9-43b2-a6bd-0ec6fb9f21c6
exception_details:
progress_updates:
2016-08-28T21:06:39.000000 Creating migration worker instance Neutron port
2016-08-28T21:06:39.000000 Creating migration worker instance keypair
2016-08-28T21:06:41.000000 Adding migration worker instance floating IP
2016-08-28T21:06:53.000000 Adding migration worker instance security group
2016-08-28T21:06:55.000000 Waiting for connectivity on host: 10.89.13.226:22
2016-08-28T21:07:08.000000 Attaching volume to worker instance
2016-08-28T21:07:15.000000 Attaching volume to worker instance
2016-08-28T21:07:21.000000 Preparing instance for target platform
2016-08-28T21:07:21.000000 Connecting to SSH host: 10.89.13.226:22
2016-08-28T21:07:24.000000 Discovering and mounting OS partitions
2016-08-28T21:08:01.000000 OS being migrated: ('CentOS Linux', '7.2.1511')
2016-08-28T21:08:04.000000 Removing packages: ['open-vm-tools', 'hyperv-daemons']
2016-08-28T21:08:07.000000 Adding packages: ['dracut-config-generic', 'cloud-init', 'cloud-utils', 'parted', 'git', 'cloud-utils-growpart']
2016-08-28T21:08:40.000000 Generating initrd for kernel: 3.10.0-327.el7.x86_64
2016-08-28T21:09:43.000000 Dismounting OS partitions
2016-08-28T21:09:45.000000 Removing worker instance resources
2016-08-28T21:09:56.000000 Renaming volumes
2016-08-28T21:09:57.000000 Ensuring volumes are bootable
2016-08-28T21:09:57.000000 Creating Neutron ports for migrated instance
2016-08-28T21:09:59.000000 Creating migrated instance
2016-08-28T21:10:20.000000 Deleting Glance images

id: d4ebd9b7-76a9-46b5-b7c1-fbfed7aa5b99
task_type: DELETE_REPLICA_DISK_SNAPSHOTS
instance: WebServer
status: COMPLETED
depends_on: be587123-f01e-4ddc-a9e2-1474d7b6ca4c
exception_details:
progress_updates:
2016-08-28T21:10:22.000000 Removing replica disk snapshots
Congratulations, your workload has been successfully migrated!


What about testing the replicated workloads?

One important requirement consists in periodically testing the replicated workloads on the destination cloud. This can be easily done with Coriolis, even while the replicated resources on the source environment continue running unaffected. This also opens the way for numerous testing scenarios (e.g. integration / functional / white box / black box) to be performed on the replicated workloads at anytime, reassuring that the workloads will operate as expected and lead to a smooth recovery in the event of an emergency.


What are the supported guest operating systems?

One of the advantages of Coriolis is that the replica is guest OS agnostic, so differences between guest operating systems come only into play when performing the migration. Coriolis supports migrations for all Windows versions (Windows Server 2008, 2008 R2, 2012, 2012 R2, 2016 including Nano Server, Windows 7, 8, 8.1, 10), Ubuntu 12.04 and above, RHEL / CentOS 6.x and 7.x, SUSE SLE 11 and 12, openSUSE, Debian and Fedora. Support for other Linux distributions can also be added on demand.


How can you deploy Coriolis?

Just contact us for pricing and additional info! We are also offering a demo appliance that can be easily deployed on your environment for evaluating Coriolis!


The post Coriolis v2 – Adding DRaaS to Cloud Migrations appeared first on Cloudbase Solutions.

Open vSwitch 2.5 on Hyper-V (VXLAN) – Part 2

$
0
0

OVS VXLAN setup on Hyper-V without OpenStack

In the previous post we explained how to deploy Open vSwitch (OVS) on Hyper-V and integrate it into an OpenStack environment.

In this second part we will explain how to configure manually a VXLAN tunnel between VMs running on Hyper-V and KVM hosts.

KVM OVS configuration

In this example, KVM1 provides a VXLAN tunnel with local endpoint 14.14.14.1:

  • vxlan-0e0e0e02 connected to Hyper-V (14.14.14.2) through br-eth3

ubuntu@ubuntu:~$ sudo ovs-vsctl show
82585eef-349c-4573-8d77-91f9602bb535
    Bridge br-int
        fail_mode: secure
        Port br-int
            Interface br-int
                type: internal
        Port "vm1"
            Interface "vm1"
                type: internal
        Port patch-tun
            Interface patch-tun
                type: patch
                options: {peer=patch-int}
    Bridge "br-eth3"
        Port "eth3"
            Interface "eth3"
        Port "br-eth3"
            Interface "br-eth3"
                type: internal
    Bridge br-tun
        fail_mode: secure
        Port patch-int
            Interface patch-int
                type: patch
                options: {peer=patch-tun}
        Port "vxlan-0e0e0e02"
            Interface "vxlan-0e0e0e02"
                type: vxlan
                options: {df_default="true", in_key=flow, local_ip="14.14.14.1", out_key=flow, remote_ip="14.14.14.2"}
        Port br-tun
            Interface br-tun
                type: internal
    ovs_version: "2.5.1"
ububtu@ubuntu:~$ ifconfig eth3
eth3      Link encap:Ethernet  HWaddr 00:0c:29:25:db:8c  
          inet6 addr: fe80::20c:29ff:fe25:db8c/64 Scope:Link
          UP BROADCAST RUNNING MULTICAST  MTU:1500  Metric:1
          RX packets:40051 errors:0 dropped:0 overruns:0 frame:0
          TX packets:51087 errors:0 dropped:0 overruns:0 carrier:0
          collisions:0 txqueuelen:1000
          RX bytes:6907123 (6.9 MB)  TX bytes:81805610 (81.8 MB)
ubuntu@ubuntu:~$ ifconfig br-eth3
br-eth3   Link encap:Ethernet  HWaddr 00:0c:29:25:db:8c  
          inet addr:14.14.14.1  Bcast:14.14.14.255  Mask:255.255.255.0
          inet6 addr: fe80::d413:1fff:fe62:cdd8/64 Scope:Link
          UP BROADCAST RUNNING  MTU:1500  Metric:1
          RX packets:1377 errors:0 dropped:0 overruns:0 frame:0
          TX packets:1573 errors:0 dropped:0 overruns:0 carrier:0
          collisions:0 txqueuelen:0
          RX bytes:315330 (315.3 KB)  TX bytes:283030 (283.0 KB)
ubuntu@@ubuntu:~$ ifconfig vm1
vm1       Link encap:Ethernet  HWaddr 6a:d6:1b:77:2d:95  
          inet addr:10.0.0.1  Bcast:10.0.0.255  Mask:255.255.255.0
          inet6 addr: fe80::68d6:1bff:fe77:2d95/64 Scope:Link
          UP BROADCAST RUNNING  MTU:1450  Metric:1
          RX packets:506 errors:0 dropped:0 overruns:0 frame:0
          TX packets:768 errors:0 dropped:0 overruns:0 carrier:0
          collisions:0 txqueuelen:0
          RX bytes:39788 (39.7 KB)  TX bytes:61932 (61.9 KB)

Please note the MTU value on vm1 is set to 1450.

Hyper-V OVS configuration

Let us presume that you have a Hyper-V Virtual Switch of type external bound to the interface port1 called vSwitch.

The following commands will: create an IP-able device called br-port1, add the physical NIC to the bridge called br-port1, enable the device named br-port1, set the IP 14.14.14.2 to br-port1, add a bridge br-int in which we shall add the VMs later on, and will create another bridge with the tunneling information on the port vxlan-1.

ovs-vsctl.exe add-br br-port1
ovs-vsctl.exe add-port br-port1 port1
Enable-NetAdapter br-port1
New-NetIpAddress -IpAddress 14.14.14.2 -PrefixLength 24 -InterfaceAlias br-port1
ovs-vsctl.exe add-br br-int
ovs-vsctl.exe add-port br-int patch-tun -- set interface patch-tun type=patch options:peer=patch-int
ovs-vsctl.exe add-br br-tun
ovs-vsctl.exe add-port br-tun patch-int -- set interface patch-int type=patch options:peer=patch-tun
ovs-vsctl.exe add-port br-tun vxlan-1 -- set interface vxlan-1 type=vxlan options:local_ip=14.14.14.2 options:remote_ip=14.14.14.1 options:in_key=flow options:out_key=flow

As you can see, all the commands are very familiar if you are used to OVS on Linux.

As introduced before, the main area where the Hyper-V implementation differs from its Linux counterpart is in how virtual machines are attached to a given OVS port. This is easily accomplished by using the Set-VMNetworkAdapterOVSPort PowerShell cmdlet provided with the installer (please refer to part 1 for details on installing OVS).

Let us say that we have a Hyper-V virtual machine called “instance-00000003” and that we want to connect it to the Hyper-V OVS switch. All we have to do for each VM network adapter is to connect it to the Hyper-V Virtual Switch named vSwitch as you would normally do, assign it to a given OVS port and create the corresponding ports in OVS:

$vnic = Get-VMNetworkAdapter instance-00000003
Connect-VMNetworkAdapter -VMNetworkAdapter $vnic -SwitchName vSwitch
$vnic | Set-VMNetworkAdapterOVSPort -OVSPortName vm2
ovs-vsctl.exe add-port br-int vm2

Here is how the resulting OVS configuration looks like on Hyper-V:

PS C:\> ovs-vsctl.exe show
a81a54fc-0a3c-4152-9a0d-f3cbf4abc3ca
    Bridge br-tun
        Port br-tun
            Interface br-tun
                type: internal
        Port "vxlan-1"
            Interface "vxlan-1"
                type: vxlan
                options: {in_key=flow, local_ip="14.14.14.2", out_key=flow, remote_ip="14.14.14.1"}
        Port patch-int
            Interface patch-int
                type: patch
                options: {peer=patch-tun}
    Bridge br-int
        Port patch-tun
            Interface patch-tun
                type: patch
                options: {peer=patch-int}
        Port "vm2"
            Interface "vm2"
        Port br-int
            Interface br-int
                type: internal
    Bridge "br-port1"
        Port "port1"
            Interface "port1"
        Port "br-port1"
            Interface "br-port1"
                type: internal

Further control can be accomplished by applying flow rules.

OVS based networking is now fully functional between KVM and Hyper-V hosted virtual machines!

The post Open vSwitch 2.5 on Hyper-V (VXLAN) – Part 2 appeared first on Cloudbase Solutions.

Open vSwitch 2.5 on Hyper-V (GRE) – Part 3

$
0
0

OVS GRE setup on Hyper-V without OpenStack

In this post we will explain how to configure manually a Open vSwitch GRE tunnel between VMs running on Hyper-V and KVM hosts.

KVM OVS configuration

In this example, KVM1 provides a GRE tunnel with local endpoint 14.14.14.1:

  • gre-1 connected to Hyper-V (14.14.14.2) through br-eth3

ubuntu@ubuntu:~$ sudo ovs-vsctl show
82585eef-349c-4573-8d77-91f9602bb535
    Bridge br-int
        fail_mode: secure
        Port br-int
            Interface br-int
                type: internal
        Port "vm1"
            Interface "vm1"
                type: internal
        Port patch-tun
            Interface patch-tun
                type: patch
                options: {peer=patch-int}
    Bridge "br-eth3"
        Port "eth3"
            Interface "eth3"
        Port "br-eth3"
            Interface "br-eth3"
                type: internal
    Bridge br-tun
        fail_mode: secure
        Port patch-int
            Interface patch-int
                type: patch
                options: {peer=patch-tun}
        Port "gre-1"
            Interface "gre-1"
                type: gre
                options: {in_key=flow, local_ip="14.14.14.2", out_key=flow, remote_ip="14.14.14.1"}
        Port br-tun
            Interface br-tun
                type: internal
ububtu@ubuntu:~$ ifconfig eth3
eth3      Link encap:Ethernet  HWaddr 00:0c:29:25:db:8c  
          inet6 addr: fe80::20c:29ff:fe25:db8c/64 Scope:Link
          UP BROADCAST RUNNING MULTICAST  MTU:1500  Metric:1
          RX packets:40051 errors:0 dropped:0 overruns:0 frame:0
          TX packets:51087 errors:0 dropped:0 overruns:0 carrier:0
          collisions:0 txqueuelen:1000
          RX bytes:6907123 (6.9 MB)  TX bytes:81805610 (81.8 MB)
ubuntu@ubuntu:~$ ifconfig br-eth3
br-eth3   Link encap:Ethernet  HWaddr 00:0c:29:25:db:8c  
          inet addr:14.14.14.1  Bcast:14.14.14.255  Mask:255.255.255.0
          inet6 addr: fe80::d413:1fff:fe62:cdd8/64 Scope:Link
          UP BROADCAST RUNNING  MTU:1500  Metric:1
          RX packets:1377 errors:0 dropped:0 overruns:0 frame:0
          TX packets:1573 errors:0 dropped:0 overruns:0 carrier:0
          collisions:0 txqueuelen:0
          RX bytes:315330 (315.3 KB)  TX bytes:283030 (283.0 KB)
ubuntu@@ubuntu:~$ ifconfig vm1
vm1       Link encap:Ethernet  HWaddr 6a:d6:1b:77:2d:95  
          inet addr:10.0.0.1  Bcast:10.0.0.255  Mask:255.255.255.0
          inet6 addr: fe80::68d6:1bff:fe77:2d95/64 Scope:Link
          UP BROADCAST RUNNING  MTU:1472  Metric:1
          RX packets:506 errors:0 dropped:0 overruns:0 frame:0
          TX packets:768 errors:0 dropped:0 overruns:0 carrier:0
          collisions:0 txqueuelen:0
          RX bytes:39788 (39.7 KB)  TX bytes:61932 (61.9 KB)

Please note the MTU value on vm1 is set to 1472.

Hyper-V OVS configuration

Let us assume that you have a Hyper-V Virtual Switch of type external bound to the interface port1 called vSwitch.

The following commands will: create an IP-able device called br-port1, add the physical NIC to the bridge called br-port1, enable the device named br-port1, set the IP 14.14.14.2 to br-port1, add a bridge br-int in which we shall add the VMs later on, and will create another bridge with the tunneling information on the port gre-1.

ovs-vsctl.exe add-br br-port1
ovs-vsctl.exe add-port br-port1 port1
Enable-NetAdapter br-port1
New-NetIpAddress -IpAddress 14.14.14.2 -PrefixLength 24 -InterfaceAlias br-port1
ovs-vsctl.exe add-br br-int
ovs-vsctl.exe add-port br-int patch-tun -- set interface patch-tun type=patch options:peer=patch-int
ovs-vsctl.exe add-br br-tun
ovs-vsctl.exe add-port br-tun patch-int -- set interface patch-int type=patch options:peer=patch-tun
ovs-vsctl.exe add-port br-tun gre-1 -- set interface gre-1 type=gre options:local_ip=14.14.14.2 options:remote_ip=14.14.14.1 options:in_key=flow options:out_key=flow

As you can see, all the commands are very familiar if you are used to OVS on Linux.

As introduced before, the main area where the Hyper-V implementation differs from its Linux counterpart is in how virtual machines are attached to a given OVS port. This is easily accomplished by using the Set-VMNetworkAdapterOVSPort PowerShell cmdlet provided with the installer (please refer to part1 for details on installing OVS).

Let us say that we have a Hyper-V virtual machine called “instance-00000003” and that we want to connect it to the Hyper-V OVS switch. All we have to do for each VM network adapter is to connect it to the Hyper-V Virtual Switch named vSwitch as you would normally do, assign it to a given OVS port and create the corresponding ports in OVS:

$vnic = Get-VMNetworkAdapter instance-00000003
Connect-VMNetworkAdapter -VMNetworkAdapter $vnic -SwitchName vSwitch
$vnic | Set-VMNetworkAdapterOVSPort -OVSPortName vm2
ovs-vsctl.exe add-port br-int vm2

Here is how the resulting OVS configuration looks like on Hyper-V:

a81a54fc-0a3c-4152-9a0d-f3cbf4abc3ca
    Bridge br-int
        Port "vm2"
            Interface "vm2"
        Port patch-tun
            Interface patch-tun
                type: patch
                options: {peer=patch-int}
        Port br-int
            Interface br-int
                type: internal
    Bridge br-tun
        Port "gre-1"
            Interface "gre-1"
                type: gre
                options: {in_key=flow, local_ip="14.14.14.2", out_key=flow, remote_ip="14.14.14.1"}
        Port patch-int
            Interface patch-int
                type: patch
                options: {peer=patch-tun}
        Port br-tun
            Interface br-tun
                type: internal
    Bridge "br-port1"
        Port "port1"
            Interface "port1"
        Port "br-port1"
            Interface "br-port1"
                type: internal

Further control can be accomplished by applying flow rules.

OVS based networking is now fully functional between KVM and Hyper-V hosted virtual machines!

P.S.: Don’t forget to check out part 1 (OpenStack) and part 2 (VXLAN) of this series if you missed them!

The post Open vSwitch 2.5 on Hyper-V (GRE) – Part 3 appeared first on Cloudbase Solutions.
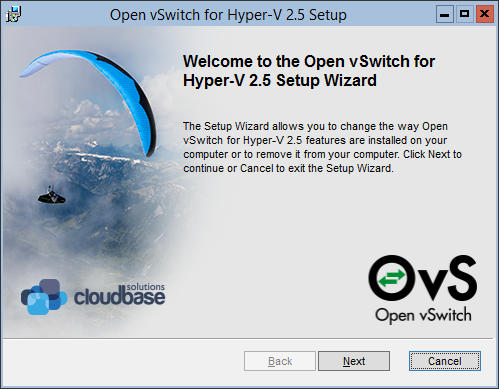
Open vSwitch 2.5 on Hyper-V (STT) – Part 4

$
0
0

OVS STT setup on Hyper-V without OpenStack

In this post we will explain how to configure manually a Open vSwitch STT tunnel between VMs running on Hyper-V and KVM hosts.

KVM OVS configuration

In this example, KVM1 provides a STT tunnel with local endpoint 14.14.14.1:

  • stt-1 connected to Hyper-V (14.14.14.2) through br-eth3

ubuntu@ubuntu:~$ sudo ovs-vsctl show
82585eef-349c-4573-8d77-91f9602bb535
    Bridge br-int
        fail_mode: secure
        Port br-int
            Interface br-int
                type: internal
        Port "vm1"
            Interface "vm1"
                type: internal
        Port patch-tun
            Interface patch-tun
                type: patch
                options: {peer=patch-int}
    Bridge "br-eth3"
        Port "eth3"
            Interface "eth3"
        Port "br-eth3"
            Interface "br-eth3"
                type: internal
    Bridge br-tun
        fail_mode: secure
        Port "stt-1"
            Interface "stt-1"
                type: stt
                options: {in_key=flow, local_ip="14.14.14.1", out_key=flow, remote_ip="14.14.14.2"}
        Port patch-int
            Interface patch-int
                type: patch
                options: {peer=patch-tun}
        Port br-tun
            Interface br-tun
                type: internal
ububtu@ubuntu:~$ ifconfig eth3
eth3      Link encap:Ethernet  HWaddr 00:0c:29:25:db:8c  
          inet6 addr: fe80::20c:29ff:fe25:db8c/64 Scope:Link
          UP BROADCAST RUNNING MULTICAST  MTU:1500  Metric:1
          RX packets:40051 errors:0 dropped:0 overruns:0 frame:0
          TX packets:51087 errors:0 dropped:0 overruns:0 carrier:0
          collisions:0 txqueuelen:1000
          RX bytes:6907123 (6.9 MB)  TX bytes:81805610 (81.8 MB)
ubuntu@ubuntu:~$ ifconfig br-eth3
br-eth3   Link encap:Ethernet  HWaddr 00:0c:29:25:db:8c  
          inet addr:14.14.14.1  Bcast:14.14.14.255  Mask:255.255.255.0
          inet6 addr: fe80::d413:1fff:fe62:cdd8/64 Scope:Link
          UP BROADCAST RUNNING  MTU:1500  Metric:1
          RX packets:1377 errors:0 dropped:0 overruns:0 frame:0
          TX packets:1573 errors:0 dropped:0 overruns:0 carrier:0
          collisions:0 txqueuelen:0
          RX bytes:315330 (315.3 KB)  TX bytes:283030 (283.0 KB)
ubuntu@@ubuntu:~$ ifconfig vm1
vm1       Link encap:Ethernet  HWaddr 6a:d6:1b:77:2d:95  
          inet addr:10.0.0.1  Bcast:10.0.0.255  Mask:255.255.255.0
          inet6 addr: fe80::68d6:1bff:fe77:2d95/64 Scope:Link
          UP BROADCAST RUNNING  MTU:1420  Metric:1
          RX packets:506 errors:0 dropped:0 overruns:0 frame:0
          TX packets:768 errors:0 dropped:0 overruns:0 carrier:0
          collisions:0 txqueuelen:0
          RX bytes:39788 (39.7 KB)  TX bytes:61932 (61.9 KB)

Please note the MTU value on vm1 is set to 1420.

Hyper-V OVS configuration

Let us assume that you have a Hyper-V Virtual Switch of type external bound to the interface port1 called vSwitch.

The following commands will: create an IP-able device called br-port1, add the physical NIC to the bridge called br-port1, enable the device named br-port1, set the IP 14.14.14.2 to br-port1, add a bridge br-int in which we shall add the VMs later on, and will create another bridge with the tunneling information on the port stt-1.

ovs-vsctl.exe add-br br-port1
ovs-vsctl.exe add-port br-port1 port1
Enable-NetAdapter br-port1
New-NetIpAddress -IpAddress 14.14.14.2 -PrefixLength 24 -InterfaceAlias br-port1
ovs-vsctl.exe add-br br-int
ovs-vsctl.exe add-port br-int patch-tun -- set interface patch-tun type=patch options:peer=patch-int
ovs-vsctl.exe add-br br-tun
ovs-vsctl.exe add-port br-tun patch-int -- set interface patch-int type=patch options:peer=patch-tun
ovs-vsctl.exe add-port br-tun stt-1 -- set interface stt-1 type=stt options:local_ip=14.14.14.2 options:remote_ip=14.14.14.1 options:in_key=flow options:out_key=flow

As you can see, all the commands are very familiar if you are used to OVS on Linux.

As introduced before, the main area where the Hyper-V implementation differs from its Linux counterpart is in how virtual machines are attached to a given OVS port. This is easily accomplished by using the Set-VMNetworkAdapterOVSPort PowerShell cmdlet provided with the installer (please refer to part1 for details on installing OVS).

Let us say that we have a Hyper-V virtual machine called “instance-00000003” and that we want to connect it to the Hyper-V OVS switch. All we have to do for each VM network adapter is to connect it to the Hyper-V Virtual Switch named vSwitch as you would normally do, assign it to a given OVS port and create the corresponding ports in OVS:

$vnic = Get-VMNetworkAdapter instance-00000003
Connect-VMNetworkAdapter -VMNetworkAdapter $vnic -SwitchName vSwitch
$vnic | Set-VMNetworkAdapterOVSPort -OVSPortName vm2
ovs-vsctl.exe add-port br-int vm2

Here is how the resulting OVS configuration looks like on Hyper-V:

PS C:\> ovs-vsctl.exe show
a81a54fc-0a3c-4152-9a0d-f3cbf4abc3ca
    Bridge br-int
        Port "vm2"
            Interface "vm2"
        Port patch-tun
            Interface patch-tun
                type: patch
                options: {peer=patch-int}
        Port br-int
            Interface br-int
                type: internal
    Bridge br-tun
        Port "stt-1"
            Interface "stt-1"
                type: stt
                options: {in_key=flow, local_ip="14.14.14.2", out_key=flow, remote_ip="14.14.14.1"}
        Port patch-int
            Interface patch-int
                type: patch
                options: {peer=patch-tun}
        Port br-tun
            Interface br-tun
                type: internal
    Bridge "br-port1"
        Port "port1"
            Interface "port1"
        Port "br-port1"
            Interface "br-port1"
                type: internal

Further control can be accomplished by applying flow rules.

OVS based networking is now fully functional between KVM and Hyper-V hosted virtual machines!

P.S.: Don’t forget to check out part 1 (OpenStack)part 2 (VXLAN) and part 3 (GRE) of this series if you missed them!

The post Open vSwitch 2.5 on Hyper-V (STT) – Part 4 appeared first on Cloudbase Solutions.
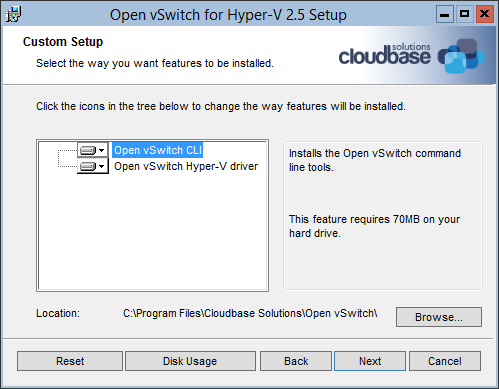
Azure Service Fabric on OpenStack

$
0
0

Azure Service Fabric is a distributed systems platform that makes it easy to package, deploy, and manage scalable and reliable microservices. It can be deployed on Azure, but also on-premise, thus making OpenStack a great choice for the latter.

We are going to use Juju to deploy our Azure Service Fabric cluster directly on OpenStack with Active Directory for authentication / authorization and HAProxy to do a reverse proxy for the GUI and API endpoints across the cluster.

Deployment steps

Before anything else, make sure the following prerequisites are available in your OpenStack environment:

  • Make sure OpenStack images for both Windows Server 2012 R2 or 2016 and Ubuntu Xenial are available in Glance. Any OpenStack supported hypervisor works, including Hyper-V, KVM and ESXi. Bare Metal (Ironic) works as well.
  • Create a Neutron private network connected with a router to a public network that has two unallocated floating IPs available for the deployment.
  • Set up the Nova flavors to be used by Juju in order to boot the instances, see here for more details.

Once all the prerequisites are met, install the Juju binaries by executing the following commands on a Ubuntu Xenial machine that has access to the OpenStack cloud API:

sudo add-apt-repository ppa:juju/stable --y
sudo apt-get update
sudo apt-get install juju-2.0 -y

After Juju is installed, you need to add your OpenStack cloud API endpoint details. First of all, create a yaml file with the following structure:

clouds:
  openstack:
    type: openstack
    auth-types: [userpass]
    regions:
      RegionOne:
        endpoint: '<keystone_auth_url>'

credentials:
  openstack:
    default-region: RegionOne
    default-credential: openstack_user
    openstack_user:
      auth-type: userpass
      username: '<keystone_user>'
      password: '<keystone_password>'
      tenant-name: '<keystone_tenant_name>'
      domain-name: default

Now, execute the following commands to let Juju know about your cloud:

juju add-cloud openstack <path_to_yaml_file>
juju add-credential openstack -f <path_to_yaml_file>

Generate Juju simplestreams metadata:

KEYSTONE_ENDPOINT="<keystone_auth_url>"
WIN2012R2_UUID="<win2012r2_glance_image_uuid>"
XENIAL_UUID="<xenial_glance_image_uuid>"

juju metadata generate-image -a amd64 -i $WIN2012R2_UUID -s win2012r2 -d $HOME \
                             -u $KEYSTONE_ENDPOINT -r RegionOne
juju metadata generate-image -a amd64 -i $XENIAL_UUID -s xenial -d $HOME \
                             -u $KEYSTONE_ENDPOINT -r RegionOne

Now, you are ready to create a Juju controller instance on OpenStack (this will also allocate and associate the first floating IP):

juju bootstrap openstack openstack \
               --constraints "mem=2G" --metadata-source=$HOME \
               --config agent-metadata-url=https://streams.canonical.com/juju/tools/ \
               --config default-series=xenial \
               --config network=<private_network_name> \
               --config use-floating-ip=true
juju model-config use-floating-ip=false

We are now going to use Juju charms to deploy and configure a three node Azure Service Fabric cluster with Active Directory (AD) node-to-node and client-to-node security. On top of this we will add HAProxy to load-balance requests for the GUI and API endpoints of the Azure Service Fabric cluster.

In this scenario, we deploy charms for the following services: Azure Service Fabric, Active Directory and HAProxy.

The Azure Service Fabric charm needs the following resources in order to be deployed. Those need to be downloaded on your Juju client machine before starting the actual deployment:

Once you have your Juju resources ready, the following commands will do the magic and take care of the entire deployment:

juju deploy cs:~cloudbaseit/azure-service-fabric \
            --num-units 3 --series win2012r2 --constraints "mem=3G" \
            --resource dotnet-installer="<dot_net_framework_installer_path>" \
            --resource asf-zip-package="<service_fabric_zip_package_path>"
juju config azure-service-fabric security-type=Windows \
                                 change-hostname=True

juju deploy cs:~cloudbaseit/active-directory \
            --series win2012r2 --constraints "mem=3G"
juju config active-directory administrator-password="Passw0rd" \
                             safe-mode-password="Passw0rd" \
                             domain-user="jujuadmin" \
                             domain-user-password="Passw0rd" \
                             domain-name="cloudbase.local" \
                             change-hostname=True

juju deploy cs:haproxy --series xenial --constraints "mem=2G"
juju expose haproxy

juju add-relation azure-service-fabric active-directory
juju add-relation azure-service-fabric haproxy

You can monitor the deployment progress:

watch juju status

This is how the deployment looks like in the Juju GUI:

asf_juju_gui

After the deployment finishes, allocate and assign the second floating IP to the HAProxy instance by executing the following commands:

JUJU_MACHINE_ID=$(juju status | grep haproxy/0 | awk '{print $4}')
FLOATING_IP=$(neutron floatingip-create '<public_network_name>' | \
              grep floating_ip_address | awk '{print $4}')
NOVA_MACHINE_ID=$(nova list | egrep "juju-.+-default-$JUJU_MACHINE_ID" | awk '{print $2}')
nova floating-ip-associate $NOVA_MACHINE_ID $FLOATING_IP
echo "Associated floating IP $FLOATING_IP to HAProxy instance"

Given the HAProxy public address, you may then:

  • Query the API at the following endpoint: <haproxy_floating_ip>:19000
  • Access the Service Fabric dashboard at the the following URL: http://<haproxy_floating_ip>:19080
  • Access any deployed application endpoint via Service Fabric reverse proxy at the following URL: http://<haproxy_floating_ip>:19081/<service_instance_name>/. More details about this here.

One of the following two Active Directory domain user credentials are required to gain access to either the GUI or the API endpoints of the Azure Service Fabric cluster. The AD users have been requested by the Service Fabric charm from Active Directory during the deployment process, one (asf-admin) having full cluster administrative privileges, the other (asf-user) being just a normal user with read-only access to the cluster.

Passwords for these domain users are randomly generated by the AD charm. You can find their passwords by running the get-ad-user-credentials Juju action:

UNIT="azure-service-fabric/0"
ACTION_ID=$(juju run-action $UNIT get-ad-user-credentials | awk '{print $5}')
juju show-action-output $ACTION_ID

This is how the Service Fabric Explorer dashboard looks like after you login:

asf_dashboard

If at any point in time you decide to scale-up your cluster, you can add one or more nodes to it by simply typing the following command:

juju add-unit --num-units 2 azure-service-fabric

Juju will spawn more instances on OpenStack, do the proper installation / configuration and join them to the existing Service Fabric cluster.

Deploy applications from Visual Studio

In order to be able to publish applications from Visual Studio directly on your Service Fabric cluster, you need to install the Service Fabric runtime, SDK and tools for Visual Studio.

Before you start publishing applications, you need to make sure that you can successfully create a connection to the Service Fabric cluster. Since the client-to-cluster communication uses WindowsCredential Active Directory authentication, you will need to make sure you have the domain credential stored before trying to publish an application from Visual Studio. We will use the Cmdkey tool to store the Service Fabric cluster administrator credential in PowerShell:

cmdkey.exe /add:<haproxy_floating_ip> `
           /user:"<ad_domain>\asf-admin" /pass:"<asf_admin_password>"

The <haproxy_floating_ip>, as well as both the <ad_domain> and the <asf_admin_password> are the ones obtained in the previous steps. To test if you can successfully connect to the cluster, you can execute the following PowerShell cmdlet:

Connect-ServiceFabricCluster -ConnectionEndpoint <haproxy_floating_ip>:19000 `
                             -WindowsCredential

This will return True and give you some information about the currently established session to the cluster.

Once you have validated that you can connect to the Service Fabric cluster, you can start publishing applications. For a quick demonstration, start Visual Studio, go to File -> New -> Project and create a Service Fabric Application using the Stateful Service template:

vs_1

vs_2

vs_3

After the application is created, right click on it from the solution explorer and click Publish:

vs_4

Specify the correct connection endpoint, expand Advanced Connection Parameters and set WindowsCredential to True. You should see a green check-mark near the connection endpoint box indicating that a successful connection to the cluster was made:

vs_5

Now you are ready to publish the application by hitting the Publish button. In a few seconds the application should have been successfully published, which you can see either in the Visual Studio console or by checking the Service Fabric dashboard:

vs_6

vs_7

Notes:

  • If you get any errors when trying to publish the application from Visual Studio, make sure you target the .NET framework version you have previously installed on your cluster nodes.
  • If any application deployed on the Service Fabric cluster is using TCP ports not present in the port range defined in the charm config, new Windows firewall rules need to be defined on the cluster nodes. This can easily be done via the Juju client for the entire cluster at once:
    juju run --application azure-service-fabric './hooks/open-windows-firewall-ports.ps1'


What’s next?

Stay tuned for learning how to move your Service Fabric applications between on-premise OpenStack and Azure public cloud!

The post Azure Service Fabric on OpenStack appeared first on Cloudbase Solutions.
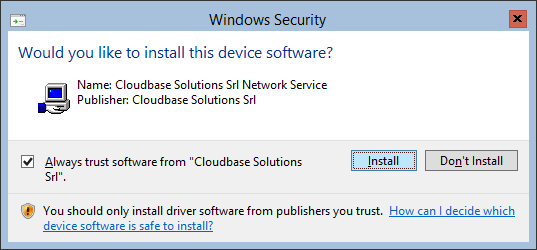
OpenStack – KVM vs Hyper-V – Part 1

$
0
0

OpenStack Newton has been recently released. During this cycle we did quite some work on increasing the performance and overall reliability of our Windows and Hyper-V OpenStack compute drivers.


This is the first post in a series where we are going to share some of our Hyper-V vs KVM benchmarking results for this OpenStack release, get ready to be surprised!


To begin with, here’s our setup:

  • Controller node, Ubuntu 16.04.1 LTS (default kernel version 4.4.0-45-generic)
  • KVM Compute node, Ubuntu 16.04.1 LTS (default kernel version 4.4.0-45-generic)
  • Hyper-V Compute node, Windows Server 2012 R2
  • Hyper-V Compute node, Windows Server 2016


Hardware Specs (all nodes are identical)
Processor Intel(R) Xeon(R) CPU E5-2650 @ 2.00GHz
Installed memory (RAM) 128 GB
Network cards Chelsio Communications Inc T420-CR 10 Gigabit Ethernet
Storage Intel SSDSC2BA200G3T 200GB SATA Solid State Drive


All the nodes have plain vanilla OS installs with the latest updates.

The Linux hosts have been deployed using DevStack. Here you can find more details about the deployment and configuration.

The Hyper-V compute nodes include the Hyper-V Compute driver.


Configuration

A set of basic steps have been taken to improve performance on both types of hypervisors.

For the KVM Compute node, we followed the official documentation:

In /etc/nova/nova.conf the “cpu_mode” was modified to “host-passthrough”, as follows:

[libvirt]

cpu_mode = host-passthrough


The VHostNet kernel module improves network performance:

modprobe vhost_net


For the Hyper-V Compute nodes, the active power option scheme has been set to “High Performance“:

powercfg.exe /setactive 8c5e7fda-e8bf-4a96-9a85-a6e23a8c635c

Note: in our results, changing the power option scheme brought roughly a 10-15% performance boost.


Rally

We used Rally as a benchmarking tool for the OpenStack deployment, installed on the Controller node.

Our Rally scenarios can be found here. To begin with, just download and run this script, it will install Rally in the “~/rally” virtualenv:

./install_rally.sh –url https://github.com/cloudbase/rally –branch blogpost


If everything ends successfully, a short green message should appear saying how to activate the Rally virtual environment:

source ~/rally/bin/activate


First, you have to provide the details about the OpenStack deployment that you are going to benchmark. A simple way to register an existing deployment in Rally is through the deployment configuration files.

Put your cloud access data into a JSON configuration file (for existing OpenStack deployments we can use “existing.json”) and run the following command to register the deployment in Rally:

rally deployment create –file=existing.json –name=existing


Rally should now be able to list all the images/flavors/networks etc. from the OpenStack deployment:

rally show images

rally show flavors

rally show networks


To run a benchmark test, you need a task configuration file. You can find here the JSON files that we are going to use. Here’s how to start the execution of a task:

rally task start –task boot_and_delete.json –task-args '{"image": "cirros-vhdx", "flavor_name": "m1.tiny"}'


Thanks for reading this first post in our KVM vs Hyper-V series! To add some suspense, benchmarking results will be published in the next entries, starting with part 2!

The post OpenStack – KVM vs Hyper-V – Part 1 appeared first on Cloudbase Solutions.


OpenStack – KVM vs Hyper-V – Part 2

$
0
0

In the previous part of this OpenStack KVM vs Hyper-V compute benchmarking series we talked about how to setup the testing environment and how to run some scenarios. Time for some results!


Scenario 1


To begin with, we started with a basic KVM vs Hyper-V scenario:

  • Ask Nova to boot a VM
  • Wait until Nova reports the VM as active
  • Ask Nova to delete the VM

Results become especially interesting when looking for bottlenecks in the infrastructure, so the following results were obtained by running the test with 50 VMs in parallel on a single node with a total of 200 VM.

  1. Results for KVM running on Xenial Ubuntu 16.04.1 LTS (default kernel version 4.4.0-45-generic): kvm-1
  2. Results for Hyper-V / Windows Server 2012 R2:hyperv-2012r2-1
  3. Results for Hyper-V / Windows Server 2016:hyperv-2016-1

Conclusions

Each iteration sequence number corresponds to one Rally scenario execution. We can see a few spikes in the graph for Hyper-V Compute with Windows Server 2012 R2. Those are due to a minor bottleneck on Windows Server 2012 R2, which is no longer present in Windows Server 2016.

On average in this scenario, KVM is ~32% slower than Hyper-V on Windows Server 2016, but ~18% faster than Hyper-V on Windows Server 2012 R2.

Not only is Hyper-V on Windows Server 2016 faster than Hyper-V on Windows Server 2012 R2, but it’s also significantly faster than KVM!

Ready for more scenarios? part 3 is going to be available soon!

The post OpenStack – KVM vs Hyper-V – Part 2 appeared first on Cloudbase Solutions.

OpenStack Newton Benchmarking – Scenario 2

$
0
0

We talked about setting up the environment for benchmarking and we have seen in the previous part a simple OpenStack scenario. In this part we are going to continue by adding more complexity to the use case being tested.


Scenario 2

br>
In the second scenario a few intermediate steps have been added to increase the complexity of the scenario test. The steps now are:

  • nova boot VM
  • wait until nova reports VM as active
  • nova associate floating IP to the VM
  • wait until a SSH connection is available to the VM
  • nova delete floating IP
  • nova delete VM

The following results have been obtained by running the test with 50 VMs in parallel on a single hypervisor and with a total of 200 VM.

  1. Results for KVM with Xenial Ubuntu 16.04.1 LTS (default kernel version 4.4.0-45-generic) as host operating system:
    kvm-2
  2. Results for Hyper-V with Windows Server 2012 R2 as host operating system:
    hyperv-2012r2-2
  3. Results for Hyper-V with Windows Server 2016 as host operating system:
    hyperv-2016-2

Remarks for the second scenario: as explained before, each iteration sequence number corresponds to one run, where the steps are described at the beginning of this post.

On average KVM is ~30% slower than Hyper-V on Windows Server 2012 R2 and almost 42% slower than Hyper-V on Windows Server 2016.

The difference is pretty small between each Windows version with Windows Server 2016 being slightly faster. We recommend anyway the latter, since it includes a lot of new features.

The post OpenStack Newton Benchmarking – Scenario 2 appeared first on Cloudbase Solutions.

OpenStack Newton Benchmarking – Scenario 3 (Hadoop)

$
0
0

We have seen how to setup the benchmarking environment and two simple scenarios (Scenario 1, Scenario 2) in the previous blogposts of this series. This time we are going to add Hadoop to the mix to test a workload with significant memory, CPU and I/O impact.


Scenario 3


The image used for this test is an Ubuntu Xenial 16.04.1 LTS (cloud image), which is available for download here. Hadoop has been configured to run in standalone mode (Single Node Cluster), with commands being sent via SSH from Rally over a tenant network. The official documentation on how to setup an Apache Hadoop Cluster 2.7.2 (latest stable version) can be found here.


This test consists of:

  • booting a VM from an image where Hadoop is already installed and configured. The flavor being used for each VM has 4096MB RAM, 40GB disk and 2 vCPUs.
  • waiting until the VM becomes active and is ready to process Hadoop jobs
  • executing three different Hadoop jobs:
    • TeraGen -> a map/reduce program to generate the data
    • TeraSort -> samples the input data generated by TeraGen and uses map/reduce to sort the data
    • TeraValidate -> a map/reduce program that validates if the output from TeraGen is properly sorted
  • deleting the VM


Part 1 – One VM in parallel


For the beginning, we started with one VM and the size of the input data for TeraGen set to 10.000.000 (number of 100-byte rows).

  1. Results for KVM with Xenial Ubuntu 16.04.1 LTS (default kernel version 4.4.0-45-generic) as host operating system:
    kvm-3-1

  2. Results for Hyper-V with Windows Server 2012 R2 as host operating system:
    hyperv-2012r2-3-1
  3. Results for Hyper-V with Windows Server 2016 as host operating system:
    hyperv-2016-3-1

Remarks for the results obtained so far: the average time is approximately the same in case of Hyper-V, with KVM being slightly slower than Hyper-V.


Part 2 – 10 VMs in paralellel


The following results have been obtained by running the tests with a load of 10 VMs in parallel.

The size of the input data for TeraGen is still set at 10.000.000 (number of 100-byte rows):

  1. Results for KVM with Xenial Ubuntu 16.04.1 LTS (default kernel version 4.4.0-45-generic) as host operating system:
    kvm-3-2
  2. Results for Hyper-V with Windows Server 2012 R2 as host operating system:
    hyperv-2012r2-3-2
  3. Results for Hyper-V with Windows Server 2016 as host operating system:
    hyperv-2016-3-2

After increasing the workload of the compute nodes by adding more parallel iterations to the test, we can notice that Hyper-V is slightly faster than KVM on average time. The differences in this case are anyway quite negligible. Time for some conclusions? Yes, in the next blog post!


The post OpenStack Newton Benchmarking – Scenario 3 (Hadoop) appeared first on Cloudbase Solutions.

OpenStack Newton Benchmarking – Conclusions

$
0
0

before reading the conclusions, we recommend to read the previous posts in this series if you want to know more details about the environment and the test scenarios: Introduction, Scenario 1, Scenario 2, Scenario 3.


Conclusions

It’s time to discuss all the results obtained so far. The table below show the average time expressed in seconds for every scenario (green: better, red: worse):


KVM Hyper-V onWindows Server 2012 R2 Hyper-V onWindows Server 2016
Scenario 1 37,627 45,163 27,200
Scenario 2 76,469 56,132 49,811
Scenario 3 (part 1) 119,247 114,310 114,700
Scenario 3 (part 2) 221,638 219,237 218,941


The first two scenarios are mostly focused on IaaS operations (booting VMs, SSH into the VMs over software defined tenant networks, deleting the VMs, etc), so the performance differences become more visible, with Hyper-V Server 2016 showing up on the top of the heap.

The third scenario is mostly focused on guest workloads (Hadoop in this case) so the difference between IaaS operations does not provide a big impact. It’s good to see that the performance between Linux guests on KVM and Hyper-V is almost identical.

Performance is a feature, so hopefully this might help in deciding which hypervisor to choose next in your OpenStack deployment. One of the great advantages of OpenStack is that different hypervisors can be mixed in the same infrastructure, so our recommendation is to try benchmarking more than one one based on your preferences (KVM, Hyper-V, ESXi, etc) and decide. Hopefully our Rally scenarios will ease your work!

About Hyper-V, we’ve come a long way here at Cloudbase with our work on the OpenStack compute driver and we’re really happy with the results, especially considering that OpenStack is traditionally tied to Linux and KVM.

Hypervisors are mostly seen as commodity these days, but there are still significant differences that are relevant depending on the scenarios, for example the unique features that Hyper-V Server 2016 provides (Failover Clustering, Shielded VMs, RemoteFX, etc) are particularly well suited for enterprise deployments.

Here are a few recommended blog posts about Hyper-V and OpenStack for further reading:


What’s next?

To begin with, we’re going to publish VMware vSphere / ESXi benchmarks and see how those compare against KVM and Hyper-V, followed by some Windows guest workloads benchmarks. After that, what about some hyper-converged storage performance comparisons? For example Ceph + KVM vs Storage Spaces Direct + Hyper-V? And networking, NFVs? Looks like this performance series is going to go on for quite some time!

The post OpenStack Newton Benchmarking – Conclusions appeared first on Cloudbase Solutions.

Migrate VirtualBox VMs to Hyper-V and Azure

$
0
0

Both Oracle VirtualBox and VMware Workstation / Fusion use the popular VMDK virtual disk format, optionally as part of an OVA package. Here’s a quick HOWTO on converting VMDK disks to the VHD or VHDX formats for Hyper-V or Azure

To begin with, if you have a file with the OVA extension (e.g. exported from VirtualBox), this is just a TAR archive and all you need to do is to extract the content to have access to the VMDK disks. On Windows you can easily do this with the popular open source 7-zip archiver:

7z.exe x VM.ova

Next, we need qemu-img. if you’re using Windows, download and extract our qemu-img for Windows binaries. On Linux you can easily find packages provided by your distribution of choice (e.g. on Ubuntu “apt-get install qemu-utils“).

Now you can convert your VMDK virtual disk(s):

For Hyper-V 2012 and above use the VDHX format:

qemu-img convert source.img -O vhdx -o subformat=dynamic dest.vhdx

For Azure and Hyper-V 2008 / 2008 R2 you need the older VHD (vpc) format:

qemu-img convert source.img -O vpc -o subformat=fixed dest.vhd

Please note that for Azure you need static VHD files aligned to 1MB. Our version of qemu-img will take care of the alignment for you, alternatively (e.g. on Linux) you will need qemu-img 2.6 or above, adding “-o force_size” to the command line.

You’re now ready to boot your VM in Hyper-V or upload it to Azure. If you’d running Linux, make sure to add the latest Linux Integration Services (LIS).

The post Migrate VirtualBox VMs to Hyper-V and Azure appeared first on Cloudbase Solutions.

Viewing all 84 articles
Browse latest View live


Latest Images