We are happy to announce the availability of the Open vSwitch (OVS) 2.4.0 beta for Microsoft Hyper-V Server 2012, 2012 R2 and 2016 (technical preview) thanks to the joint effort of Cloudbase Solutions, VMware and the rest of the Open vSwitch community. Furthermore, support for Open vSwitch on OpenStack Hyper-V compute nodes is also available starting with Kilo!
The OVS 2.4 0 release includes the Open vSwitch CLI tools and daemons (e.g. ovsdb-server, ovs-vswitchd, ovs-vsctl, ovs-ofctl etc), and an updated version of the OVS Hyper-V virtual switch forwarding extension, providing fully interoperable VXLAN and STT encapsulation between Hyper-V and Linux, including KVM based virtual machines.
As usual, we also released an MSI installer that takes care of the Windows services for the ovsdb-server and ovs-vswitchd daemons along with all the required binaries and configurations.
All the Open vSwitch code is available as open source here:
https://github.com/openvswitch/ovs/tree/branch-2.4
https://github.com/cloudbase/ovs/tree/branch-2.4-ovs
Supported Windows operating systems:
- Windows Server and Hyper-V Server 2012 and 2012 R2
- Windows Server and Hyper-V Server 2016 (technical preview)
- Windows 8, 8.1 and 10
Installing Open vSwitch on Hyper-V
The entire installation process is seamless. Download our installer and run it. You’ll be welcomed by the following screen:

Click “Next”, accept the license, click “Next” again and you’ll have the option to install both the Hyper-V virtual switch extension driver and the command line tools. In case you’d like to install the command line tools only to connect remotely to a Windows or Linux OVS server, just deselect the driver option.

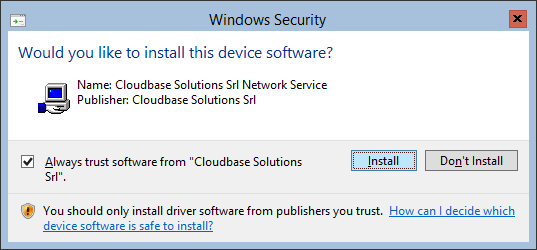
Click “Next” followed by “Install” and the installation will start. You’ll have to confirm that you want to install the signed kernel driver and the process will be completed in a matter of a few seconds, generating an Open vSwitch database and starting the ovsdb-server and ovs-vswitchd services.
The installer also adds the command line tools folder to the system path, available after the next logon or CLI shell execution.
Unattended installation
Fully unattended installation is also available(if you already have accepted/imported our certificate) in order to install Open vSwitch with Windows GPOs, Puppet, Chef, SaltStack, DSC or any other automated deployment solution:
msiexec /i openvswitch-hyperv-installer-beta.msi /l*v log.txt
Configuring Open vSwitch on Windows
Create a Hyper-V external virtual switch. Remember that if you want to take advantage of VXLAN or STT tunnelling you will have to create an external virtual switch with the AllowManagementOS flag set to true.
For example:
PS C:\package> Get-VMSwitch

Name     SwitchType NetAdapterInterfaceDescription
----     ---------- ------------------------------
external External   Intel(R) PRO/1000 MT Network Connection #2
PS C:\package> Get-VMNetworkAdapter -ManagementOS -SwitchName external

Name     IsManagementOs VMName SwitchName MacAddress   Status IPAddresses
----     -------------- ------ ---------- ----------   ------ -----------
external True                  external   000C293F2BCF {Ok}
To verify that the extension has been installed on our system:
PS C:\package> Get-VMSwitchExtension external

Id                  : EA24CD6C-D17A-4348-9190-09F0D5BE83DD
Name                : Microsoft NDIS Capture
Vendor              : Microsoft
Version             : 6.3.9600.16384
ExtensionType       : Monitoring
ParentExtensionId   :
ParentExtensionName :
SwitchId            : 42406c9a-7b64-432a-adcd-83aa60aefeb9
SwitchName          : external
Enabled             : False
Running             : False
ComputerName        : WIN-L8H4PEU1R8B
Key                 :
IsDeleted           : False

Id                  : E7C3B2F0-F3C5-48DF-AF2B-10FED6D72E7A
Name                : Microsoft Windows Filtering Platform
Vendor              : Microsoft
Version             : 6.3.9600.16384
ExtensionType       : Filter
ParentExtensionId   :
ParentExtensionName :
SwitchId            : 42406c9a-7b64-432a-adcd-83aa60aefeb9
SwitchName          : external
Enabled             : True
Running             : True
ComputerName        : WIN-L8H4PEU1R8B
Key                 :
IsDeleted           : False

Id                  : 583CC151-73EC-4A6A-8B47-578297AD7623
Name                : Open vSwitch Extension
Vendor              : Open vSwitch
Version             : 11.56.50.171
ExtensionType       : Forwarding
ParentExtensionId   :
ParentExtensionName :
SwitchId            : 42406c9a-7b64-432a-adcd-83aa60aefeb9
SwitchName          : external
Enabled             : False
Running             : False
ComputerName        : WIN-L8H4PEU1R8B
Key                 :
IsDeleted           : False
We can now enable the OVS extension on the external virtual switch:
PS C:\package> Enable-VMSwitchExtension "Open vSwitch Extension" -VMSwitchName external

Id                  : 583CC151-73EC-4A6A-8B47-578297AD7623
Name                : Open vSwitch Extension
Vendor              : Open vSwitch
Version             : 11.56.50.171
ExtensionType       : Forwarding
ParentExtensionId   :
ParentExtensionName :
SwitchId            : 42406c9a-7b64-432a-adcd-83aa60aefeb9
SwitchName          : external
Enabled             : True
Running             : True
ComputerName        : WIN-L8H4PEU1R8B
Key                 :
IsDeleted           : False
Please note that in the moment you enable the extension, the virtual switch will stop forwarding traffic until configured:
PS C:\package> ovs-vsctl.exe add-br br-tun
PS C:\package> ovs-vsctl.exe add-port br-tun external.1
PS C:\package> ovs-vsctl.exe add-port br-tun internal
PS C:\package> ping 10.13.10.30

Pinging 10.13.10.30 with 32 bytes of data:
Reply from 10.13.10.30: bytes=32 time=2ms TTL=64
Reply from 10.13.10.30: bytes=32 time<1ms TTL=64
Why is the above needed?
To seamlessly integrate Open vSwitch with the Hyper-V networking model we need to use Hyper-V virtual switch ports instead of tap devices (Linux). This is the main difference in the architectural model between Open vSwitch on Windows compared to its Linux counterpart.
From the OVS reference:
“In OVS for Hyper-V, we use ‘external’ as a special name to refer to the physical NICs connected to the Hyper-V switch. An index is added to this special name to refer to the particular physical NIC. Eg. ‘external.1’ refers to the first physical NIC on the Hyper-V switch. (…) Internal port is the virtual adapter created on the Hyper-V switch using the ‘AllowManagementOS’ setting. In OVS for Hyper-V, we use a ‘internal’ as a special name to refer to that adapter.”
Note: the above is subject to change. The actual adapter names will be used in an upcoming release (e.g. Ethernet1) in place of “external.x”.
Limitations
We currently support a single Hyper-V virtual switch in our forwarding extension. This is subject to change in the near future.
Openstack Integration with Open vSwitch on Windows
OpenStack is a very common use case for Open vSwitch on Hyper-V. The following example is based on a DevStack Kilo All-in-One deployment on Ubuntu 14.04 LTS with a Hyper-V compute node, but the concepts and the following steps apply to any OpenStack deployment.
Let’s install our SevStack node. Here’s a sample localrc configuration:
ubuntu@ubuntu:~/devstack$ cat localrc
# Misc
HOST_IP=10.13.10.30
DATABASE_PASSWORD=Passw0rd
ADMIN_PASSWORD=Passw0rd
SERVICE_PASSWORD=Passw0rd
SERVICE_TOKEN=Passw0rd
RABBIT_PASSWORD=Passw0rd

KEYSTONE_BRANCH=stable/kilo
NOVA_BRANCH=stable/kilo
NEUTRON_BRANCH=stable/kilo
GLANCE_BRANCH=stable/kilo
HORIZON_BRANCH=stable/kilo
REQUIREMENTS_BRANCH=stable/kilo

# Reclone each time
RECLONE=yes

# Enable Logging
LOGFILE=/opt/stack/logs/stack.sh.log
VERBOSE=True
LOG_COLOR=True
SCREEN_LOGDIR=/opt/stack/logs

# Pre-requisite
ENABLED_SERVICES=rabbit,mysql,key

# Nova - Compute Service
ENABLED_SERVICES+=,n-api,n-crt,n-obj,n-cpu,n-cond,n-sch
IMAGE_URLS+=",https://launchpad.net/cirros/trunk/0.3.0/+download/cirros-0.3.0-x86_64-disk.img"

# Neutron - Networking Service
ENABLED_SERVICES+=,q-svc,q-agt,q-dhcp,q-l3,q-meta,neutron,g-api,g-reg

# Horizon
ENABLED_SERVICES+=,horizon

# VLAN configuration
Q_PLUGIN=ml2
Q_ML2_PLUGIN_MECHANISM_DRIVERS=openvswitch
ENABLE_TENANT_TUNNELS=True
Q_ML2_TENANT_NETWORK_TYPE=vxlan
TENANT_TUNNEL_RANGE=5000:10000
Networking:
ubuntu@ubuntu:~/devstack$ ifconfig eth1
eth1      Link encap:Ethernet  HWaddr 00:0c:29:87:f9:4a
          inet addr:10.13.10.30  Bcast:10.13.10.255  Mask:255.255.255.0
          inet6 addr: fe80::20c:29ff:fe87:f94a/64 Scope:Link
          UP BROADCAST RUNNING MULTICAST  MTU:1500  Metric:1
          RX packets:1481 errors:0 dropped:0 overruns:0 frame:0
          TX packets:1642 errors:0 dropped:0 overruns:0 carrier:0
          collisions:0 txqueuelen:1000
          RX bytes:101988 (101.9 KB)  TX bytes:112315 (112.3 KB)
          Interrupt:16 Base address:0x2000
After DevStack finishes installing we can add some Hyper-V VHD or VHDX images to Glance, for example our Windows Server 2012 R2 evaluation image. Additionally, since we are using VXLAN, the default guest MTU should be set to 1450. This can be done via a DHCP option if the guest supports it, as described here.
Now let’s move to the Hyper-V node. First we have to download the latest OpenStack compute installer:
PS C:\package> Start-BitsTransfer https://www.cloudbase.it/downloads/HyperVNovaCompute_Kilo_2015_1.msi
Full steps on how to install and configure OpenStack on Hyper-V are available here: Openstack on Windows installation.
In our example, the Hyper-V node will use the following adapter to connect to the OpenStack environment:
Ethernet adapter vEthernet (external):

   Connection-specific DNS Suffix  . :
   IPv6 Address. . . . . . . . . . . : fd1a:32:d256:0:7911:fd1e:32b8:1d50
   Link-local IPv6 Address . . . . . : fe80::7911:fd1e:32b8:1d50%19
   IPv4 Address. . . . . . . . . . . : 10.13.10.35
   Subnet Mask . . . . . . . . . . . : 255.255.255.0
   Default Gateway . . . . . . . . . :
This is the adapter bound to the external virtual switch, as created during the previous steps.
We can now verify our deployment by taking a look at the Nova services and Neutron agents status on the OpenStack controller and ensuring that they are up and running:
ubuntu@ubuntu:~/devstack$ nova service-list
+----+----------------+-----------------+----------+---------+-------+----------------------------+-----------------+
| Id | Binary         | Host            | Zone     | Status  | State | Updated_at                 | Disabled Reason |
+----+----------------+-----------------+----------+---------+-------+----------------------------+-----------------+
| 1  | nova-conductor | ubuntu          | internal | enabled | up    | 2015-09-17T10:02:15.000000 | -               |
| 2  | nova-cert      | ubuntu          | internal | enabled | up    | 2015-09-17T10:02:18.000000 | -               |
| 3  | nova-scheduler | ubuntu          | internal | enabled | up    | 2015-09-17T10:02:21.000000 | -               |
| 4  | nova-compute   | ubuntu          | nova     | enabled | up    | 2015-09-17T10:02:19.000000 | -               |
| 5  | nova-compute   | WIN-L8H4PEU1R8B | nova     | enabled | up    | 2015-09-17T10:02:17.000000 | -               |
+----+----------------+-----------------+----------+---------+-------+----------------------------+-----------------+
ubuntu@ubuntu:~/devstack$ neutron agent-list
+--------------------------------------+--------------------+-----------------+-------+----------------+---------------------------+
| id                                   | agent_type         | host            | alive | admin_state_up | binary                    |
+--------------------------------------+--------------------+-----------------+-------+----------------+---------------------------+
| 2cbf5b0c-5d31-40a5-8abc-c889663e2cb4 | L3 agent           | ubuntu          | :-)   | True           | neutron-l3-agent          |
| 4de21c7c-5e50-4835-96f3-d34228cf2480 | DHCP agent         | ubuntu          | :-)   | True           | neutron-dhcp-agent        |
| 530ace5c-bb03-4b56-a087-b2048261255a | Open vSwitch agent | ubuntu          | :-)   | True           | neutron-openvswitch-agent |
| 90c59a72-319c-4019-94aa-b808a4f3dfb0 | Metadata agent     | ubuntu          | :-)   | True           | neutron-metadata-agent    |
| fecf11f3-7a64-4b81-8c2d-11fdd1dddbd9 | HyperV agent       | WIN-L8H4PEU1R8B | :-)   | True           | neutron-hyperv-agent      |
+--------------------------------------+--------------------+-----------------+-------+----------------+---------------------------+
Next we can disable the Windows Hyper-V agent, which is not needed since we use OVS:
C:\package>sc config "neutron-hyperv-agent" start=disabled
[SC] ChangeServiceConfig SUCCESS

C:\package>sc stop "neutron-hyperv-agent"

SERVICE_NAME: neutron-hyperv-agent
        TYPE               : 10  WIN32_OWN_PROCESS
        STATE              : 1  STOPPED
        WIN32_EXIT_CODE    : 0  (0x0)
        SERVICE_EXIT_CODE  : 0  (0x0)
        CHECKPOINT         : 0x0
        WAIT_HINT          : 0x0
We need to create a new service called neutron-ovs-agent and put its configuration options in C:\Program Files (x86)\Cloudbase Solutions\OpenStack\Nova\etc\neutron_ovs_agent.conf. From a command prompt:
C:\Users\Administrator>sc create neutron-ovs-agent binPath= "\"C:\Program Files (x86)\Cloudbase Solutions\OpenStack\Nova\bin\OpenStackServiceNeutron.exe\" neutron-hyperv-agent \"C:\Program Files (x86)\Cloudbase Solutions\OpenStack\Nova\Python27\Scripts\neutron-openvswitch-agent.exe\" --config-file \"C:\Program Files (x86)\Cloudbase Solutions\OpenStack\Nova\etc\neutron_ovs_agent.conf\"" type= own start= auto  error= ignore depend= Winmgmt displayname= "OpenStack Neutron Open vSwitch Agent Service" obj= LocalSystem
[SC] CreateService SUCCESS

C:\Users\Administrator>notepad "c:\Program Files (x86)\Cloudbase Solutions\OpenStack\Nova\etc\neutron_ovs_agent.conf"

C:\Users\Administrator>sc start neutron-ovs-agent

SERVICE_NAME: neutron-ovs-agent
        TYPE               : 10  WIN32_OWN_PROCESS
        STATE              : 2  START_PENDING
                                (STOPPABLE, NOT_PAUSABLE, ACCEPTS_SHUTDOWN)
        WIN32_EXIT_CODE    : 0  (0x0)
        SERVICE_EXIT_CODE  : 0  (0x0)
        CHECKPOINT         : 0x1
        WAIT_HINT          : 0x0
        PID                : 2740
        FLAGS              :
Note: creating a service manually for the OVS agent won’t be necessary anymore starting with the next Nova Hyper-V MSI installer version.
Here’s the content of the neutron_ovs_agent.conf file:
[DEFAULT]
verbose=true
debug=true
control_exchange=neutron
policy_file=C:\Program Files (x86)\Cloudbase Solutions\OpenStack\Nova\etc\policy.json
rpc_backend=neutron.openstack.common.rpc.impl_kombu
rabbit_host=10.13.10.30
rabbit_port=5672
rabbit_userid=guest
rabbit_password=guest
logdir=C:\OpenStack\Log\
logfile=neutron-ovs-agent.log
[agent]
tunnel_types = vxlan
enable_metrics_collection=false
[SECURITYGROUP]
enable_security_group=false
[ovs]
local_ip = 10.13.10.35
tunnel_bridge = br-tun
integration_bridge = br-int
tenant_network_type = vxlan
enable_tunneling = true
Now if we run ovs-vsctl show, we can see a VXLAN tunnel in place:
PS C:\Users\Administrator> ovs-vsctl.exe show
01ee44a6-9fac-461a-a8c1-da77a09fae69
    Bridge br-tun
        fail_mode: secure
        Port patch-int
            Interface patch-int
                type: patch
                options: {peer=patch-tun}
        Port br-tun
            Interface br-tun
                type: internal
        Port internal
            Interface internal
        Port "vxlan-0a0d0a1e"
            Interface "vxlan-0a0d0a1e"
                type: vxlan
                options: {df_default="true", in_key=flow, local_ip="10.13.10.35", out_key=flow, remote_ip="10.13.10.30"}

        Port "external.1"
            Interface "external.1"
    Bridge br-int
        fail_mode: secure
        Port patch-tun
            Interface patch-tun
                type: patch
                options: {peer=patch-int}
        Port br-int
            Interface br-int
                type: internal
After spawning a Nova instance on the Hyper-V node you should see:
PS C:\Users\Administrator> get-vm

Name              State   CPUUsage(%) MemoryAssigned(M) Uptime   Status
----              -----   ----------- ----------------- ------   ------
instance-00000004 Running 4           2048              00:00:41 Operating normally


PS C:\Users\Administrator> Get-VMConsole instance-00000004
PS C:\Users\Administrator> ovs-vsctl.exe show
01ee44a6-9fac-461a-a8c1-da77a09fae69
    Bridge br-tun
        fail_mode: secure
        Port patch-int
            Interface patch-int
                type: patch
                options: {peer=patch-tun}
        Port br-tun
            Interface br-tun
                type: internal
        Port internal
            Interface internal
        Port "vxlan-0a0d0a1e"
            Interface "vxlan-0a0d0a1e"
                type: vxlan
                options: {df_default="true", in_key=flow, local_ip="10.13.10.35", out_key=flow, remote_ip="10.13.10.30"}

        Port "external.1"
            Interface "external.1"
    Bridge br-int
        fail_mode: secure
        Port patch-tun
            Interface patch-tun
                type: patch
                options: {peer=patch-int}
        Port br-int
            Interface br-int
                type: internal
        Port "dbc80e38-96a8-4e26-bc74-3aa03aea23f9"
            tag: 1
            Interface "dbc80e38-96a8-4e26-bc74-3aa03aea23f9"
In this example, “dbc80e38-96a8-4e26-bc74-3aa03aea23f9” is the OVS port name associated to the instance-00000004 VM vnic. You can find out the details by running the following PowerShell cmdlet:
PS C:\Users\Administrator> Get-VMByOVSPort -OVSPortName "dbc80e38-96a8-4e26-bc74-3aa03aea23f9"
...
ElementName                          : instance-00000004
...
The VM instance-00000004 got an IP address from the neutron DHCP agent, with fully functional networking between KVM and Hyper-V hosted virtual machines!
This is everything you need to get started with OpenStack, Hyper-V and OVS. In the next blog post we’ll show how to manage Hyper-V on OVS without OpenStack.
Notes
The beta installer is built by our Jenkins servers every time a new commit lands in the project repositories, so expect frequent updates.
The post Open vSwitch 2.4 on Hyper-V – Part 1 appeared first on Cloudbase Solutions.