I’m very excited to announce the availability of the Open vSwitch porting to Microsoft Hyper-V Server beta release. This effort enables a whole new set of interoperability scenarios between Hyper-V and cloud computing platforms like OpenStack where Open vSwitch (OVS) is a very common SDN choice.
The porting includes all the Open vSwitch userspace tools and daemons (e.g. ovs-vsctl, ovs-vswitchd), the OVSDB database and a newly developed Hyper-V virtual switch forwarding extension, with the goal of providing the same set of tools available on Linux with a seamless integration in the Hyper-V networking model, including fully interoperable GRE and VXLAN encapsulation.
As usual, we also wanted to make the user experience as easy as possible, so we released an MSI installer that takes care of installing all the required bits, including Windows services for the obsdb-server and ovs-vswitchd daemons.
All the Open vSwitch code is available as open source:
https://github.com/cloudbase/openvswitch-hyperv
Supported Windows operating systems:
- Windows Server and Hyper-V Server 2012 and 2012 R2
- Windows 8 and 8.1
Installing Open vSwitch on Hyper-V
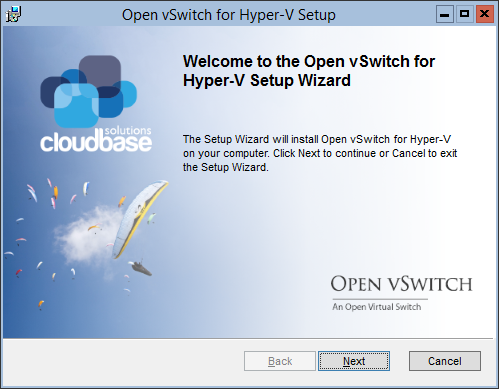
The entire installation process is seamless. Download our installer and run it. You’ll be welcomed by the following screen:
Click “Next”, accept the license, click “Next” again and you’ll have the option to install both the Hyper-V switch and command line tools. In case you’d like to install the command line tools only to connect remotely to a Windows or Linux OVS server, just deselect the driver option.

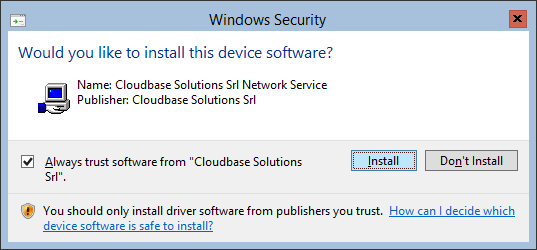
Click “Next” followed by “Install” and the installation will start. You’ll have to confirm that you want to install the signed kernel driver and the process will complete in a matter of a few seconds, generating an Open vSwitch database and starting the obsdb-server and ovs-vswitchd services.
The installer adds also the command line tools folder to the system path, but you’ll have to logoff and logon to benefit from it (this is unfortunately a Windows limitation).
Unattended installation
Fully unattended installation is also available in order to install Open vSwitch with Windows GPOs, Puppet, Chef, SaltStack, Windows DSM or any other automated deployment solution:
msiexec /i openvswitch-hyperv-installer.msi /l*v log.txt
Configuring Open vSwitch on Windows
The OVS command line tools have been fully ported, so you can expect the same user experience that you would have on Linux, with only a few important distinctions in how the switch ports are handled since here we have Hyper-V virtual switch ports instead of tap devices.
To begin with, we need to create a Hyper-V virtual switch with a port on the host OS (this is a limitation that will be removed remove soon, currently required for managing local tunnel endpoints traffic):
New-VMSwitch external -AllowManagementOS $true -NetAdapterName Ethernet1
In this example the switch is called external, but feel free to rename it as you prefer.
“Large Send Offload” needs to be disabled on the virtual host adapter for performance reasons:
Set-NetAdapterAdvancedProperty "vEthernet (external)" -RegistryKeyword "*LsoV2IPv4" -RegistryValue 0
Set-NetAdapterAdvancedProperty "vEthernet (external)" -RegistryKeyword "*LsoV2IPv6" -RegistryValue 0
We can now enable the OVS extension on the external virtual switch:
Enable-VMSwitchExtension "openvswitch extension" external
and finally create an OVS switch called br0 associated with our Hyper-V switch:
ovs-vsctl.exe add-br br0
ovs-vsctl.exe add-port br0 external
To provide a real world example, let’s take a typical scenario where networking between virtual machines running on multiple KVM and Hyper-V nodes needs to be established via GRE or VXLAN tunnels. The following example shows how to configure a Hyper-V node in order to connect to two existing KVM nodes named KVM1 and KVM2.
KVM1 OVS configuration
KVM1 provides two tunnels with local endpoint 10.13.8.2:
- vxlan-1 connected to Hyper-V (10.13.8.4)
- gre-2 connected to KVM2 (10.13.8.3)
ovs-vsctl show
d128025c-0bc8-4e4e-834b-c95f2fe5ed01
    Bridge br-tun
        Port "vxlan0"
            Interface " vxlan-1"
                type: vxlan
                options: {in_key=flow, local_ip="10.13.8.2", out_key=flow, remote_ip="10.13.8.4"}
        Port "gre-2"
            Interface "gre-2"
                type: gre
                options: {in_key=flow, local_ip="10.13.8.2", out_key=flow, remote_ip="10.13.8.3"}
        Port "qvo5c5a7843-05"
            Interface "qvo5c5a7843-05"
        Port br-tun
            Interface br-tun
                type: internal
KVM2 OVS configuration
KVM2 provides one tunnel with local endpoint 10.13.8.3:
- gre-1 connected to Hyper-V (10.13.8.4).
ovs-vsctl show
ff0d7fb7-6837-4ca0-aa3f-6a19548c9245
    Bridge br-tun
        Port "qvo18d9d6c5-74"
            Interface "qvo18d9d6c5-74"
        Port br-tun
            Interface br-tun
                type: internal
        Port "gre-1"
            Interface "gre-1"
                type: gre
                options: {in_key=flow, local_ip="10.13.8.3", out_key=flow, remote_ip="10.13.8.4"}
Hyper-V OVS configuration
The Ip address assigned to the “vEthernet (external)” adapter is 10.13.8.4.
Let’s start by creating the VXLAN tunnel:
ovs-vsctl.exe add-port br0 vxlan-1
ovs-vsctl.exe set Interface vxlan-1 type=vxlan
ovs-vsctl.exe set Interface vxlan-1 options:local_ip=10.13.8.4
ovs-vsctl.exe set Interface vxlan-1 options:remote_ip=10.13.8.2
ovs-vsctl.exe set Interface vxlan-1 options:in_key=flow
ovs-vsctl.exe set Interface vxlan-1 options:out_key=flow
and now the two GRE tunnels:
ovs-vsctl.exe add-port br0 gre-1
ovs-vsctl.exe set Interface gre-1 type=gre
ovs-vsctl.exe set Interface gre-1 options:local_ip=10.13.8.4
ovs-vsctl.exe set Interface gre-1 options:remote_ip=10.13.8.3
ovs-vsctl.exe set Interface gre-1 options:in_key=flow
ovs-vsctl.exe set Interface gre-1 options:out_key=flow

ovs-vsctl.exe add-port br0 gre-2
ovs-vsctl.exe set Interface gre-2 type=gre
ovs-vsctl.exe set Interface gre-2 options:local_ip=10.13.8.4
ovs-vsctl.exe set Interface gre-2 options:remote_ip=10.13.8.2
ovs-vsctl.exe set Interface gre-2 options:in_key=flow
ovs-vsctl.exe set Interface gre-2 options:out_key=flow
As you can see, all the commands are very familiar if you are already used to OVS on Linux.
As introduced before, the main area where the Hyper-V implementation differs from the Linux counterpart is in how virtual machines are attached to a given OVS port. This is easily accomplished by using the Set-VMNetworkAdapterOVSPort PowerShell cmdlet provided with the installer.
Let’s say that we have two Hyper-V virtual machines called VM1 and VM2 and that we want to connect them to the switch. All we have to do for each network adapter is a VM is to connect it to the external switch as you would normally do, assign it to a given OVS port and create the corresponding port in OVS:
$vnic = Get-VMNetworkAdapter VM1
Connect-VMNetworkAdapter -VMNetworkAdapter $vnic -SwitchName external
$vnic | Set-VMNetworkAdapterOVSPort -OVSPortName ovs-port-1
ovs-vsctl.exe add-port br0 ovs-port-1
Here’s how the resulting OVS configuration looks like on Hyper-V after connecting VM1 and VM2 to the switch:
ovs-vsctl.exe show
3bc682a9-1bbd-4f98-b8a6-22f21966e2f5
    Bridge "br0"
        Port "ovs-port-2"
            Interface "ovs-port-2"
        Port "ovs-port-1"
            Interface "ovs-port-1"
        Port "gre-1"
            Interface "gre-1"
                type: gre
                options: {in_key=flow, local_ip="10.13.8.4", out_key=flow, remote_ip="10.13.8.3"}
        Port "gre-2"
            Interface "gre-2"
                type: gre
                options: {in_key=flow, local_ip="10.13.8.4", out_key=flow, remote_ip="10.13.8.2"}
        Port "vxlan0"
            Interface "vxlan-1"
                type: vxlan
                options: {in_key=flow, local_ip="10.13.8.4", out_key=flow, remote_ip="10.13.8.2"}
        Port external
            Interface external
        Port "br0"
            Interface "br0"
                type: internal
Networking is now fully functional between KVM and Hyper-V hosted virtual machines!
Further control can be accomplished by applying flow rules, for example by limiting what port / virtual machine can be accessible on each VXLAN or GRE tunnel. We’ll write more on this topic in a future article on OpenStack Neutron integration.
Notes
Like every project in beta status, the Open vSwitch porting has still bugs that need to be fixed. The kernel extension, like any other kernel level code, can generate blue screens or freezes in case of issues, so don’t use the beta releases on production systems!
Known issues currently being fixed :
- In some conditions with heavy network traffic, uninstalling the driver might cause a crash
- Switch traffic might become unavailable after some hours of usage
- Performance on GRE tunnels needs improvements
![:-)]()
The beta installer is built by our Jenkins servers every time a new commit lands in the project repositories, so expect frequent updates.
The post Open vSwitch on Hyper-V appeared first on Cloudbase Solutions.